跳转到主内容

How to Disconnect the Battery

仅作为前提条件
本指南仅提供前提条件!本指南是另一个程序的一部分,不能单独使用。

你所需要的

  1. How to Disconnect the Battery, Remove the battery board cover: 步骤 1 中的图像 1,2 How to Disconnect the Battery, Remove the battery board cover: 步骤 1 中的图像 2,2
    在这个步骤中使用的工具:
    Tweezers
    $4.99
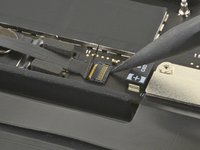
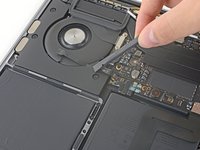
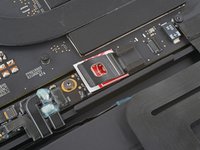
    • Use blunt nose tweezers or your fingers to peel and remove the cover from the battery board, just above the middle battery cell.

  2. How to Disconnect the Battery, Disconnect the battery data cable: 步骤 2 中的图像 1,2 How to Disconnect the Battery, Disconnect the battery data cable: 步骤 2 中的图像 2,2
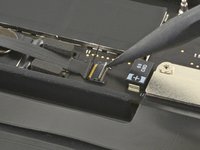
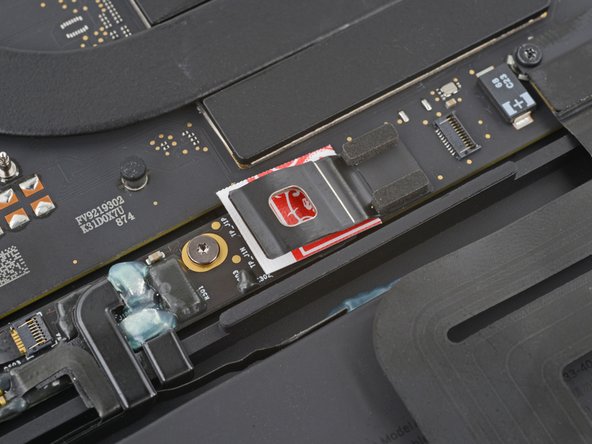
    • Use blunt nose tweezers to gently peel back the pull tab covering the battery data connector.

    • Don't remove or tear the pull tab, as it's attached to the head of the connector.

  3. How to Disconnect the Battery: 步骤 3 中的图像 1,2 How to Disconnect the Battery: 步骤 3 中的图像 2,2
    • Use the point of a spudger to flip up the small locking tab securing the battery data connector.

    • Locking tabs on ZIF connectors are fragile—be gentle with your spudger.

  4. How to Disconnect the Battery: 步骤 4 中的图像 1,3 How to Disconnect the Battery: 步骤 4 中的图像 2,3 How to Disconnect the Battery: 步骤 4 中的图像 3,3
    • Use blunt nose tweezers or your fingers to grab the battery data cable pull tab and slide it straight out of its socket.

    • Move the cable to the left, out of the way of the battery board.

    • Don't strain the cable, as it's still attached to the battery board.

  5. How to Disconnect the Battery, Unfasten the battery connector: 步骤 5 中的图像 1,1
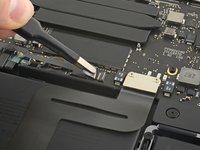
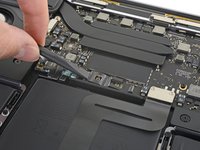
    • Use a T5 Torx driver to remove the 3.7 mm screw securing the battery connector.

  6. How to Disconnect the Battery, Disconnect the battery: 步骤 6 中的图像 1,3 How to Disconnect the Battery, Disconnect the battery: 步骤 6 中的图像 2,3 How to Disconnect the Battery, Disconnect the battery: 步骤 6 中的图像 3,3
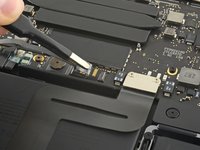
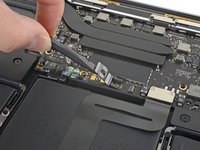
    • Use the flat end of your spudger to slightly lift the battery connector away from the battery board.

    • Lifting the connector too high will break it. Angle it enough so it won't accidentally contact the battery board during repair.

    • Optionally, you may insert a barrier, such as a piece of a playing card, between the connector and the board during the repair.

结论

To reassemble your device, follow these instructions in reverse order.

Clay Eickemeyer

于09/19/22注册

95,850 声望

创作了466篇指南

团队

Guide Team Guide Team 的会员

Staff

10 名成员

创作了15,909篇指南

0指南评论

添加评论

浏览统计数据:

过去 24 小时: 0

过去 7 天: 0

过去 30 天: 3

总计 91