跳转到主内容

HTC Vive Pro Head Strap Replacement

你所需要的

  1. HTC Vive Pro Head Strap Replacement, Reposition the head strap: 步骤 1 中的图像 1,2 HTC Vive Pro Head Strap Replacement, Reposition the head strap: 步骤 1 中的图像 2,2
    • Rotate the head strap forward as far as it will go.

  2. HTC Vive Pro Head Strap Replacement, Unplug the All-In-One Cable: 步骤 2 中的图像 1,2 HTC Vive Pro Head Strap Replacement, Unplug the All-In-One Cable: 步骤 2 中的图像 2,2
    • Unplug the All-In-One Cable from your headset.

  3. HTC Vive Pro Head Strap Replacement, Remove the All-In-One Cable: 步骤 3 中的图像 1,3 HTC Vive Pro Head Strap Replacement, Remove the All-In-One Cable: 步骤 3 中的图像 2,3 HTC Vive Pro Head Strap Replacement, Remove the All-In-One Cable: 步骤 3 中的图像 3,3
    • Remove the All-In-One Cable from the cable guides along the left side of the head strap.

    • During reassembly, connect the All-In-One Cable to the headset before routing it through the cable guides. This will ensure it has the right amount of slack.

  4. HTC Vive Pro Head Strap Replacement, Remove the top strap: 步骤 4 中的图像 1,2 HTC Vive Pro Head Strap Replacement, Remove the top strap: 步骤 4 中的图像 2,2
    • Separate the top strap from itself where the Velcro secures it.

  5. HTC Vive Pro Head Strap Replacement: 步骤 5 中的图像 1,3 HTC Vive Pro Head Strap Replacement: 步骤 5 中的图像 2,3 HTC Vive Pro Head Strap Replacement: 步骤 5 中的图像 3,3
    • Peel back the Velcro securing the rear of the top strap.

    • Feed the top strap out through the head strap to partially remove it.

  6. HTC Vive Pro Head Strap Replacement: 步骤 6 中的图像 1,3 HTC Vive Pro Head Strap Replacement: 步骤 6 中的图像 2,3 HTC Vive Pro Head Strap Replacement: 步骤 6 中的图像 3,3
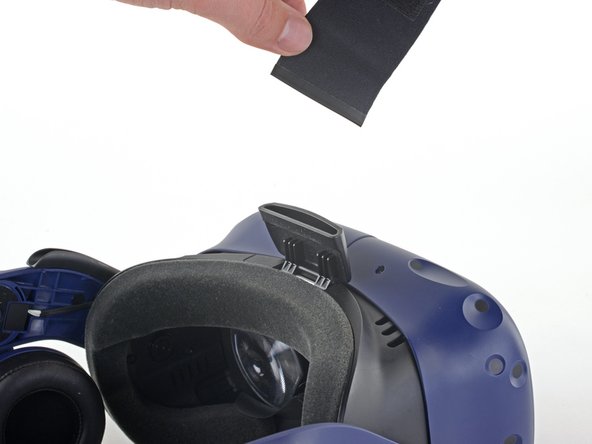
    • Feed the top strap through the clip near the front of headset to fully remove it.

  7. HTC Vive Pro Head Strap Replacement, Remove the front side foam pads: 步骤 7 中的图像 1,3 HTC Vive Pro Head Strap Replacement, Remove the front side foam pads: 步骤 7 中的图像 2,3 HTC Vive Pro Head Strap Replacement, Remove the front side foam pads: 步骤 7 中的图像 3,3
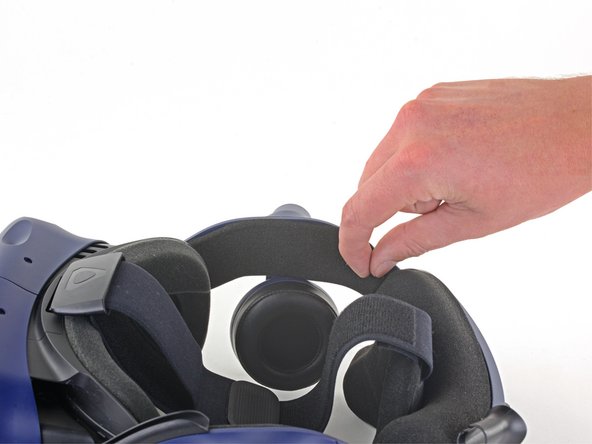
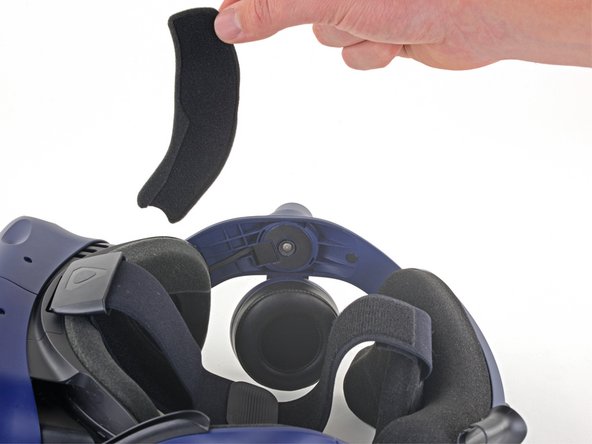
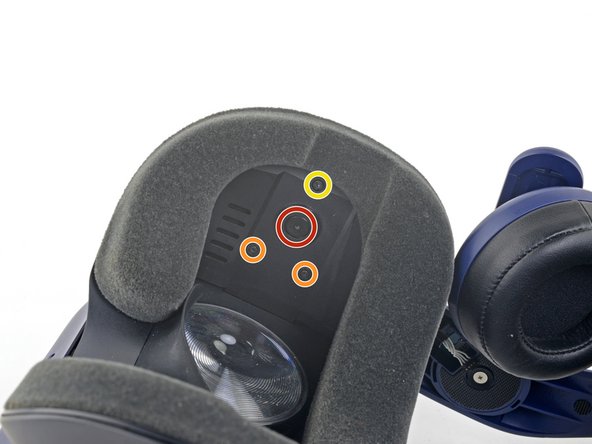
    • Peel off both front side foam pads to uncover the speaker wires.

  8. HTC Vive Pro Head Strap Replacement, Remove the two rubber spacers: 步骤 8 中的图像 1,3 HTC Vive Pro Head Strap Replacement, Remove the two rubber spacers: 步骤 8 中的图像 2,3 HTC Vive Pro Head Strap Replacement, Remove the two rubber spacers: 步骤 8 中的图像 3,3
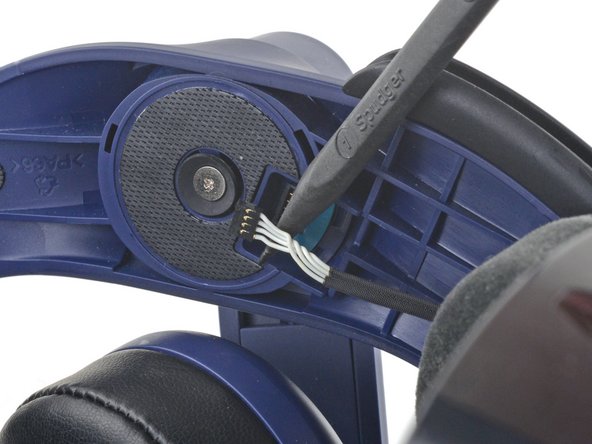
    • Use the point of your spudger to pry out the two rubber spacers next to the headphone screws.

    • Be careful not to accidentally pry any of the speaker wires under the rubber spacer.

  9. HTC Vive Pro Head Strap Replacement, Disconnect the speaker wires: 步骤 9 中的图像 1,2 HTC Vive Pro Head Strap Replacement, Disconnect the speaker wires: 步骤 9 中的图像 2,2
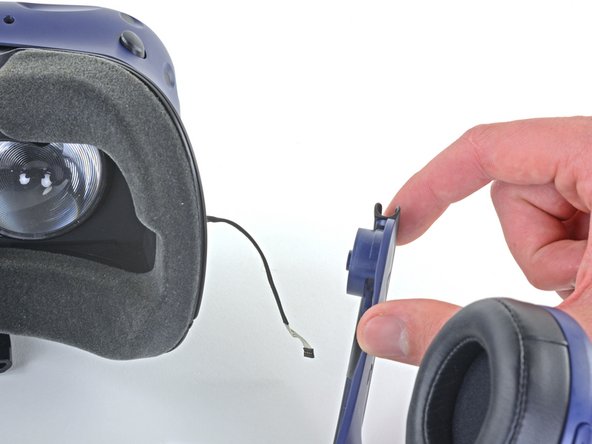
    • Use the point of your spudger to pry up and disconnect both the left and right headphone speaker wires.

  10. HTC Vive Pro Head Strap Replacement, Remove the head strap: 步骤 10 中的图像 1,2 HTC Vive Pro Head Strap Replacement, Remove the head strap: 步骤 10 中的图像 2,2
    • Use a T6 Torx screwdriver to remove the two 12.1 mm screws (one on each side) securing the head strap to the headset.

  11. HTC Vive Pro Head Strap Replacement: 步骤 11 中的图像 1,1
    • Remove the two plastic spacers underneath the previously removed Torx T6 screw.

  12. HTC Vive Pro Head Strap Replacement: 步骤 12 中的图像 1,3 HTC Vive Pro Head Strap Replacement: 步骤 12 中的图像 2,3 HTC Vive Pro Head Strap Replacement: 步骤 12 中的图像 3,3
    • Thread the headphone speaker wires out through both ends of the head strap.

  13. HTC Vive Pro Head Strap Replacement, Only the head strap remains: 步骤 13 中的图像 1,1
    • Transfer all foam pads from the old head strap to the new one.

结论

Compare your new replacement part to the original part—you may need to transfer remaining components or remove adhesive backings from the new part before installing.

To reassemble your device, follow the above steps in reverse order.

Take your e-waste to an R2 or e-Stewards certified recycler.

Repair didn’t go as planned? Try some basic troubleshooting, or ask our Answers community for help.

Sam Omiotek

于02/25/19注册

87,294 声望

创作了290篇指南

2指南评论

There is a missing step. The replacement part doesn't contain anything to connect the audio wires to. You will have to remove a screw and pry up the little board that has the headphone connector on it. The spudger works well for this. Be aware that in addition to the screw, this little audio connector board is also held on with adhesive, so you will need to peel it off. The adhesive isn't too strong, so you can get it up pretty easily. When putting the audio connectors into the replacement head strap you'll want to be sure to peel off the backing on the adhesive before seating the board on it.

Ike - 回复

Nice tutorial! You do not actually have to remove those six T5 screws.

Lance Putnam - 回复

添加评论

浏览统计数据:

过去 24 小时: 0

过去 7 天: 9

过去 30 天: 51

总计 2,271