跳转到主内容

HTC Vive Cosmos Fan Replacement

你所需要的

  1. HTC Vive Cosmos Fan Replacement, Remove the facerest: 步骤 1 中的图像 1,3 HTC Vive Cosmos Fan Replacement, Remove the facerest: 步骤 1 中的图像 2,3 HTC Vive Cosmos Fan Replacement, Remove the facerest: 步骤 1 中的图像 3,3
    • Pull the bottom of the facerest straight away from the Vive Cosmos to unclip it from the Vive.

    • With the bottom unclipped, pull the top of the facerest away from the Vive to remove it.

  2. HTC Vive Cosmos Fan Replacement, Release the faceplate switch: 步骤 2 中的图像 1,2 HTC Vive Cosmos Fan Replacement, Release the faceplate switch: 步骤 2 中的图像 2,2
    • Use your finger to push the sliding faceplate release switch, sitting to the left of the lenses, toward the bottom of the Vive.

  3. HTC Vive Cosmos Fan Replacement, Remove the faceplate: 步骤 3 中的图像 1,2 HTC Vive Cosmos Fan Replacement, Remove the faceplate: 步骤 3 中的图像 2,2
    • While holding the switch in the bottom position, pull the faceplate straight up and away from the front of the Vive.

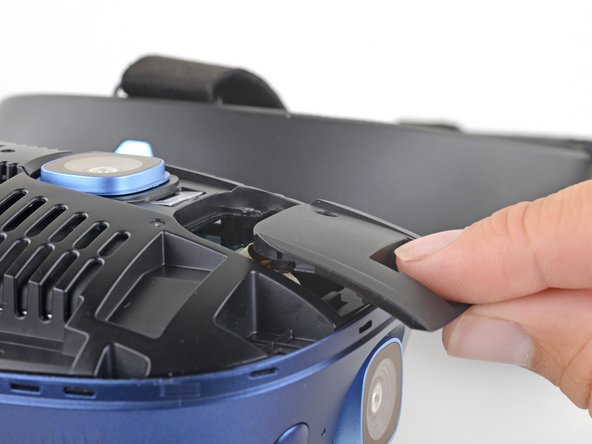
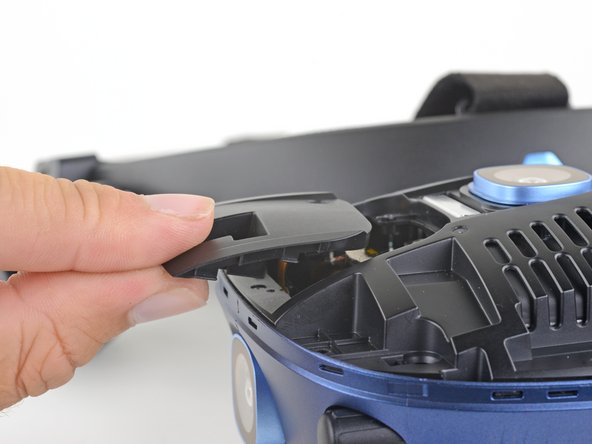
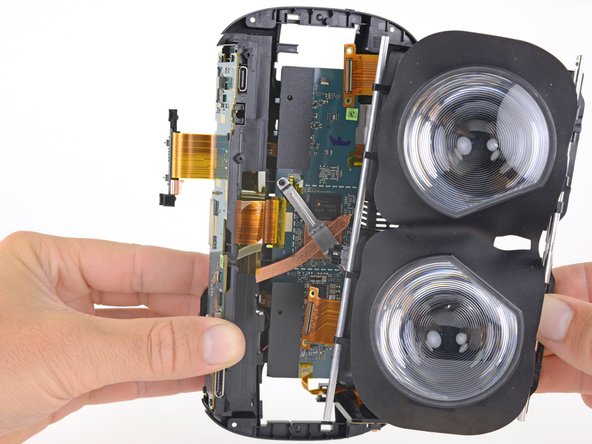
    • Remove the faceplate.

  4. HTC Vive Cosmos Fan Replacement, Unscrew the focus knob: 步骤 4 中的图像 1,1
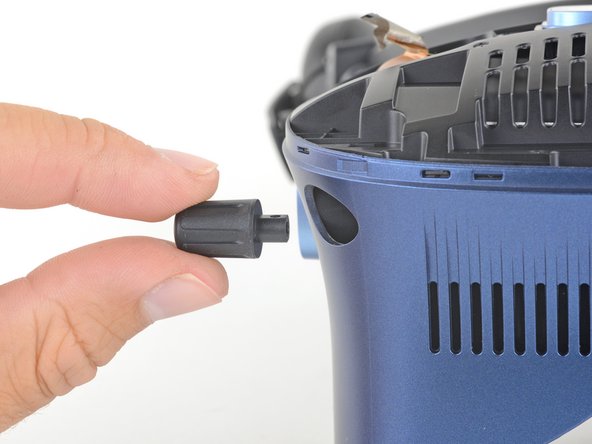
    • Use a T5 Torx driver to remove the 4.1 mm long screw securing the focus knob.

  5. HTC Vive Cosmos Fan Replacement, Remove the focus knob: 步骤 5 中的图像 1,2 HTC Vive Cosmos Fan Replacement, Remove the focus knob: 步骤 5 中的图像 2,2
    • Slide the focus knob out of the plastic housing, off of the focus rod, and remove it.

  6. HTC Vive Cosmos Fan Replacement, Unplug the audio connector: 步骤 6 中的图像 1,3 HTC Vive Cosmos Fan Replacement, Unplug the audio connector: 步骤 6 中的图像 2,3 HTC Vive Cosmos Fan Replacement, Unplug the audio connector: 步骤 6 中的图像 3,3
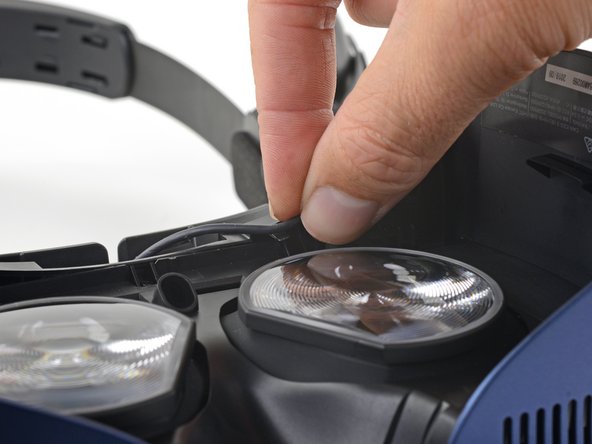
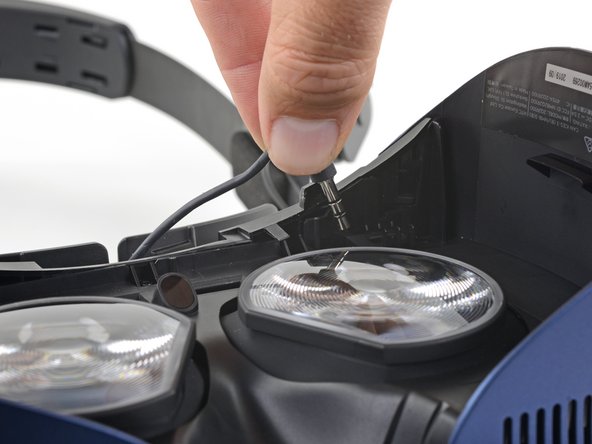
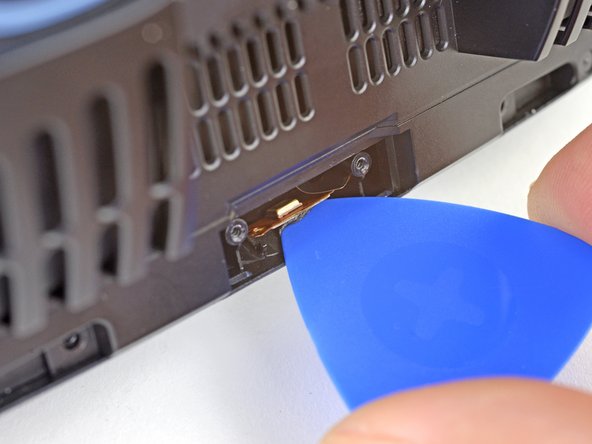
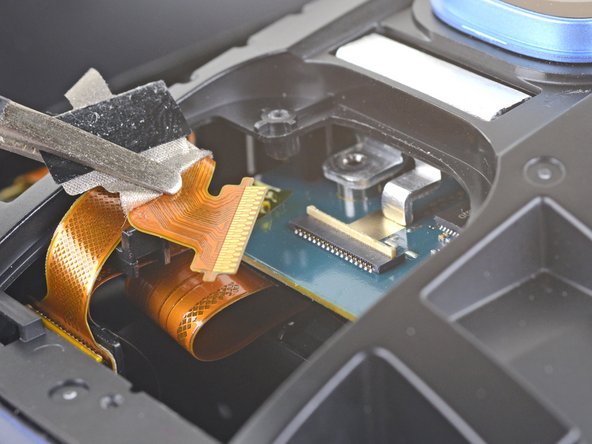
    • Twist the 3.5 mm audio connector counter-clockwise slightly and slide its cable out from under the plastic retaining clip.

    • Lift the audio connector straight up to unplug it.

  7. HTC Vive Cosmos Fan Replacement, Unscrew the LCD and motherboard assembly: 步骤 7 中的图像 1,1
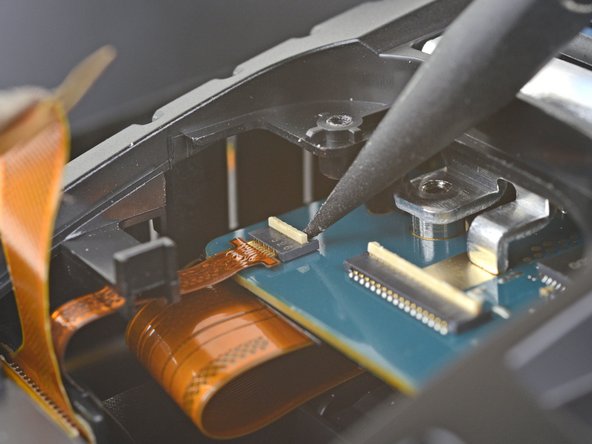
    • Use a T5 Torx driver to remove the three 4.1 mm long screws securing the LCD and motherboard assembly.

  8. HTC Vive Cosmos Fan Replacement: 步骤 8 中的图像 1,2 HTC Vive Cosmos Fan Replacement: 步骤 8 中的图像 2,2
    • Gently peel up the stickers on either side of the front of the Vive. If possible, keep the stickers intact and reuse them.

  9. HTC Vive Cosmos Fan Replacement: 步骤 9 中的图像 1,1
    • Use a T5 Torx driver to unscrew the screws securing the upper component cover and the LCD and motherboard assembly:

    • Sixteen 4.1 mm long screws

    • One captive screw

    • This screw is covered by a sticker. Poke your driver through the sticker to access the screw.

    • Two 4.1 mm long screws

    • These screws are covered by stickers. Poke your driver through the stickers to access the screws.

  10. HTC Vive Cosmos Fan Replacement, Remove the microphone: 步骤 10 中的图像 1,1
    • Remove the microphone cover from the bottom edge of the headset.

  11. HTC Vive Cosmos Fan Replacement, Separate the microphone adhesive: 步骤 11 中的图像 1,2 HTC Vive Cosmos Fan Replacement, Separate the microphone adhesive: 步骤 11 中的图像 2,2
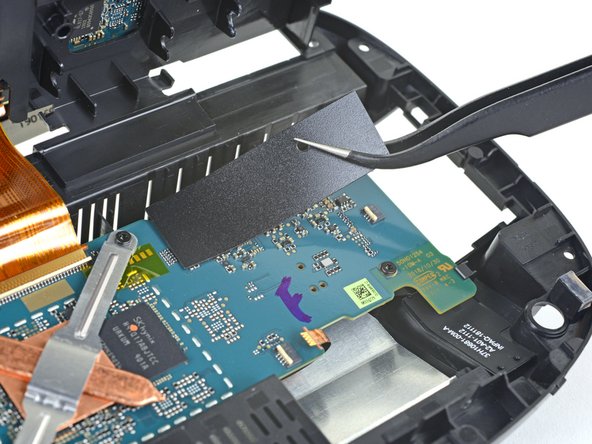
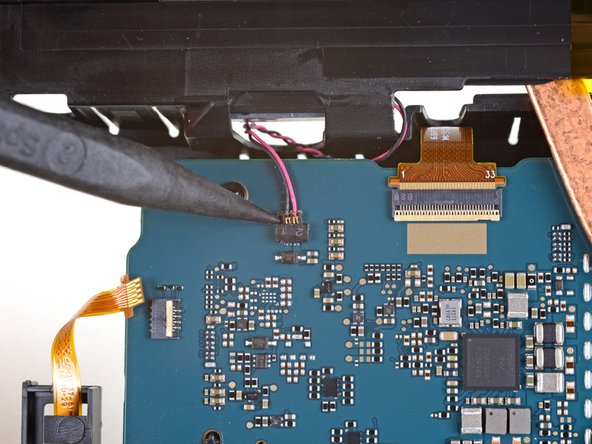
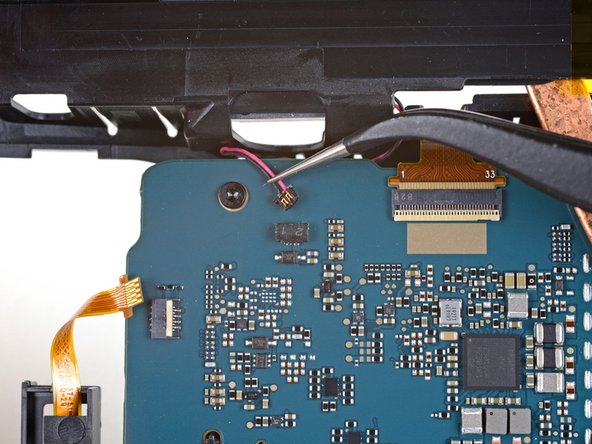
    • Slide an opening pick under the microphone to separate the adhesive securing it to the Vive.

    • If this is difficult, use a heated iOpener, hair dryer, or heat gun to apply heat to adhesive.

  12. HTC Vive Cosmos Fan Replacement, Remove the upper component cover: 步骤 12 中的图像 1,3 HTC Vive Cosmos Fan Replacement, Remove the upper component cover: 步骤 12 中的图像 2,3 HTC Vive Cosmos Fan Replacement, Remove the upper component cover: 步骤 12 中的图像 3,3
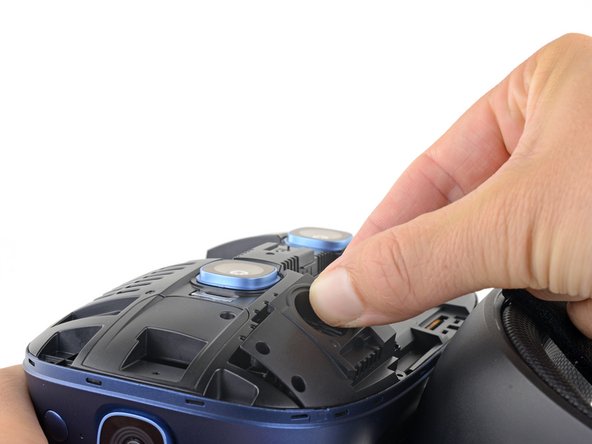
    • Angle the bottom end of the upper component cover away from the front of the Vive.

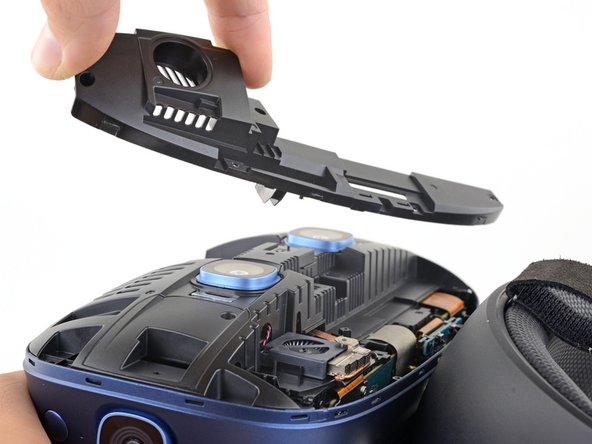
    • Pull the upper component cover away from the front of the Vive and remove it.

  13. HTC Vive Cosmos Fan Replacement, Remove the camera connector covers: 步骤 13 中的图像 1,3 HTC Vive Cosmos Fan Replacement, Remove the camera connector covers: 步骤 13 中的图像 2,3 HTC Vive Cosmos Fan Replacement, Remove the camera connector covers: 步骤 13 中的图像 3,3
    • Slide the camera connector covers on either side of the LCD and motherboard assembly away from the center off of the assembly and remove them.

  14. HTC Vive Cosmos Fan Replacement, Disconnect the cameras: 步骤 14 中的图像 1,3 HTC Vive Cosmos Fan Replacement, Disconnect the cameras: 步骤 14 中的图像 2,3 HTC Vive Cosmos Fan Replacement, Disconnect the cameras: 步骤 14 中的图像 3,3
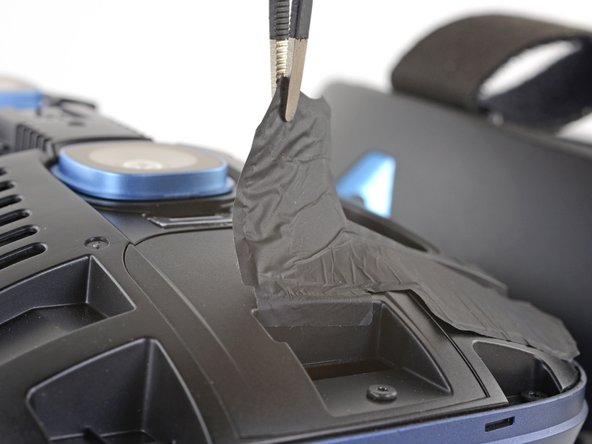
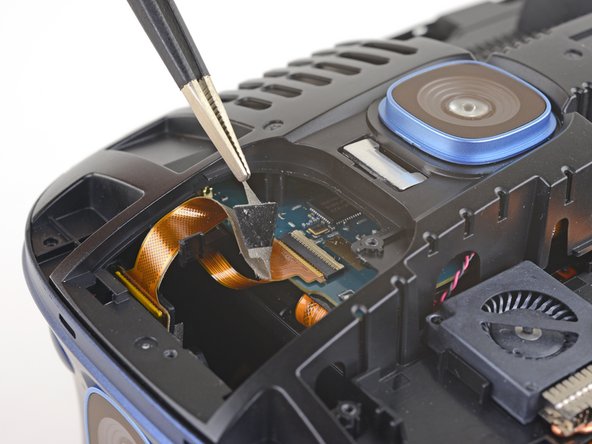
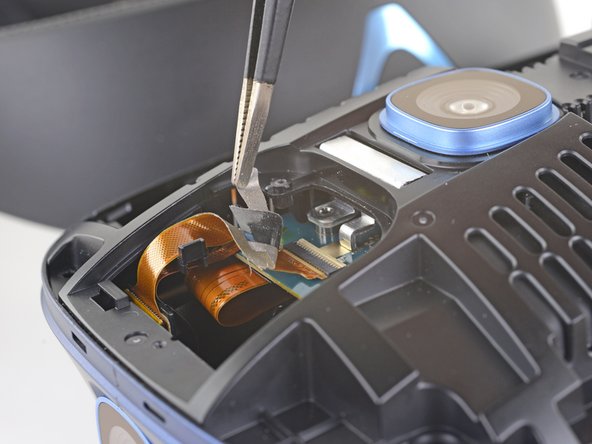
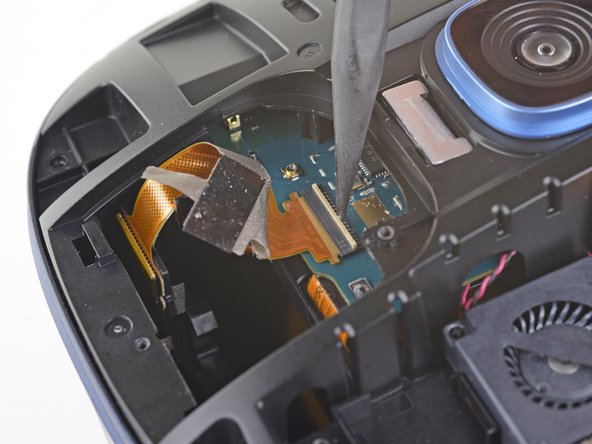
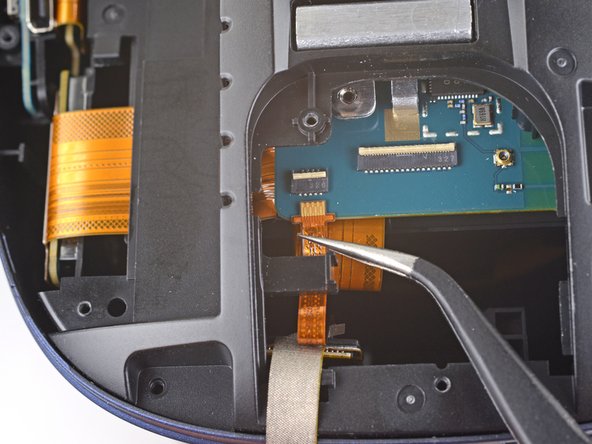
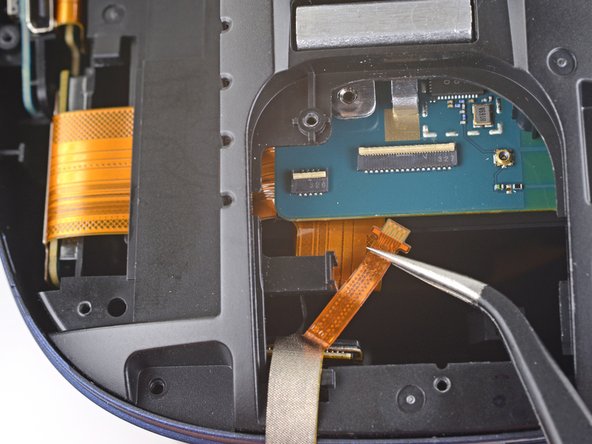
    • Peel the tape over the right camera connector back enough to access the camera's ZIF connector underneath.

    • Repeat the same process to peel back the tape over the left camera ZIF connector.

  15. HTC Vive Cosmos Fan Replacement: 步骤 15 中的图像 1,3 HTC Vive Cosmos Fan Replacement: 步骤 15 中的图像 2,3 HTC Vive Cosmos Fan Replacement: 步骤 15 中的图像 3,3
    • Use the point of a spudger to flip up the small locking flap securing the right camera cable ZIF connector.

    • Carefully slide the camera connector cable straight out of its socket on the motherboard.

  16. HTC Vive Cosmos Fan Replacement: 步骤 16 中的图像 1,2 HTC Vive Cosmos Fan Replacement: 步骤 16 中的图像 2,2
    • Use the point of a spudger to flip up the small locking flap securing the left camera cable ZIF connector.

    • Carefully slide the camera connector cable straight out of its socket on the motherboard.

  17. HTC Vive Cosmos Fan Replacement, Disconnect the microphone: 步骤 17 中的图像 1,1
    • Peel the yellow tape off of the microphone connector.

  18. HTC Vive Cosmos Fan Replacement: 步骤 18 中的图像 1,2 HTC Vive Cosmos Fan Replacement: 步骤 18 中的图像 2,2
    • Use the point of a spudger to flip up the small locking flap securing the microphone cable ZIF connector.

  19. HTC Vive Cosmos Fan Replacement: 步骤 19 中的图像 1,3 HTC Vive Cosmos Fan Replacement: 步骤 19 中的图像 2,3 HTC Vive Cosmos Fan Replacement: 步骤 19 中的图像 3,3
    • Carefully slide the microphone connector cable straight out of its socket on the motherboard.

    • With the cable out of its socket, slide the cable toward the bottom of the Vive and out of its clip on the LCD and motherboard assembly.

    • Take care not to crease or tear the cable while you're moving it.

  20. HTC Vive Cosmos Fan Replacement, Remove the LCD and motherboard assembly: 步骤 20 中的图像 1,2 HTC Vive Cosmos Fan Replacement, Remove the LCD and motherboard assembly: 步骤 20 中的图像 2,2
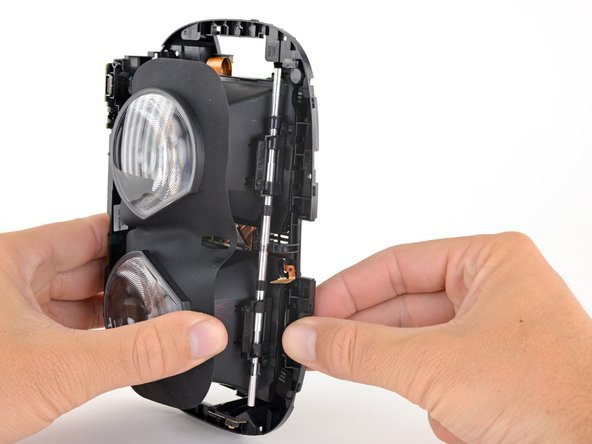
    • Lift the LCD and motherboard assembly out of the headset.

    • The assembly is secured by clips around the edges. It may help to release the clips using a thin plastic tool, like an opening tool or a spudger.

  21. HTC Vive Cosmos Fan Replacement, Disconnect the LCD panels: 步骤 21 中的图像 1,1
    • Use a T5 Torx driver to remove the four 2.9 mm long screws securing the LCD connectors.

  22. HTC Vive Cosmos Fan Replacement: 步骤 22 中的图像 1,3 HTC Vive Cosmos Fan Replacement: 步骤 22 中的图像 2,3 HTC Vive Cosmos Fan Replacement: 步骤 22 中的图像 3,3
    • Use the flat end of a spudger to pry the LCD connectors straight up and out of their sockets on the daughterboard.

  23. HTC Vive Cosmos Fan Replacement, Remove the LCD frame assembly: 步骤 23 中的图像 1,3 HTC Vive Cosmos Fan Replacement, Remove the LCD frame assembly: 步骤 23 中的图像 2,3 HTC Vive Cosmos Fan Replacement, Remove the LCD frame assembly: 步骤 23 中的图像 3,3
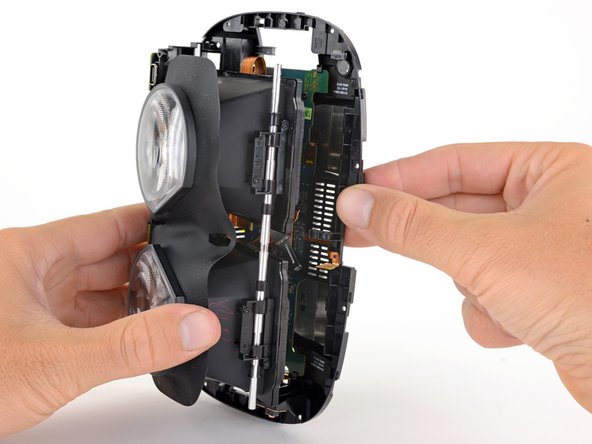
    • Gently pull the bottom edge of the midframe away from the bottom edges of the LCD frames to unclip the LCD frames from the midframe.

  24. HTC Vive Cosmos Fan Replacement: 步骤 24 中的图像 1,2 HTC Vive Cosmos Fan Replacement: 步骤 24 中的图像 2,2
    • Remove the LCD frame assembly from the midframe.

    • During reassembly, first seat the support rod in its slots in the midframe. Then gently press the rest of the LCD frame assembly into the midframe so that the bottom edges of the LCD frames clip into the midframe.

  25. HTC Vive Cosmos Fan Replacement, Disconnect the fan: 步骤 25 中的图像 1,2 HTC Vive Cosmos Fan Replacement, Disconnect the fan: 步骤 25 中的图像 2,2
    • Peel both black plastic stickers off of either side of the motherboard.

  26. HTC Vive Cosmos Fan Replacement: 步骤 26 中的图像 1,3 HTC Vive Cosmos Fan Replacement: 步骤 26 中的图像 2,3 HTC Vive Cosmos Fan Replacement: 步骤 26 中的图像 3,3
    • Use the tip of a spudger to push one side of the the fan connector slightly out of its socket on the motherboard, then push on the other side of the connector. Continue alternating pressure on each side to gently ease the connector out of its socket.

    • Apply pressure parallel to the motherboard. Do not pry up on the connector.

  27. HTC Vive Cosmos Fan Replacement, Unscrew the heat sink and fan: 步骤 27 中的图像 1,1
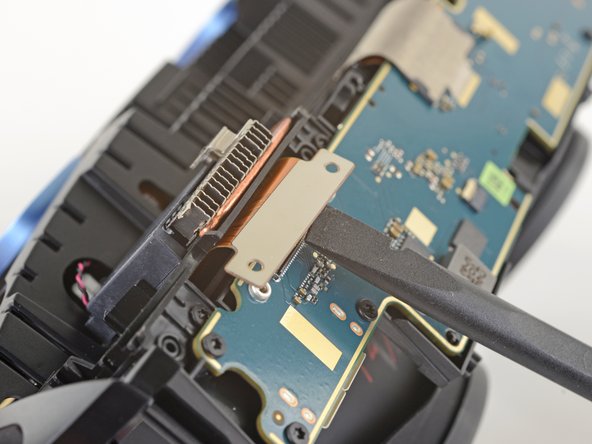
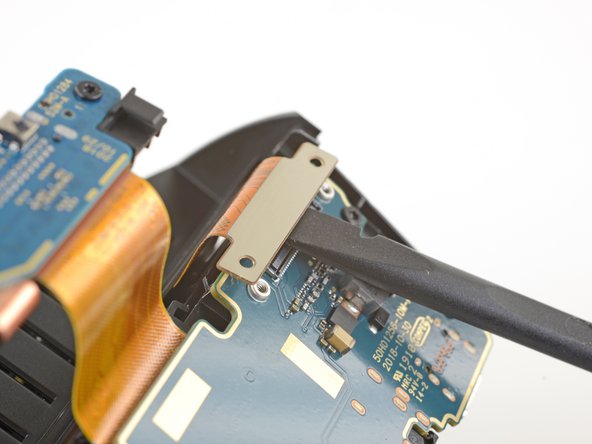
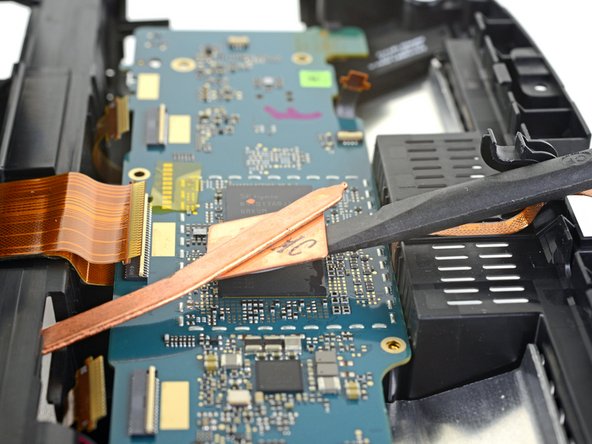
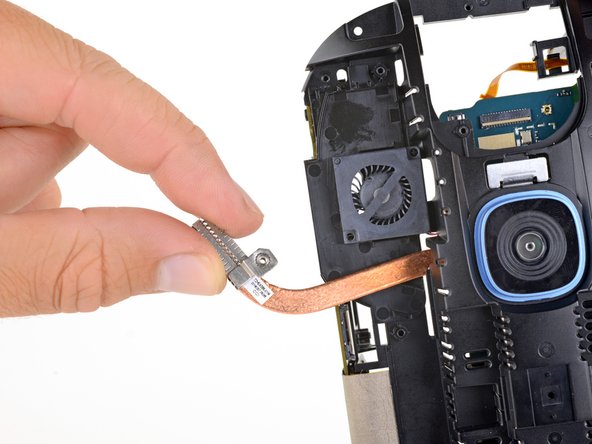
    • Use a T5 Torx driver to remove the screws securing the heat sink and fan:

    • Two 4.1 mm long screws

    • One 8.5 mm long screw

  28. HTC Vive Cosmos Fan Replacement, Unstick the heat sink: 步骤 28 中的图像 1,1
    • Remove the heat sink bracket.

  29. HTC Vive Cosmos Fan Replacement: 步骤 29 中的图像 1,2 HTC Vive Cosmos Fan Replacement: 步骤 29 中的图像 2,2
  30. HTC Vive Cosmos Fan Replacement: 步骤 30 中的图像 1,2 HTC Vive Cosmos Fan Replacement: 步骤 30 中的图像 2,2
    • Slide the heat sink off of the fan. You do not need to completely remove it from the midframe.

  31. HTC Vive Cosmos Fan Replacement, Remove the fan: 步骤 31 中的图像 1,2 HTC Vive Cosmos Fan Replacement, Remove the fan: 步骤 31 中的图像 2,2
    • Slide an opening pick between the fan and the midframe.

    • If this proves difficult, apply heat to the midframe directly under the fan to soften the adhesive securing the fan.

  32. HTC Vive Cosmos Fan Replacement: 步骤 32 中的图像 1,2 HTC Vive Cosmos Fan Replacement: 步骤 32 中的图像 2,2
    • Use the opening pick to pry the fan away from the midframe.

  33. HTC Vive Cosmos Fan Replacement: 步骤 33 中的图像 1,1
    • Lift the fan straight up from the midframe and remove it.

结论

Compare your new replacement part to the original part—you may need to transfer remaining components or remove adhesive backings from the new part before installing.

To reassemble your device, follow the above steps in reverse order.

Take your e-waste to an R2 or e-Stewards certified recycler.

Repair didn’t go as planned? Check out our Answers community for troubleshooting help.

Adam O'Camb

于04/11/15注册

195,318 声望

创作了416篇指南

2条评论

Would the replacement fan also fit the same into a Vive Cosmos Elite Headset ?

Key Lo - 回复

Both the vive cosmos elite and vive cosmos are almost identical. The only difference is the front panel which can be replaced on the vive cosmos to make it into the elite version.

Robert Kelso -

添加评论

浏览统计数据:

过去 24 小时: 2

过去 7 天: 4

过去 30 天: 18

总计 943