简介
HTC Vive 手柄前面板按钮可能已磨损或因长时间使用而无法点击。这可能会导致使用过程中出现功能问题。取下纽扣时注意不要撕破橡胶针孔。本指南将向你展示如何更换前面板按钮。
你所需要的
-
-
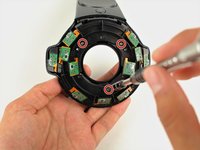
使用尼龙撬棒将顶部和底部的碟子盖在边缘处分开。
-
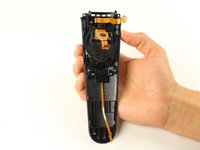
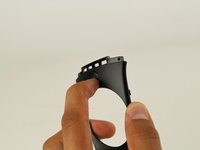
用手向上拉,只取下顶部的碟盖。
My top saucer was REALLY stubborn. Don’t force it with your hand, use the spudger to separate it at the seam. Try not to poke your spudger in too deep, there are internals just inside the seam.
The second time around, I learned why it was so stubborn. The picture suggests that you should start at the base of the saucer and work your way around, but that’s backwards.
Start separating with your spudger at the distal side of the saucer and work your way toward the handle. Then for the last part, pull the piece up and away, like peeling a banana. See the second picture for the bottom half of the saucer, below. Do the same on the top.
-
-
-
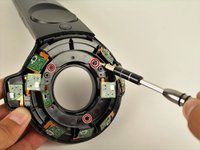
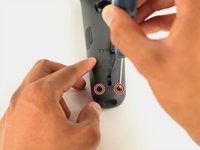
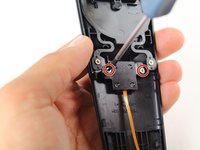
使用 Phillips 00 螺丝刀从暴露的上部传感器面板上卸下三颗 12.8 毫米银色螺丝。
It’s Phillips 0, not 00.
You do not need to remove these screws to remove the bottom saucer. They provide stability to the two halves of the donut.
I had the same experience. Putting the screws back in made the bottom shell easier to remove.
I concur, you don’t need to remove these screws to take the bottom shell off.
I found mine had ph#000 screws size, not ph#00.
please do not remove the Phillips-head screws it is not necessary to remove them.
-
-
-
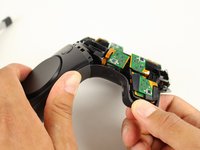
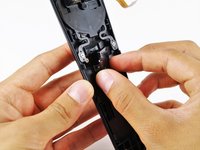
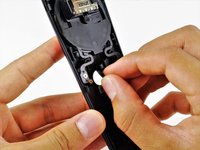
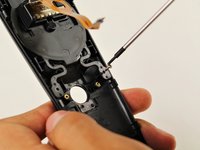
用手小心地拉开底部碟盘。
From what I can tell, there are two clicks on each side? one is quite easy, then the other one seems to require considerable force pushing down and on the side, I had to do it one side at a time and found two YouTube videos performing this step to use as reference. I have the vive pro wands and not the originals, so this may explain the difference. This felt very wrong to me.
-
-
-
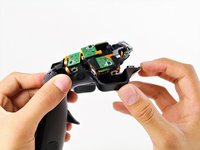
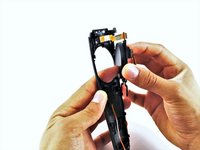
翻转 Vive 手柄,使暴露的底托面板朝上。
-
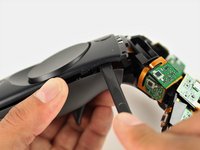
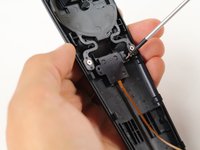
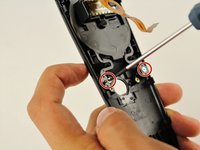
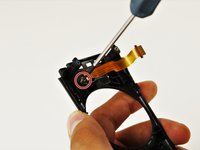
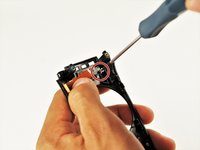
使用 T5 Torx 螺丝刀卸下三颗黑色 5.2mm 螺丝。
Leave the middle screw where it is (the one being unscrewed in the picture). That screw holds the two halves of the photodiode assembly together, not the case.
five screws… two at bottom
I concur with trevosklar, don’t need to remove center screw to remove front panel (pad cover).
-
-
-
-
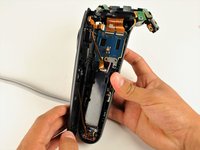
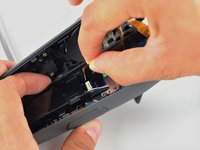
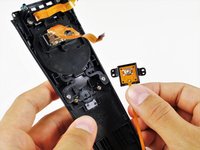
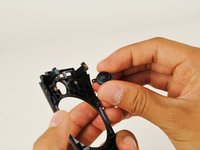
用两根手指将带状电缆向上拉离主板,轻轻断开上部带状电缆的连接。
You do not have to remove the ribbon cables from the plugs…you can carefully work the battery holder around them and remove it…being very gentle. And the black part of the handle will stay attached to the cables and be in the way. But removing the cables does make it easier to access the area for the battery, just not completely necessary.
-
-
-
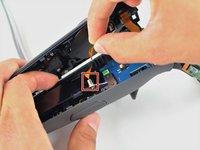
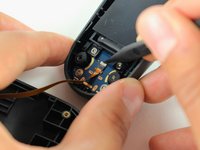
使用尼龙撬棒将白色标签提起 90 度。
-
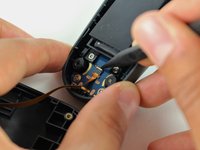
用两根手指向下拉带状电缆,轻轻断开底部带状电缆的连接。
Hallo what is the name of this conector because i Broker it
Yeah I did as instructed only to realize after that my gen 1 vive controller does not do that, and i desoldered the power button ribbon. That cable, does NOT detach on my model. destroyed.
-
-
-
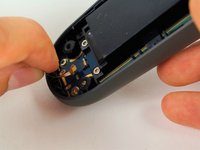
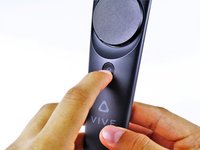
用手指推动菜单按钮,直到它从前面板弹出。
-


请按逆序重组你的设备。
请按逆序重组你的设备。
8等其他人完成本指南。

团队

Cal Poly, Team S15-G5, Livingston Fall 2017 Cal Poly, Team S15-G5, Livingston Fall 2017 的会员
CPSU-LIVINGSTON-F17S15G5
4 名成员
创作了51篇指南
5条评论
Okay great! But where can I buy replacement parts?
Thanks for the guide! Even though iFixit doesn’t have the replacement parts, I was able to fix my button that was off-center and get my controller back up and running! The only issue is that with step 5, the T5 screwdriver that comes with the iFixit tool kits doesn’t work, as it’s too wide. I had to go out and buy a narrower driver, but still much less expensive than the controller. Thanks again!
I had my front panel TOUCHPAD STUCK, in the sense it could sense my thumb touch, but NOT my thumb press on the upper-right part (presses on the other directions were detected). I figured out how to fix it:
The touchpad presses are detected by a little sensor on the controller: it’s the little pink button we can see on the picture of Step 8 on the dark-blue board. This button is pressed when pressing the touchpad, via a little black round plastic thingy behind the very center of the touchpad : we can see it on the top of picture of Step 11, the little black circle. If this black circle is off-center or simply *too low*, the contact with the pink button will not happen properly. I personnaly got the black circle thingy off, placed another thin layer of material below it (of approximately the size of the thingy) and placed it back, so it would be more in contact with the pink button. Solved on my both controllers !
Thanks for this really good guide which helped me solve this !
Jesuis Une - 回复
Hi! My ribbon cable to the touchpad is damaged. Does anyonw know whre to buy a replacment? Seems like it’s soldered to the rumblepack also.
Where can I buy new t5 21 mm screws? Mine are getting stripped out!
jeremyvanwoerden - 回复
Where can you get replacement batteries?
Mike Justice - 回复
The middle bottom screw may have some form of warranty sticker on it if you have a Vive Pro wand (which is purple). Mine had this. Easy enough to remove and get on with it.
sodiboo - 回复