当前版本的文档还未经巡查,您可以查看最新的已查核版本 。
First, begin by removing the printer's hood.
Open the printer's mouth by simply pulling down on it; there are 2 mouth pieces that need to be pulled down.
Adjust the flap covering the scanner upward, as shown.
To access and remove the fourth and final screw attaching the hood, the panel for the power button must be removed as follows:
Reach into the mouth of the printer and press on the small clip behind the power button. This allows the panel of the power button to be removed.
A picture of the power button panel removed is provided to show the location of the clip that needs to be pressed.
After pressing the clip, pull out the power button panel by pulling from right to left.
Remove the exposed screw that was covered by the power button panel.
Do not try and torque the screw from an angle. This will ruin the screw's head, and make it even more difficult to remove the screw. Only remove it as already described.
This screw is placed awkwardly. We found holding a T9 bit in a pair of needle nose pliers gave us enough leverage to pull it up.
This step is easier with two people. Carefully have one person lift the hood of the printer 2-3 inches above where it was resting.
Remove the ribbon cables and wires attaching the motherboard (the only green PCB board) to the hood by gently pulling upward on them.
When all three cables are removed, lift the hood away from the printer and set it aside.
After being separated from the printer, the hood is ready to be disassembled.
Remove the only screw on the printer hood's underside, as shown. Use a T-9 screwdriver.
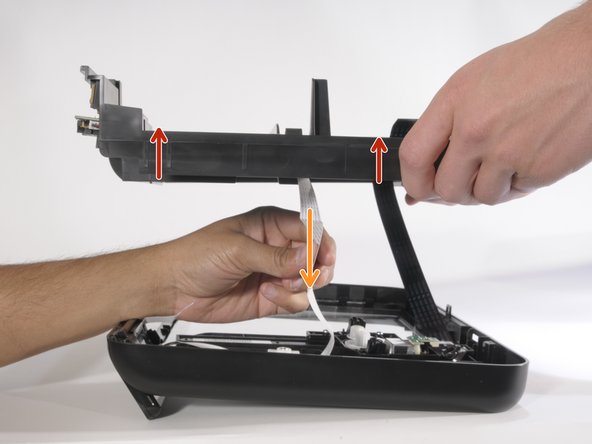
With the screw removed, separate the two pieces of the hood by lifting it vertically.
Only lift the the top piece enough so that there is no tension applied to the ribbon cables shown.
Carefully pull down the white ribbon cable through the top piece of the hood.
Carefully separate the two hood pieces connected by the black ribbon.
Set the piece of the hood down such that no stress is applied to the scanner as it is attached by ribbon cable.
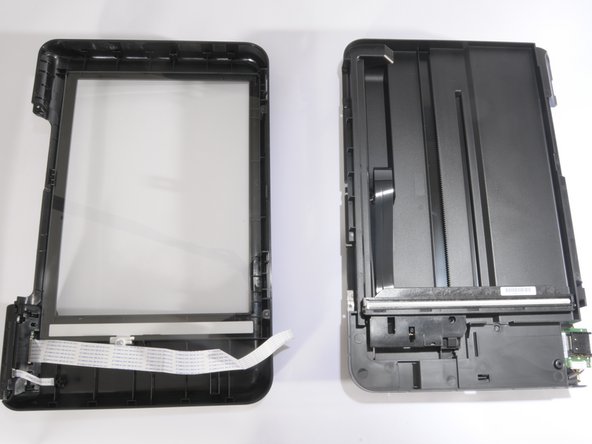
The printer hood should now be in 2 pieces.
The LCD screen is attached to the piece of the hood with the glass shield.
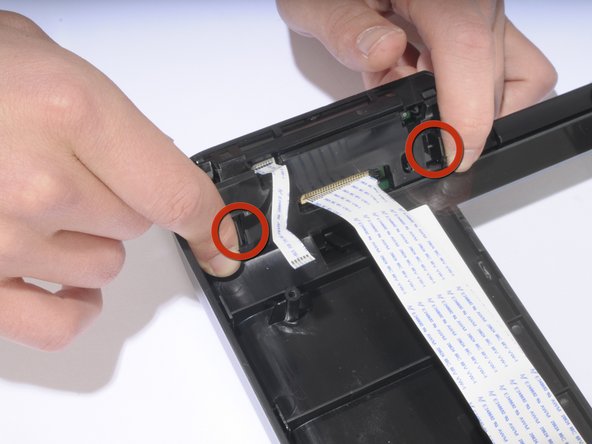
Two ribbon wires are connected to the LCD module. The smaller of the two cannot be removed. Do not remove the small ribbon wire.
The LCD is attached to the hood by two slots as shown in red. Push the sloped slides of the slots inward to release the slots from the hood.
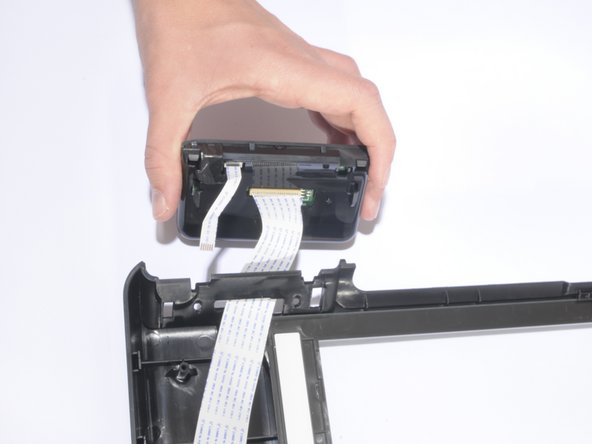
Push the LCD module down and pull it away from the hood. The LCD should slide out of its holders.
The LCD module should now be separated from the hood. The large ribbon wire from the LCD can be detached if needed.
嵌入本指南
选择一个尺寸并复制下面的代码,将本指南作为一个小插件嵌入到你的网站/论坛中。
单个步骤
完整指南
小——600像素
中——800像素
大——1200像素
预览