跳转到主内容

HP Pavilion 17-g192dx Motherboard Replacement

你所需要的

  1. HP Pavilion 17-g192dx Motherboard Replacement, Battery: 步骤 1 中的图像 1,3 HP Pavilion 17-g192dx Motherboard Replacement, Battery: 步骤 1 中的图像 2,3 HP Pavilion 17-g192dx Motherboard Replacement, Battery: 步骤 1 中的图像 3,3
    • Turn off the laptop.

    • Slide the battery lock to the right until you see the open lock symbol.

  2. HP Pavilion 17-g192dx Motherboard Replacement: 步骤 2 中的图像 1,1
    • Slide the battery release to the left until the battery pops up.

    • This may require significant force.

  3. HP Pavilion 17-g192dx Motherboard Replacement: 步骤 3 中的图像 1,2 HP Pavilion 17-g192dx Motherboard Replacement: 步骤 3 中的图像 2,2
    • Lift the battery up.

  4. HP Pavilion 17-g192dx Motherboard Replacement, laptop: 步骤 4 中的图像 1,1
    • Using the metal spudger, pry up the screw covers.

  5. HP Pavilion 17-g192dx Motherboard Replacement: 步骤 5 中的图像 1,1
    • Remove the fifteen 7mm screws holding the back casing on using the Phillips #00 screwdriver.

  6. HP Pavilion 17-g192dx Motherboard Replacement: 步骤 6 中的图像 1,2 HP Pavilion 17-g192dx Motherboard Replacement: 步骤 6 中的图像 2,2
    • Remove the 7mm screw holding the disc drive in place using the Phillips #00 head screwdriver.

  7. HP Pavilion 17-g192dx Motherboard Replacement: 步骤 7 中的图像 1,3 HP Pavilion 17-g192dx Motherboard Replacement: 步骤 7 中的图像 2,3 HP Pavilion 17-g192dx Motherboard Replacement: 步骤 7 中的图像 3,3
    • Using an iFixit opening tool, push the disc drive away from the outer case.

    • Once the disk drive is out far enough, it easily slides out.

  8. HP Pavilion 17-g192dx Motherboard Replacement: 步骤 8 中的图像 1,3 HP Pavilion 17-g192dx Motherboard Replacement: 步骤 8 中的图像 2,3 HP Pavilion 17-g192dx Motherboard Replacement: 步骤 8 中的图像 3,3
    • Remove the four 7mm screws holding the back resting plates on using the Phillips #00 screwdriver.

    • Using a metal spudger, lift up on the back resting plate until it pops off.

  9. HP Pavilion 17-g192dx Motherboard Replacement: 步骤 9 中的图像 1,2 HP Pavilion 17-g192dx Motherboard Replacement: 步骤 9 中的图像 2,2
    • Remove the two 7 mm screws behind the plate using a Phillips #00 screwdriver.

  10. HP Pavilion 17-g192dx Motherboard Replacement: 步骤 10 中的图像 1,3 HP Pavilion 17-g192dx Motherboard Replacement: 步骤 10 中的图像 2,3 HP Pavilion 17-g192dx Motherboard Replacement: 步骤 10 中的图像 3,3
    • Pry up on the case with an iFixit opening tool until you can feel a snap.

    • Pry around the remainder until you can separate the case from the keyboard with your hands.

    • Gently separate the two.

  11. HP Pavilion 17-g192dx Motherboard Replacement, RAM stick: 步骤 11 中的图像 1,3 HP Pavilion 17-g192dx Motherboard Replacement, RAM stick: 步骤 11 中的图像 2,3 HP Pavilion 17-g192dx Motherboard Replacement, RAM stick: 步骤 11 中的图像 3,3
    • Use your fingers to pry the two black tabs on either side of the RAM stick outwards until the RAM swings upwards to rest at an angle.

    • Gently slide the RAM out from the port maintaining the angle at which it rests.

    • The images show the RAM stick being pried from the port without being unlocked by the tabs. Be sure to use the black tabs to release it and avoid damaging the RAM or the motherboard.

    • During reinstallation, be sure to insert the RAM stick at a similar angle to which it rested after being unlocked. Then just press the stick down into place. There should be a click as the black tabs reengage to lock it in place.

  12. HP Pavilion 17-g192dx Motherboard Replacement, Cooling Fan: 步骤 12 中的图像 1,3 HP Pavilion 17-g192dx Motherboard Replacement, Cooling Fan: 步骤 12 中的图像 2,3 HP Pavilion 17-g192dx Motherboard Replacement, Cooling Fan: 步骤 12 中的图像 3,3
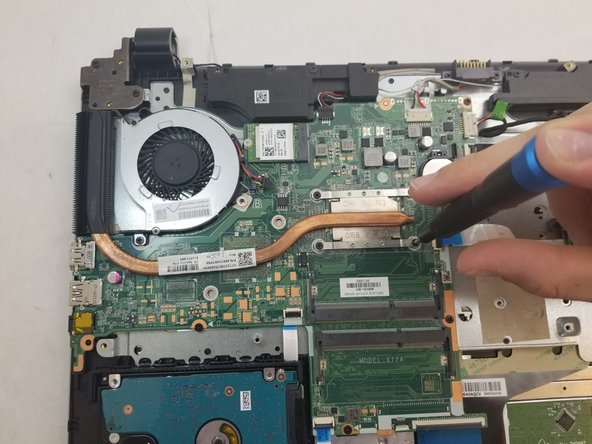
    • Remove the four 2mm screws on the heat sink with a Phillips #00 screwdriver.

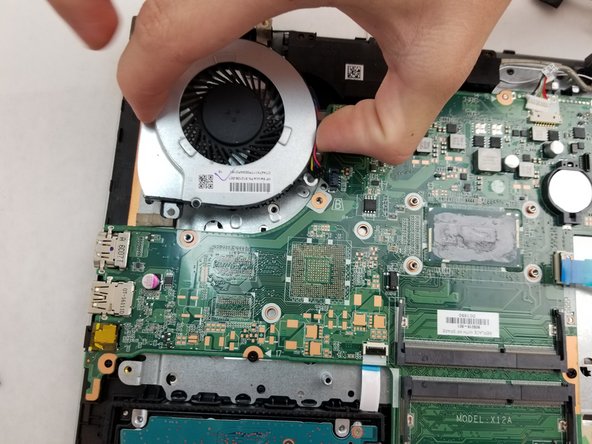
    • Remove the heat sink.

    • When setting the heat sink down, set it face down to avoid putting the thermal paste on the work surface.

    • When reinstalling the heat sink, be sure to clean the contact surfaces and reapply fresh thermal paste.

  13. HP Pavilion 17-g192dx Motherboard Replacement: 步骤 13 中的图像 1,1
    • Remove the two 5mm screws holding the fan in place using the Phillips #00 screwdriver.

  14. HP Pavilion 17-g192dx Motherboard Replacement: 步骤 14 中的图像 1,2 HP Pavilion 17-g192dx Motherboard Replacement: 步骤 14 中的图像 2,2
    • Unplug the cooling fan from the motherboard.

    • Remove the cooling fan.

  15. HP Pavilion 17-g192dx Motherboard Replacement, Motherboard: 步骤 15 中的图像 1,3 HP Pavilion 17-g192dx Motherboard Replacement, Motherboard: 步骤 15 中的图像 2,3 HP Pavilion 17-g192dx Motherboard Replacement, Motherboard: 步骤 15 中的图像 3,3
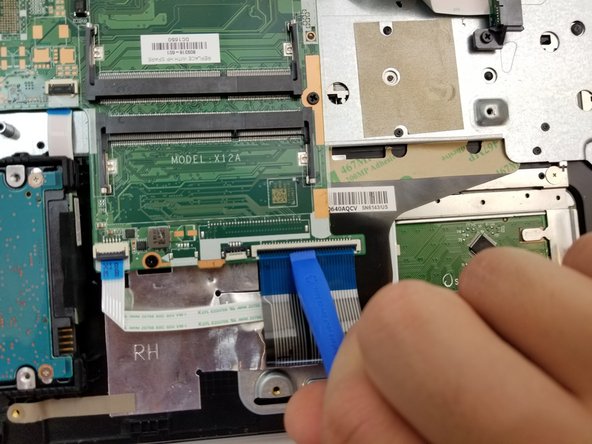
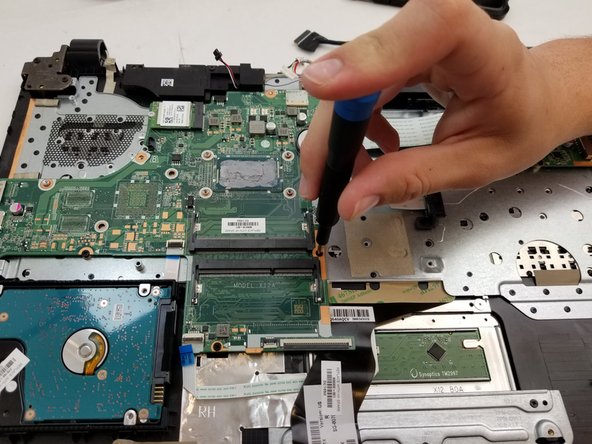
    • Unplug all wires connected to the top of the motherboard.

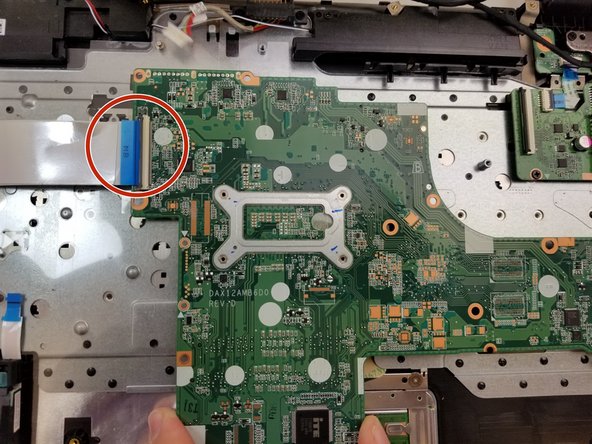
    • Use an opening tool to lift up the tab located on top of the wires.

    • An opening tool will be needed for almost all of the wires.

  16. HP Pavilion 17-g192dx Motherboard Replacement: 步骤 16 中的图像 1,2 HP Pavilion 17-g192dx Motherboard Replacement: 步骤 16 中的图像 2,2
    • Remove the four 4mm screws with a Phillips #00 screwdriver.

  17. HP Pavilion 17-g192dx Motherboard Replacement: 步骤 17 中的图像 1,3 HP Pavilion 17-g192dx Motherboard Replacement: 步骤 17 中的图像 2,3 HP Pavilion 17-g192dx Motherboard Replacement: 步骤 17 中的图像 3,3
    • Double check everything is unplugged.

    • Lift up the motherboard and flip it over to the backside.

    • Remove the wire still attached to the back with a plastic opening tool.

    • Remove the motherboard.

结论

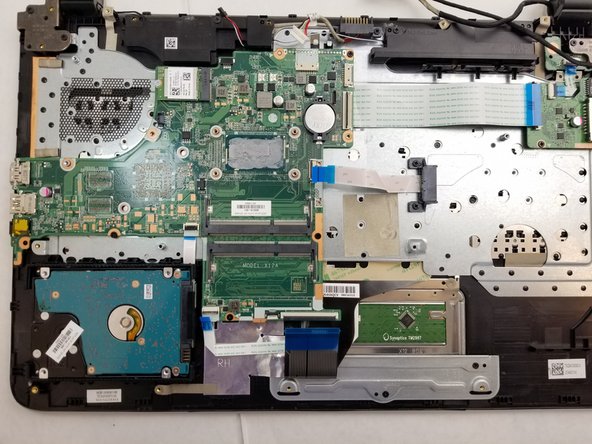
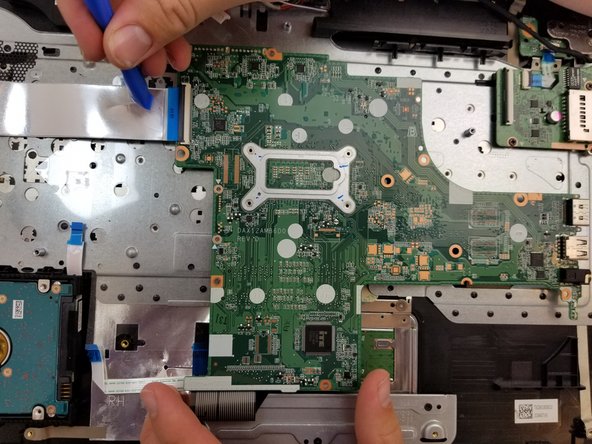
To reassemble your device, follow these instructions in reverse order.

另外一个人完成了本指南。

一条评论

I really liked the this. Only 1 issue that I saw, lifting up the tabs some are black and some are white. That was not apparent to me to do because 1 close up shot of each would show you want to look for! Great Job overall!

Craig Minnesota USA

Craig - 回复

添加评论

浏览统计数据:

过去 24 小时: 2

过去 7 天: 2

过去 30 天: 5

总计 429