你所需要的
-
-
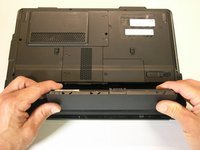
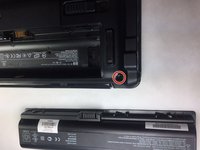
Make sure the laptop is powered OFF. Gently turn the laptop over and place it on a flat surface.
-
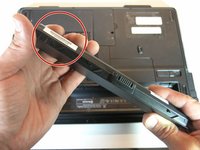
Locate the battery EJECT latch.
-
-
-
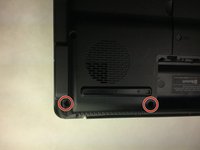
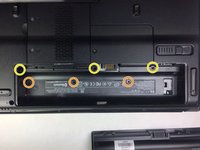
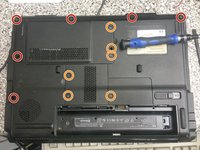
Use a Phillip's #00 screwdriver to remove all of the circled screws. Apply moderate pressure to each screw to avoid stripping it.
-
The three screws circled in red are 9mm Phillip's #00 screws.
-
The three screws circle in orange are 5mm Phillip's #00 screws.
-
The three screws circled in yellow are 6mm Phillip's #00 screws.
-
-
-
-
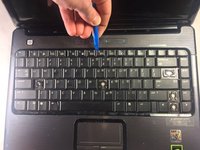
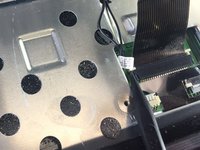
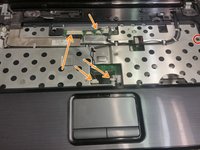
Remove both the media button and power button cables from the motherboard.
-
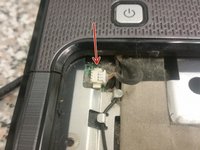
Pull up on the edges of the power button cover with your fingers to remove it.
-
-
-
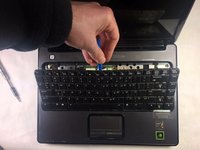
Remove the six screws securing the palmrest to the base.
-
Remove all three covers, as well as the screw securing the optical drive. Pull the optical drive out.
-
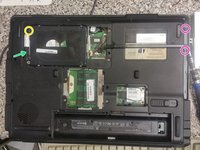
Remove the single screw securing the hard drive caddy.
-
Remove the two screws from where the optical drive was.
-
Lift the hard drive caddy out of the laptop.
-
Remove the three screws from under where the hard drive caddy was.
-
Remove the single remaining screw holding the palmrest from the bottom.
-
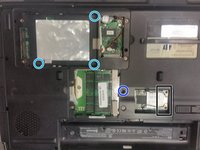
Also remove the wireless antennas from the wireless card, as well as the wireless card.
-
-
-
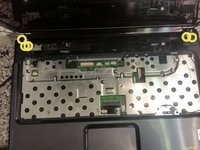
Remove the single remaining screw securing the palmrest.
-
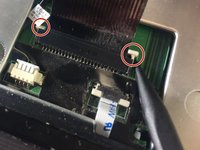
Remove all cables from the motherboard, and pull them from their clips.
-
Remove the five screws securing the screen assembly. Take care to support the LCD assembly as you unscrew it. Pull it up, then set it aside.
-
Use a spudger along the back of the computer to completely separate the palmrest from the base. Lift the palmrest up.
-


To reassemble your device, follow these instructions in reverse order.
To reassemble your device, follow these instructions in reverse order.
3等其他人完成本指南。

2条评论
Hi,
Knowing About Websites & Manufacture Companies.
Thanks