简介
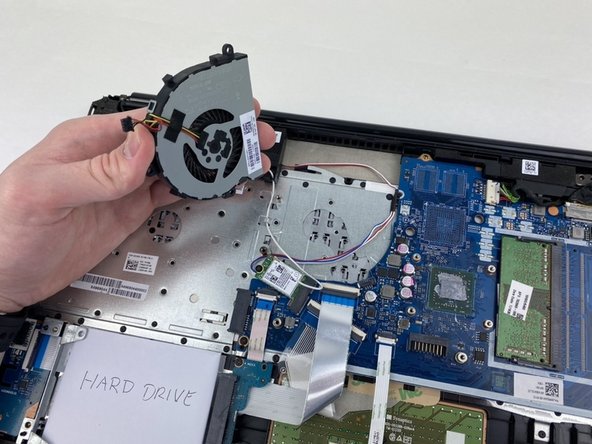
This is a guide on how to replace the Fan and Heat Sink in the HP 15-db0015dx laptop. Use this guide to replace or upgrade the fan and heat sink. You may need to upgrade or replace the fan and heat sink if the computer is running too hot, smoking, making excessive noise during compute-intensive operations, or under-performing.
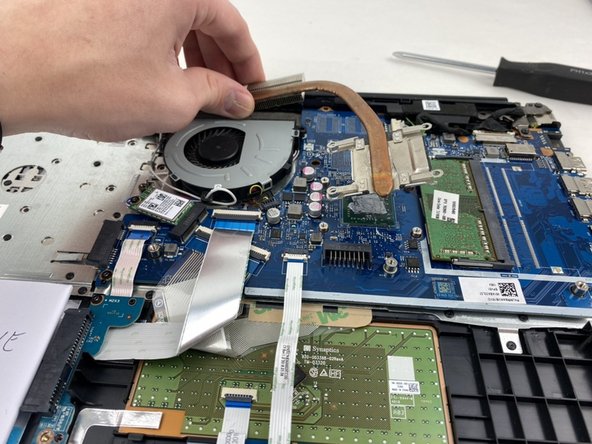
In replacing the heatsink, you will need to separate it from the CPU, which will require a cleaning and reapplication of the thermal paste. See this Thermal Paste Application guide for details on how to replace your thermal paste correctly to maintain proper thermal conductivity. Old thermal paste can cause issues with heat uptake by the heatsink, so just by replacing this thermal paste, you may notice better heat mitigation performance from your device.
你所需要的
-
-
Power off the device before starting.
-
Remove the rubber strips that hide the screws using the spudger.
-
Flip the device and unscrew the eleven screws with a Phillips #0 screwdriver.
-
-


To reassemble your device, follow these instructions in reverse order.
To reassemble your device, follow these instructions in reverse order.
另外一个人完成了本指南。

团队

Embry-Riddle Aeronautical University, Team S2-G5, Watkins Spring 2020 Embry-Riddle Aeronautical University, Team S2-G5, Watkins Spring 2020 的会员
ERAU-WATKINS-S20S2G5
5 名成员
创作了8篇指南
3条评论
It's best to remove the material on both the CPU side and the attached fan side.