简介
Use this guide to replace a damaged back case, or open the case to access other components of your camera.
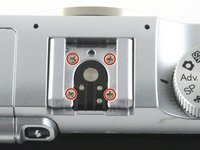
We highly suggest you use a magnetic project mat or an organization tray. This camera has many different types of screws and keeping them organized is key to proper reassembly.
你所需要的
-
-
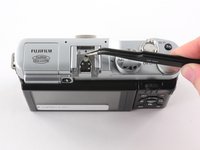
Turn the camera upside down to locate the battery compartment.
-
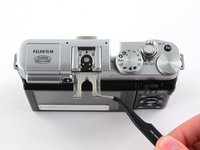
Slide the button up to open the compartment.
-
Slide the orange button up to release the battery.
-
-


结论
To reassemble your device, follow these instructions in reverse order.
2等其他人完成本指南。
