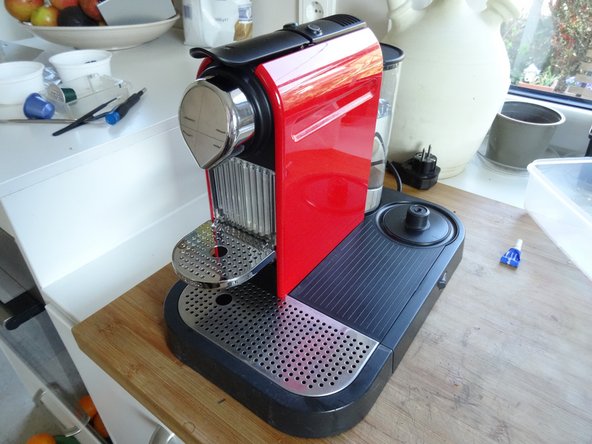
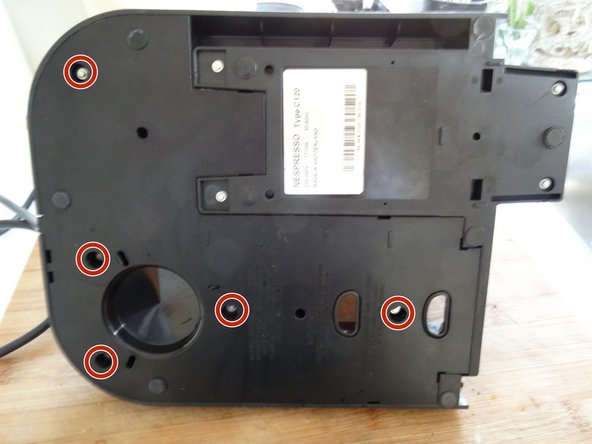
跳转到主内容

Dismantle Nespresso CitiZ

你所需要的

  1. Dismantle Nespresso CitiZ, Dismantle Nespresso CitiZ: 步骤 1 中的图像 1,1
    • Never forget: pull the plug!

    • Remove all attachments: Water tank, capsule and cup drawer, drip tray.

    • The model shown is also equipped with a milk frother, remove that too.

  2. Dismantle Nespresso CitiZ: 步骤 2 中的图像 1,2 Dismantle Nespresso CitiZ: 步骤 2 中的图像 2,2
    在这个步骤中使用的工具:
    iFixit Precision 4 mm Screwdriver Bit
    $2.99
    购买
    • The bottom is secured by oval head screws.

    • These screws have an oval head that makes them look like rivets (picture 2). You need to use a special bit - also available at iFixit - for their removal. Here a DIY guide. If the right bit is not available, it could be done with a pair of needle nose pliers. Nespresso wants to keep us out of our own machines!!!

    • Remove five oval head screws securing the large bottom panel.

    • Note: this panel is smaller on models without milk frother.

  3. Dismantle Nespresso CitiZ: 步骤 3 中的图像 1,3 Dismantle Nespresso CitiZ: 步骤 3 中的图像 2,3 Dismantle Nespresso CitiZ: 步骤 3 中的图像 3,3
    • The bottom panel is just snapped into place. Insert a metal spudger into the slots and lift the panel out. It sits quite tightly and you might use some force to get it out.

  4. Dismantle Nespresso CitiZ: 步骤 4 中的图像 1,1
    • Remove the large bottom panel.

  5. Dismantle Nespresso CitiZ: 步骤 5 中的图像 1,1
    • Use a spudger to slide off the two silicon tubes.

  6. Dismantle Nespresso CitiZ: 步骤 6 中的图像 1,2 Dismantle Nespresso CitiZ: 步骤 6 中的图像 2,2
    • Disconnect the two spade plugs on the blue and brown wires from the power switch. The two left ones remain.

  7. Dismantle Nespresso CitiZ: 步骤 7 中的图像 1,1
    • Remove four oval head screws from the small bottom panel.

    • Remove the main device from the base. It´s still connected with some wires, but this doesn´t bother much.

  8. Dismantle Nespresso CitiZ: 步骤 8 中的图像 1,3 Dismantle Nespresso CitiZ: 步骤 8 中的图像 2,3 Dismantle Nespresso CitiZ: 步骤 8 中的图像 3,3
    • The two colored side panels are only snapped into place. However, the latches sit very tight. You really need a lot of force. First lift the lower edge using a plastic opening tool.

    • Depending from the model it might help, when you first pry off the coffee spout. (See next step)

    • Unfold each of the side panels upwards and remove them.

  9. Dismantle Nespresso CitiZ: 步骤 9 中的图像 1,1
    • Insert a opening tool in the gap on the bottom of the coffee spout. Pry it off carefully.

结论

To reassemble your device, follow these instructions in reverse order.

4等其他人完成本指南。

由衷感谢以下译者:

de en

100%

VauWeh正在帮助我们修复这个世界! 您也想加入吗?
开始翻译 ›

VauWeh

于10/19/15注册

202,987 声望

创作了246篇指南

团队

Repair is War on Entropy Repair is War on Entropy 的会员

Community

25 名成员

创作了1,115篇指南

2条评论

Wie geht es weiter um an die Heizung zu kommen? Vermutlich ist eine Reperatur nicht möglich.

Martin Gastberger - 回复

Ich denke der Teardown zeigt es: Nespresso CitiZ Teardown

VauWeh -

添加评论

浏览统计数据:

过去 24 小时: 13

过去 7 天: 137

过去 30 天: 589

总计 9,655