跳转到主内容

Dell Latitude E5450 Lower Case Replacement

你所需要的

  1. Dell Latitude E5450 Lower Case Replacement, Unscrew the Lower Case: 步骤 1 中的图像 1,1
    在这个步骤中使用的工具:
    Magnetic Project Mat
    $19.95
    购买
    • Remove the six Philips #0 screws from the lower case.

    • These screws are all 5.6 mm long, but it's still a good idea to keep track of them and make sure they go back in their proper holes!

  2. Dell Latitude E5450 Lower Case Replacement: 步骤 2 中的图像 1,1
    • This photo shows the location of the ten clips that hold the lower case in place. Take note of the location of the clips, and refer back to this step if your lower case gets stuck during removal.

    • Four clips hold the upper half of the case in place and can be released by prying around them with a spudger.

    • The other six clips along the bottom edge can not be released by prying at them. Instead, they come free by sliding the whole case upward, as shown in step 5 below.

  3. Dell Latitude E5450 Lower Case Replacement: 步骤 3 中的图像 1,2 Dell Latitude E5450 Lower Case Replacement: 步骤 3 中的图像 2,2
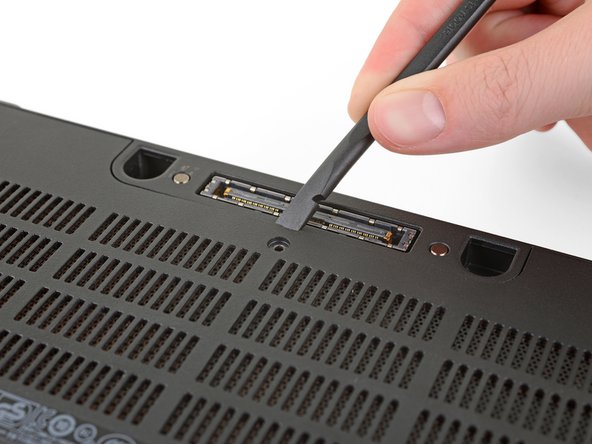
    • Insert the flat edge of a spudger into the small divot along the top edge of the case, just below the docking station port.

    • Pry up to release the two central clips along the upper edge of the case.

  4. Dell Latitude E5450 Lower Case Replacement: 步骤 4 中的图像 1,3 Dell Latitude E5450 Lower Case Replacement: 步骤 4 中的图像 2,3 Dell Latitude E5450 Lower Case Replacement: 步骤 4 中的图像 3,3
    • Use your spudger to pry up the remaining clips along the top edge.

  5. Dell Latitude E5450 Lower Case Replacement, Remove the Lower Case: 步骤 5 中的图像 1,3 Dell Latitude E5450 Lower Case Replacement, Remove the Lower Case: 步骤 5 中的图像 2,3 Dell Latitude E5450 Lower Case Replacement, Remove the Lower Case: 步骤 5 中的图像 3,3
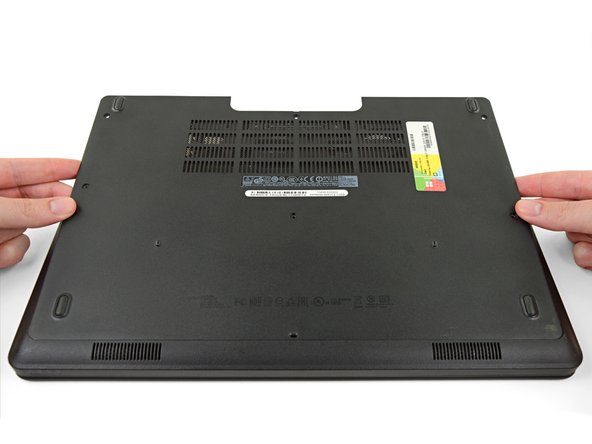
    • Slide the lower case upward and remove it.

  6. Dell Latitude E5450 Lower Case Replacement: 步骤 6 中的图像 1,2 Dell Latitude E5450 Lower Case Replacement: 步骤 6 中的图像 2,2
    • When reinstalling the lower case, make sure you slide the bottom edge (the edge without the cutout) into place first before snapping the rest of the clips shut.

结论

To reassemble your device, follow these instructions in reverse order.

Take your e-waste to an R2 or e-Stewards certified recycler.

Repair didn’t go as planned? Check out our Dell Latitude answers community for troubleshooting help.

Taylor Dixon

于06/26/18注册

67,113 声望

创作了94篇指南

0条评论

添加评论

浏览统计数据:

过去 24 小时: 0

过去 7 天: 1

过去 30 天: 12

总计 1,505