跳转到主内容

Charging Component on the Base Replacement

你所需要的

  1. Charging Component on the Base Replacement, Base: 步骤 1 中的图像 1,1
    • Turn the base over. You will see four 11mm Phillips #0 screws, one in each corner.

    • Use a screwdriver to remove all four 11mm Phillips #0 screws.

  2. Charging Component on the Base Replacement: 步骤 2 中的图像 1,2 Charging Component on the Base Replacement: 步骤 2 中的图像 2,2
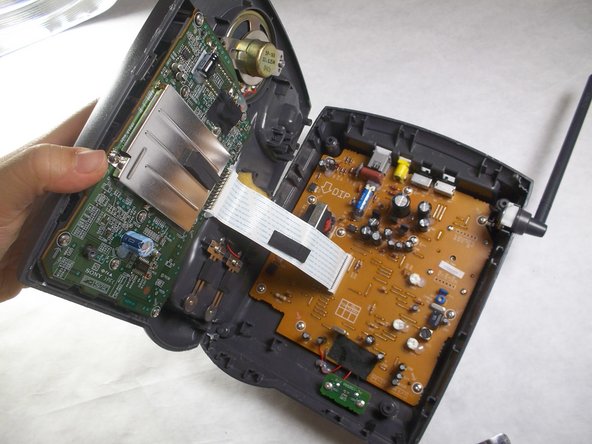
    • Locate an easy seam for entry and insert the metal spudger to separate the plastic. Use the spudger in multiple places if necessary.

    • Opening the base may require exerting significant force as it is bound together tightly. This step can be dangerous.

    • The spudger is designed to make this step easier.

  3. Charging Component on the Base Replacement, Charging Component on the Base: 步骤 3 中的图像 1,2 Charging Component on the Base Replacement, Charging Component on the Base: 步骤 3 中的图像 2,2
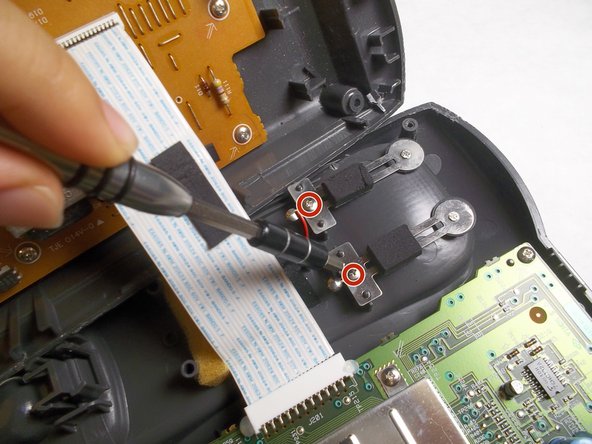
    • Locate the charging component towards the bottom of the grey, plastic, phone-shaped extrusion. It is composed of two metal pieces; each is fastened by a 5mm Phillips #0 screw.

    • Remove both 5mm Phillips #0 screws to release the metal pieces.

  4. Charging Component on the Base Replacement: 步骤 4 中的图像 1,1
    • Cut the black and red wires to finish removal, and then solder your new replacement component.

    • For more help on soldering, please refer to the iFixit Solder and Desolder Guide.

结论

To reassemble your device, follow these instructions in reverse order.

另外一个人完成了本指南。

Han Shih

于09/29/16注册

361 声望

创作了4篇指南

团队

IUPUI, Team 3-3, Harley Fall 2016 IUPUI, Team 3-3, Harley Fall 2016 的会员

IUPUI-HARLEY-F16S3G3

4 名成员

创作了17篇指南

0条评论

添加评论

浏览统计数据:

过去 24 小时: 0

过去 7 天: 1

过去 30 天: 1

总计 300