当前版本的文档还未经巡查,您可以查看最新的已查核版本 。
Unless stated otherwise, use a Phillips #00 screwdriver to remove all screws.
On the backside of the camera, remove the 4.75 mm screw that sits at the top right corner.
Remove the four 4.75 mm screws that sit at the bottom of the camera.
On the side of the camera, remove the four 4.75 mm screws that sit near the wrist strap mount.
Remove the two small metal plates, which the four screws hold in place.
在这个步骤中使用的工具:
Tweezers
$4.99
购买
When removing the casing, do not drop the small black plastic piece. This piece sits in a small gap above the lens, to the left of the flash, and underneath the camera case.
Remove the small black plastic piece and set it aside. If necessary, use tweezers to remove the small black plastic piece.
Detach the front case and back case.
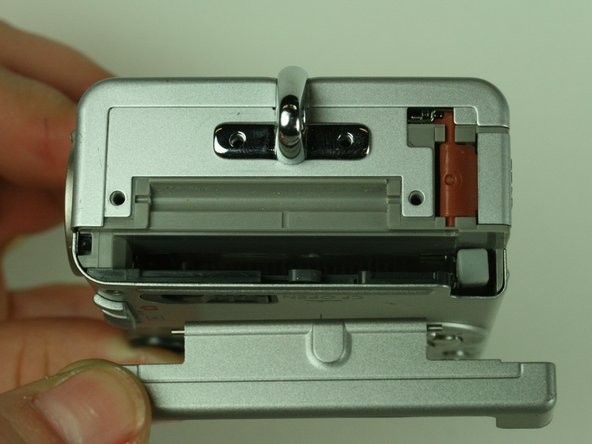
Do not remove the metal plate this step refers to. Removal at this step may damage the ribbon cable. Wait until the next step to remove the plate.
Remove the 3.5 mm screw that sits on the metal plate at the bottom of the camera.
Remove the two other 3.5 mm screws that sit on the side, to the left of the screw you just removed.
In the image, we have already removed some of the screws.
A ribbon cable attaches to the metal plate and to the main circuit board, on the front of the camera.
Gently release the black latch.
Remove the ribbon cable and metal plate assembly.
On the backside of the camera, remove the 3.5 mm screw that sits to the left of the viewfinder and above the LCD screen.
Remove the second 3.5 mm screw that sits directly above the LCD screen.
Gently detach the ribbon cable.
Locate the ribbon cable on the main circuit board, which sits below the lens.
Gently release the black latch on the ribbon cable connector and detach the ribbon cable.
嵌入本指南
选择一个尺寸并复制下面的代码,将本指南作为一个小插件嵌入到你的网站/论坛中。
单个步骤
完整指南
小——600像素
中——800像素
大——1200像素
预览