简介
Direct access to the print mechanism is limited, whether you need to investigate a fault or clear a particularly severe paper jam. Removal of the scanner unit makes it much easier, and is a prerequisite to further disassembly.
Ribbon cables are all of the push fit type. Pull gently but firmly to disengage from the socket. To reconnect, simply push the reinforced end of the ribbon firmly into the socket, making sure it's the correct way round.
你所需要的
-
-
You may wish to remove the ink cartridges if you are planning a radical disassembly, though this is not necessary for the purposes of this guide. Follow the instructions in the User Manual, and place them in a polythene bag, both to prevent them drying out and to avoid ink stains on your work surface or clothes.
-
Switch off the printer if it's on, by pressing the power button and waiting for the power light to stop flashing. Now unplug the power cable and USB lead (if connected).
-
Lift the scanner lid as far as it will go. Squeeze the finger in the centre of each hinge in order to detach it.
-
-
-
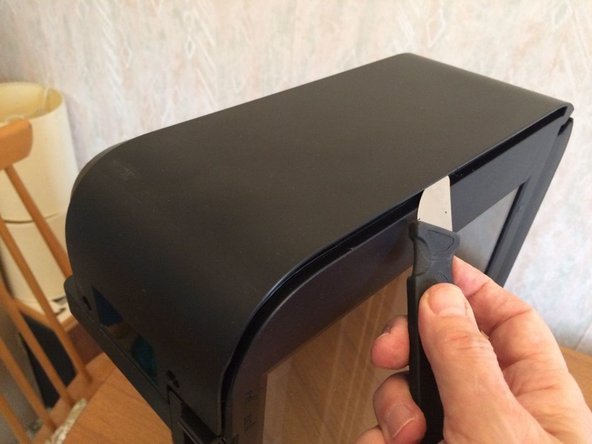
Using a jimmy (or similar tool), release the clips around the edge of the control panel cover, then lift off the cover.
-
-
-
Remove 2 cross head screws from the front of the printer on the right hand side.
-
Standing the printer on its left hand side, unclip the right side panel, first along the top edge and then at the back. It should now come away completely.
-
-
-
-
Unclip the rear of the left side panel.
-
Unclip the front of the left side panel.
-
The side panel is still retained by a hidden clip beneath a rectangular hole near the edge of the control panel. Release it by pressing down on it with a flat screwdriver blade. The left panel should now come away.
-
-
-
Lift off the control panel, taking care not to strain the ribbon cable, still attached.
-
Disconnect the ribbon cable.
Yes, just pull. See Step 2 in 认识和断开线缆连接头
How to access and replace Ink Absorber
Hallo, Wirklich den Stecker abziehen ? Ich bekomme das nicht ab ... Hab Angst es zu zerstören
Hello, Are you sure you want to unplug it? I can't get this off... Afraid of destroying it
The ribbon is reinforced where it enters the connector so no danger of tearing it. Grip it close to the connector and pull quite hard.
Das Band ist dort verstärkt, wo es in den Stecker eintritt, sodass keine Gefahr besteht, dass es reißt. Fassen Sie es nahe am Stecker und ziehen Sie ziemlich fest.
Pull the ribbon not the black connector. See also 认识和断开线缆连接头 (I no longer have this printer so can't get extra photos. Perhaps you'd like to add one?)
-
-
-
Disconnect the WiFi module ribbon from the main logic board,
-
Remove the screw holding the WiFi module bracket in place and remove the bracket and module together.
-
-
-
Disconnect a wide ribbon cable from the top of the logic board.
-
Disconnect a narrow folded ribbon from the bottom left hand corner.
-
(The connector with 2 red wires on the left hand side of the logic board does not need to be disconnected.)
-
-
-
Remove the screw at the top left of the glass pane
-
Remove the screw at the bottom left of the glass pane
-
Then gently lift the 2 tabs of the screws you just removed, and slide the whole glass pane by about 1/4inch (5 mm) to the left
-
(Note: Avoid any dust inside the scanner unit.)
-
You can stop here if you're not interested in the printer part, or put back the glass pane and go on.
-
-
-
Remove a screw from the well that housed the WiFi module.
-
Remove the screw from the front left of the device.
-
-
-
Remove a screw from the front right hand side.
-
Release a catch on the rear left hand side of the device (as seen from the rear) and lift the scanner unit off.
-
You will now be able to see the print mechanism much more easily and proceed with any further disassembly that might be needed.
Note: if you want to further disasemble the scanner unit, don’t try to pry it open by force like I just did :-/.
Instead, gently slide the upper glass pane from right to about 5 mm and it should come loose.
Please then make sure not to let any dust in of course.
-


To reassemble your device, follow these instructions in reverse order.
To reassemble your device, follow these instructions in reverse order.
33等其他人完成本指南。

团队

12条评论
Very good description. I need to empty my ink collection tank/tray. Once I have removed the scanner assembly as you describe, will I then gain access to theis container? Thanks.
See link to YouTube video below. You need long tweezers and be careful when replacing the pads as they can drop into the mechanism easily .. which is why I found this tutorial on how to dismantle the printer!
Hi. Where inside the printer to look in order to clear the error 5b02_ Thank you!
Hi, how can i clean my ink tank to clear the 5B02 error code? Thank you
thank you very much! you saved my workday! i am a girl and i really appreciate so simple manual. i wish every manual was so simple! :)))
Well done Patricia! You never need to apologise or anything of the sort for being a girl - girls are often better at this sort of thing as they tend to be more careful whereas boys sometimes rush on in a slapdash manner as if it were a race! Just believe in yourself and don’t be afraid to make mistakes - that’s how you learn - and you’ll soon be an ace fixer!
Well done explanation. You saved my printer from trash. Unresolved head alignment (tried everything) by opening the printer and perfectly clean the plastic band behind heads (it’s a pace counter in reality), as well as the plastic circle on the side opposite to head rest . were really dirty and giving false positioning to the head. Now works smoothly and precisely as new. Many thanks !
Hello everyone and thanks for the very useful guide. My Mg3650 has a paper loading problem, that is, sometimes it is unable to take it, other times it takes it a little crookedly and the paper gets stuck inside the printer... I noticed that the trolley with the two rubberized wheels which is used for pulling the paper in, it doesn't put enough pressure on the paper because I think it has a broken spring... before opening the printer following the guide, can anyone tell me if it is possible to replace or repair the spring? Maybe it's just unhooked but I'll only know when I open it. I'm wondering if any of you have had the same experience. Thank you!