跳转到主内容

Bose QuietComfort 25 Motherboard Replacement

你所需要的

  1. Bose QuietComfort 25 Motherboard Replacement, Motherboard: 步骤 1 中的图像 1,1
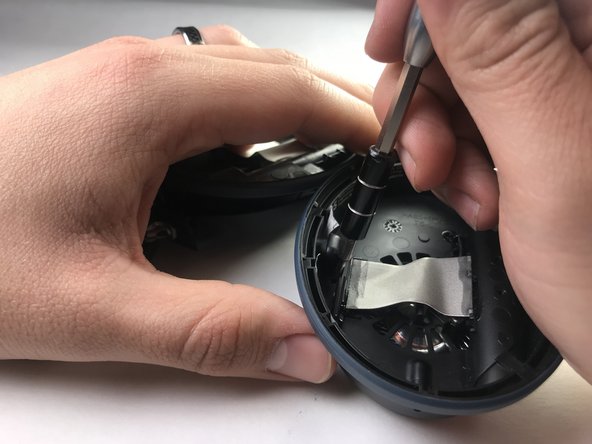
    • Begin repair by removing the ear cushion.

    • The cushion is held on by a few small plastic clips. Pry carefully with plastic opening tool or fingernails.

  2. Bose QuietComfort 25 Motherboard Replacement: 步骤 2 中的图像 1,1
    • Next, remove the soft lining behind the cushion. This is held on with adhesive and is easily removed by hand.

  3. Bose QuietComfort 25 Motherboard Replacement: 步骤 3 中的图像 1,3 Bose QuietComfort 25 Motherboard Replacement: 步骤 3 中的图像 2,3 Bose QuietComfort 25 Motherboard Replacement: 步骤 3 中的图像 3,3
    • Once the soft lining is removed from behind the ear cushion, two screws will be exposed.

    • Carefully remove the two 5 mm screws with a precision screwdriver (PH00) and put aside.

  4. Bose QuietComfort 25 Motherboard Replacement: 步骤 4 中的图像 1,1
    • Flip the earphones back over and carefully pry around the outside cover of the earpiece.

    • Try a plastic opening tool before moving on to harder metal tools.

    • This cover will come loose with moderate pressure.

  5. Bose QuietComfort 25 Motherboard Replacement: 步骤 5 中的图像 1,3 Bose QuietComfort 25 Motherboard Replacement: 步骤 5 中的图像 2,3 Bose QuietComfort 25 Motherboard Replacement: 步骤 5 中的图像 3,3
    • There are 3 screws holding the motherboard to the earpiece.

    • Remove these screws to make the next step easier.

  6. Bose QuietComfort 25 Motherboard Replacement: 步骤 6 中的图像 1,1
    • Once the motherboard is exposed, all of the soldered connection will need to be removed.

    • Be careful of this step and take note of the position of each wire.

    • This should only be attempted by someone with experience soldering small components, as irreparable damage may be result from improper methods. For help with this step see this guide on 如何焊接和拆焊

  7. Bose QuietComfort 25 Motherboard Replacement: 步骤 7 中的图像 1,1
    • After removing all the soldered joints, the motherboard can be removed by hand.

    • The connections will all need to be re-soldered into their respective locations.

结论

To reassemble your device, follow these instructions in reverse order.

6等其他人完成本指南。

Samuel Coss

于03/26/18注册

339 声望

撰写一个指南

团队

IUPUI, Team S2-G3, Harley Spring 2018 IUPUI, Team S2-G3, Harley Spring 2018 的会员

IUPUI-HARLEY-S18S2G3

3 名成员

创作了6篇指南

0条评论

添加评论

浏览统计数据:

过去 24 小时: 4

过去 7 天: 29

过去 30 天: 121

总计 11,021