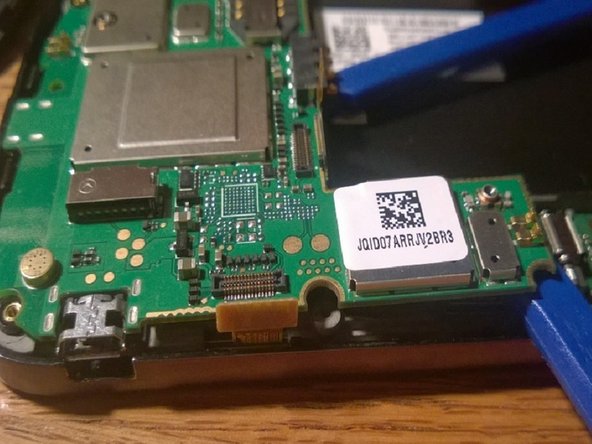
Time to remove the logic board. There are no screws to remove here. The logic board is held in place by adhesive.
Start at the bottom left corner and insert a flat pry tool and work it in under the logic board to try and release the adhesive.
Most of the adhesive is under the bottom left side of the logic board. The flatter your tool the better.
work your way around the the area where the battery terminals are and try to get some separation.
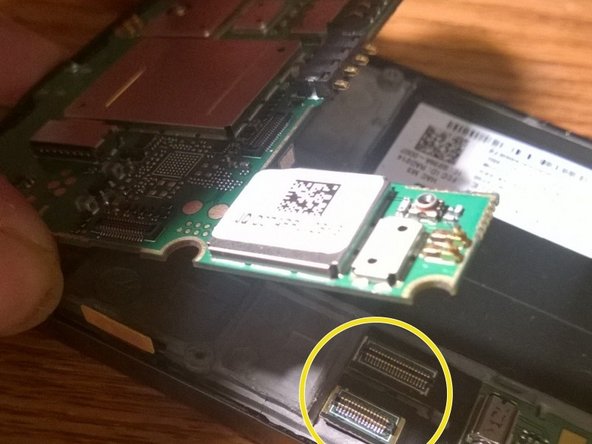
There are two connections that tie the logic boards together. They should pop loose by sliding a pry tool under the large logic board right next to the vibrator motor (on the small logic board).
With the two connections loose, lift up from that location and remove the larger logic board.
Its easiest to lift from that area and slide forward while lifting out the larger logic board because otherwise the hdmi port makes it a pain to lift from the bottom side, because the frame goes around the hdmi port.
Time to remove the small logic board. This L shaped piece is held in place with a little adhesive and a few little plastic clips.
By applying a little pressure to the larger black clip near the power button area will pretty much free it enough to begin prying it out.
Before moving on we need to free the adhesive which holds the volume button assembly in place. Just slide something thin in along the backside of the volume assembly to free the adhesive. Now we can move on.
When you get close to the volume ribbon cable leave your pry tool under the logic board and grab some tweezers to pick the volume assembly out of its slot.
After the volume assembly is out, finish prying out the small logic board.
There you have it. I would show more like lcd/digitizer teardown but I do not have all the supplies at the moment. You now can replace a part inside the phone if need be.