跳转到主内容

Acer Aspire V5-571P-6815 Touchscreen Replacement

你所需要的

  1. Acer Aspire V5-571P-6815 Touchscreen Replacement, Battery: 步骤 1 中的图像 1,1
    • Turn off the computer and unplug all power.

  2. Acer Aspire V5-571P-6815 Touchscreen Replacement: 步骤 2 中的图像 1,2 Acer Aspire V5-571P-6815 Touchscreen Replacement: 步骤 2 中的图像 2,2
    • Slide the locking latch to the right and hold while pulling the battery out with your other hand.

  3. Acer Aspire V5-571P-6815 Touchscreen Replacement, Touchscreen: 步骤 3 中的图像 1,2 Acer Aspire V5-571P-6815 Touchscreen Replacement, Touchscreen: 步骤 3 中的图像 2,2
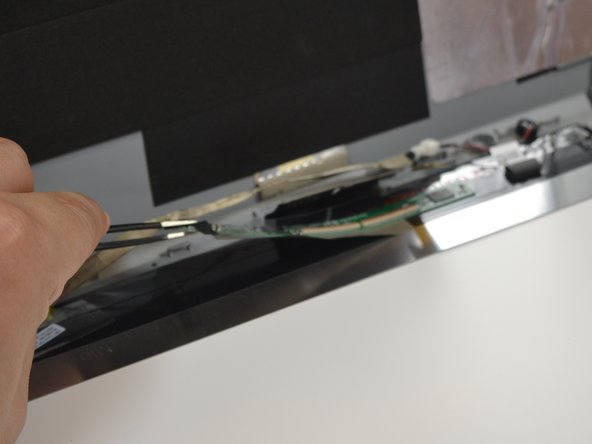
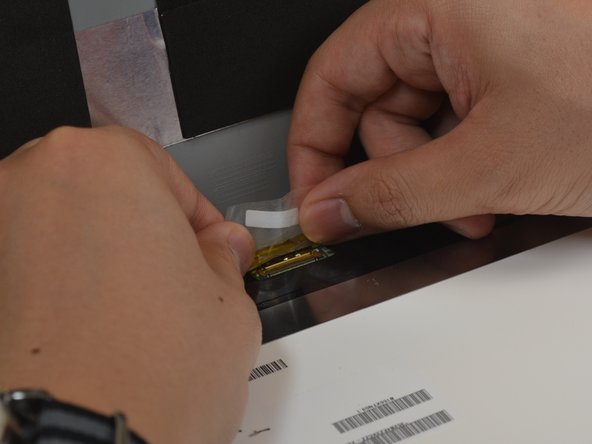
    • Insert a plastic opening tool between the screen and lid.

    • Work the plastic opening tool around the perimeter while prying upwards until the screen separates from the lid.

  4. Acer Aspire V5-571P-6815 Touchscreen Replacement: 步骤 4 中的图像 1,1
    • Lay the screen flat down on the keyboard.

  5. Acer Aspire V5-571P-6815 Touchscreen Replacement: 步骤 5 中的图像 1,2 Acer Aspire V5-571P-6815 Touchscreen Replacement: 步骤 5 中的图像 2,2
    • Remove the camera using a pair of blunt nose tweezers.

    • Peel up the adhesive tape keeping the camera's cable tied down.

  6. Acer Aspire V5-571P-6815 Touchscreen Replacement: 步骤 6 中的图像 1,2 Acer Aspire V5-571P-6815 Touchscreen Replacement: 步骤 6 中的图像 2,2
    • Remove the microphone from the motherboard with a pair of blunt nose tweezers.

    • Slide out the adhesive tape securing the microphone cable.

  7. Acer Aspire V5-571P-6815 Touchscreen Replacement: 步骤 7 中的图像 1,3 Acer Aspire V5-571P-6815 Touchscreen Replacement: 步骤 7 中的图像 2,3 Acer Aspire V5-571P-6815 Touchscreen Replacement: 步骤 7 中的图像 3,3
    • Lift up the ribbon cable contained by the adhesive strip with blunt nose tweezers.

    • This will allow you to access the two black digitizer ribbons.

    • Use a spudger to flip up the retaining flap on the digitizer ribbon cable ZIF socket.

    • Pull the ribbon cables out of their sockets.

  8. Acer Aspire V5-571P-6815 Touchscreen Replacement: 步骤 8 中的图像 1,2 Acer Aspire V5-571P-6815 Touchscreen Replacement: 步骤 8 中的图像 2,2
    • Remove the board from the laptop.

  9. Acer Aspire V5-571P-6815 Touchscreen Replacement: 步骤 9 中的图像 1,2 Acer Aspire V5-571P-6815 Touchscreen Replacement: 步骤 9 中的图像 2,2
    • Use the blunt nose tweezers to peel up the adhesive on the display cable.

    • Pull on the adhesive tape to disconnect the display from the motherboard.

  10. Acer Aspire V5-571P-6815 Touchscreen Replacement: 步骤 10 中的图像 1,2 Acer Aspire V5-571P-6815 Touchscreen Replacement: 步骤 10 中的图像 2,2
    • Lift the whole strip connected to the circuit board and LCD connector. Place the strip to the side where it is not in contact with the screen.

    • Remove the whole screen from the device.

结论

To reassemble your device, follow these instructions in reverse order.

另外一个人完成了本指南。

Brianna Sinder

于04/12/18注册

377 声望

创作了2篇指南

团队

UW Tacoma, Team S1-G4, Liner Spring 2018 UW Tacoma, Team S1-G4, Liner Spring 2018 的会员

UWT-LINER-S18S1G4

5 名成员

创作了8篇指南

一条评论

The heading of your Procedure is “Acer Aspire V5-571P-6815 Touchscreen Replacement” BUT you just opened up the entire screen.

NOTE: you didn’t separate the “TOUCH SCREEN” from the LCD screen.

This supposed to be the most important part of your procedure item ! ! ! !

PLEASE……. ******

KaivitiSingh - 回复

添加评论

浏览统计数据:

过去 24 小时: 2

过去 7 天: 9

过去 30 天: 23

总计 3,378