跳转到主内容

ASUS VivoBook S400C Trackpad Replacement

你所需要的

  1. ASUS VivoBook S400C Trackpad Replacement, Remove the Bottom Cover: 步骤 1 中的图像 1,1
    • Flip the device over and remove the ten 5.7 mm screws with a Phillips #0 screwdriver.

  2. ASUS VivoBook S400C Trackpad Replacement: 步骤 2 中的图像 1,2 ASUS VivoBook S400C Trackpad Replacement: 步骤 2 中的图像 2,2
    • Use a spudger or your fingers to go around and lift the edges and release the back panel.

  3. ASUS VivoBook S400C Trackpad Replacement, Disconnect the Battery: 步骤 3 中的图像 1,1
    • Using a spudger, lift up the plug connecting the battery to the motherboard.

  4. ASUS VivoBook S400C Trackpad Replacement, Battery: 步骤 4 中的图像 1,1
    • With a Phillips #0 screwdriver, remove the four 5.7 mm screws holding the battery to the laptop.

  5. ASUS VivoBook S400C Trackpad Replacement: 步骤 5 中的图像 1,1
    • Carefully lift the battery up and out of the device.

  6. ASUS VivoBook S400C Trackpad Replacement, Hard Drive: 步骤 6 中的图像 1,1
    • Remove the three Phillips #0 screws holding the the hard drive in place:

    • Two 3.8 mm screws.

    • One 5.7 mm screw.

  7. ASUS VivoBook S400C Trackpad Replacement: 步骤 7 中的图像 1,1
    • Pull left and lift out the hard drive.

  8. ASUS VivoBook S400C Trackpad Replacement, Heat Shield: 步骤 8 中的图像 1,2 ASUS VivoBook S400C Trackpad Replacement, Heat Shield: 步骤 8 中的图像 2,2
    • Remove the black shield covering the display connector and the heat sink.

    • You may need to use double-sided adhesive tape to resecure the shield.

  9. ASUS VivoBook S400C Trackpad Replacement, Display Assembly: 步骤 9 中的图像 1,1
    • Remove the black tape securing the keyboard ribbon cable to the display connector.

    • Fold the ribbon cable the opposite way, resecuring it to the hard drive to keep it out of the way.

  10. ASUS VivoBook S400C Trackpad Replacement: 步骤 10 中的图像 1,2 ASUS VivoBook S400C Trackpad Replacement: 步骤 10 中的图像 2,2
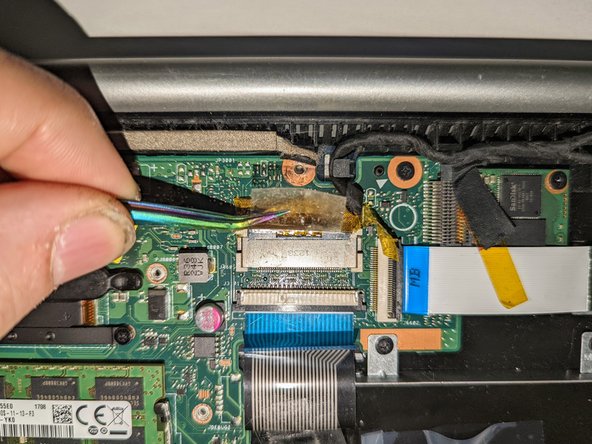
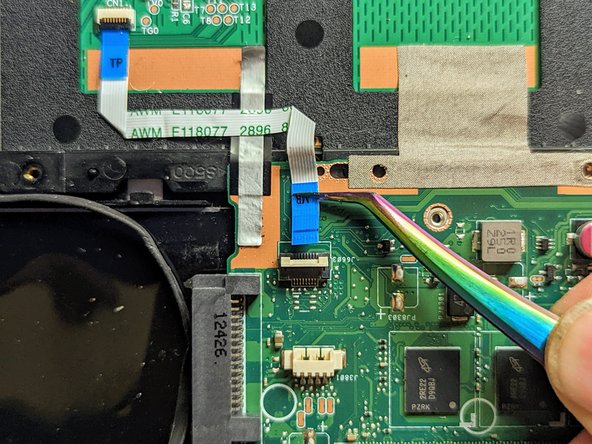
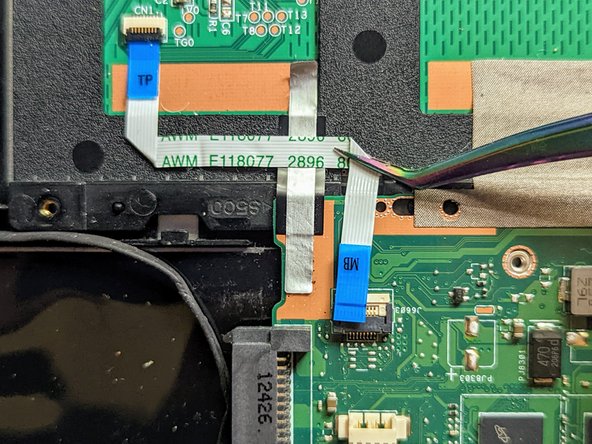
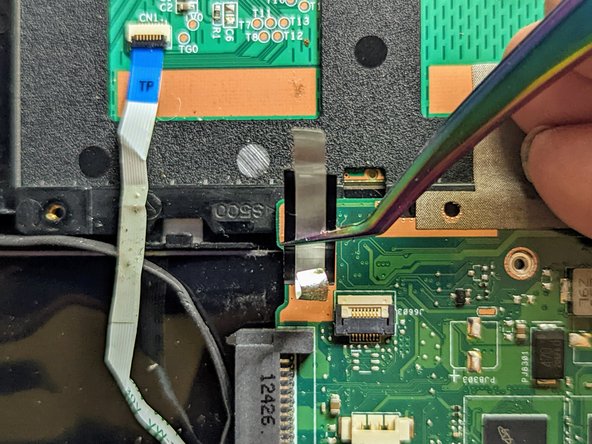
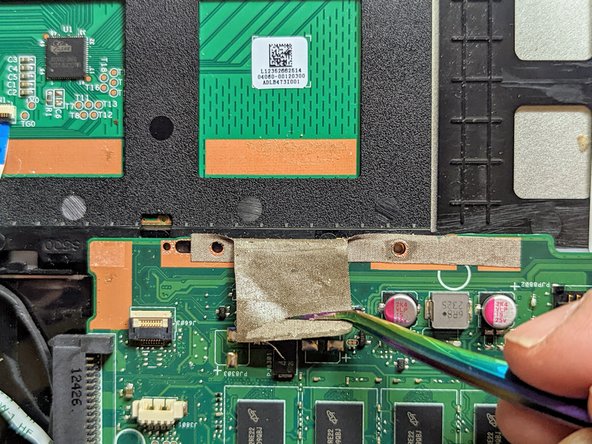
    • Peel off the clear tape from the motherboard display connector.

  11. ASUS VivoBook S400C Trackpad Replacement: 步骤 11 中的图像 1,2 ASUS VivoBook S400C Trackpad Replacement: 步骤 11 中的图像 2,2
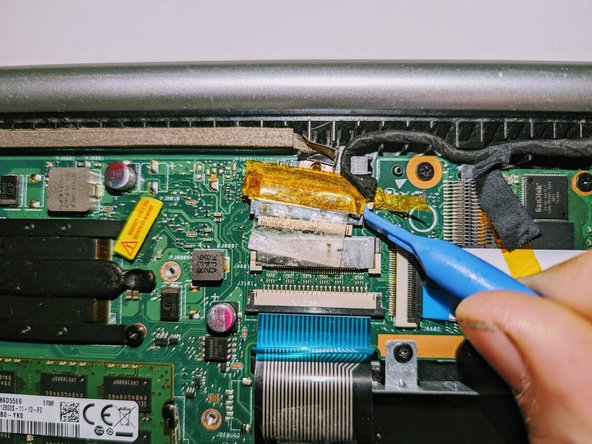
    • Position spudgers on the white tabs on either side of the connector and push evenly to unplug the display.

  12. ASUS VivoBook S400C Trackpad Replacement: 步骤 12 中的图像 1,3 ASUS VivoBook S400C Trackpad Replacement: 步骤 12 中的图像 2,3 ASUS VivoBook S400C Trackpad Replacement: 步骤 12 中的图像 3,3
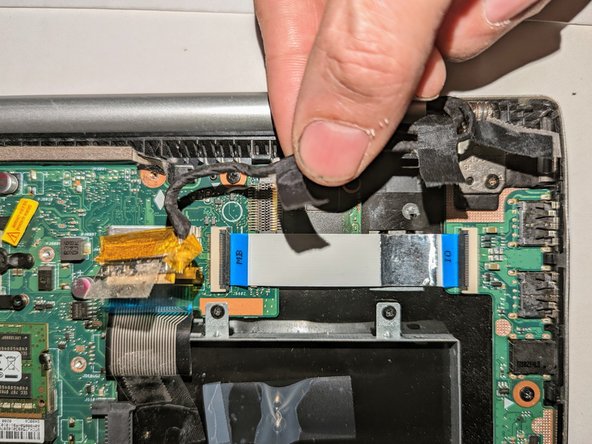
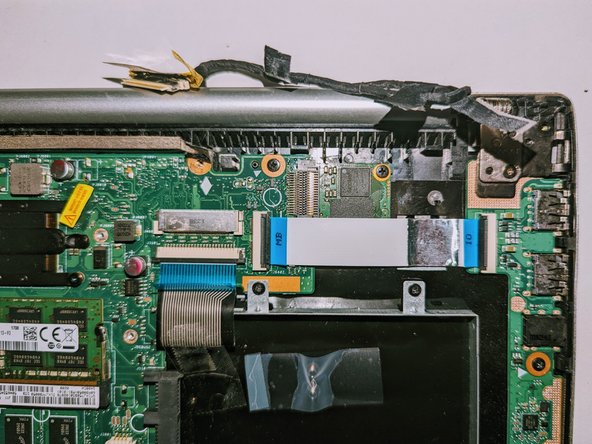
    • Peel off the three pieces of black tape securing the display cable to the motherboard.

    • Deroute the cable from the channel it sits in.

    • Move the cable to the side, out of the way.

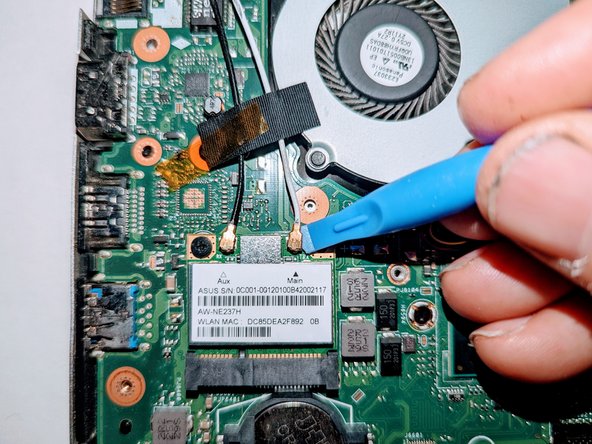
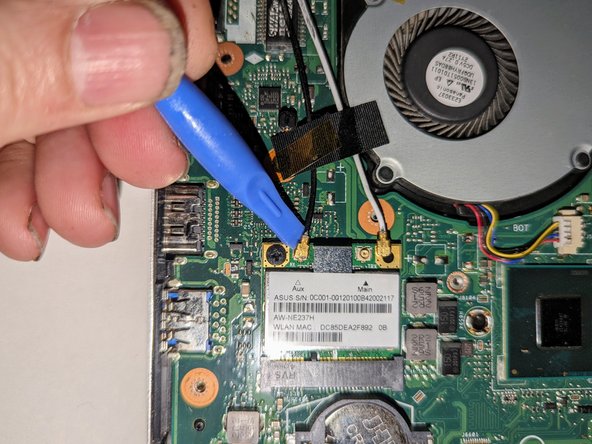
  13. ASUS VivoBook S400C Trackpad Replacement: 步骤 13 中的图像 1,3 ASUS VivoBook S400C Trackpad Replacement: 步骤 13 中的图像 2,3 ASUS VivoBook S400C Trackpad Replacement: 步骤 13 中的图像 3,3
    • Use a spudger to release the cables from the wifi card.

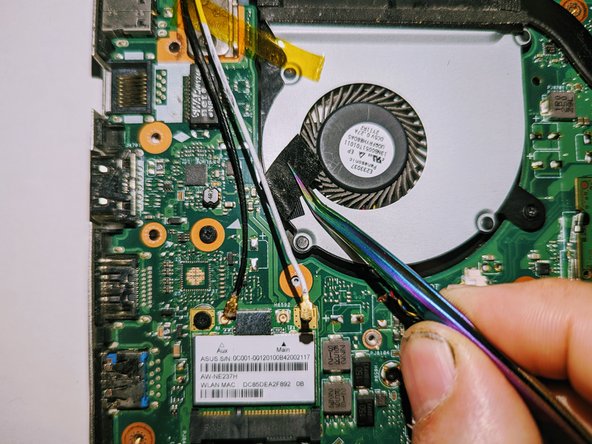
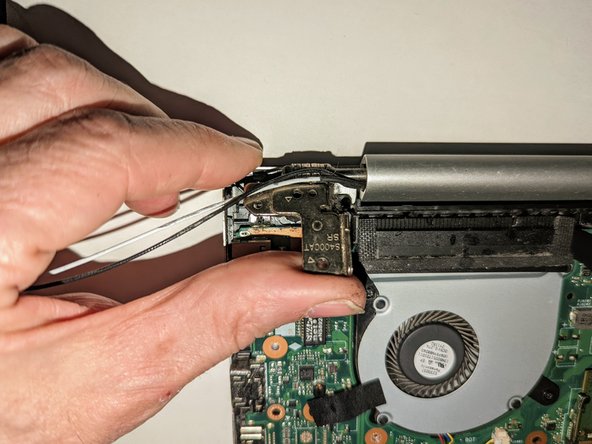
  14. ASUS VivoBook S400C Trackpad Replacement: 步骤 14 中的图像 1,3 ASUS VivoBook S400C Trackpad Replacement: 步骤 14 中的图像 2,3 ASUS VivoBook S400C Trackpad Replacement: 步骤 14 中的图像 3,3
    • Lift the tapes securing the wires to the motherboard.

    • Move the wires to the side out of the way.

  15. ASUS VivoBook S400C Trackpad Replacement, Disconnect the Hinges: 步骤 15 中的图像 1,2 ASUS VivoBook S400C Trackpad Replacement, Disconnect the Hinges: 步骤 15 中的图像 2,2
    • Remove the two screws securing the hinge on the left.

    • Pry the hinge up by hand to a 90 degree angle.

  16. ASUS VivoBook S400C Trackpad Replacement: 步骤 16 中的图像 1,2 ASUS VivoBook S400C Trackpad Replacement: 步骤 16 中的图像 2,2
    • Remove the two screws securing the hinge on the right.

    • Pry the hinge up by hand to a 90 degree angle.

  17. ASUS VivoBook S400C Trackpad Replacement, Remove the Display: 步骤 17 中的图像 1,3 ASUS VivoBook S400C Trackpad Replacement, Remove the Display: 步骤 17 中的图像 2,3 ASUS VivoBook S400C Trackpad Replacement, Remove the Display: 步骤 17 中的图像 3,3
    • Lift the base of the laptop from the front.

    • Raise it to a 90 degree angle.

    • Slide it forward slightly to clear the hinges.

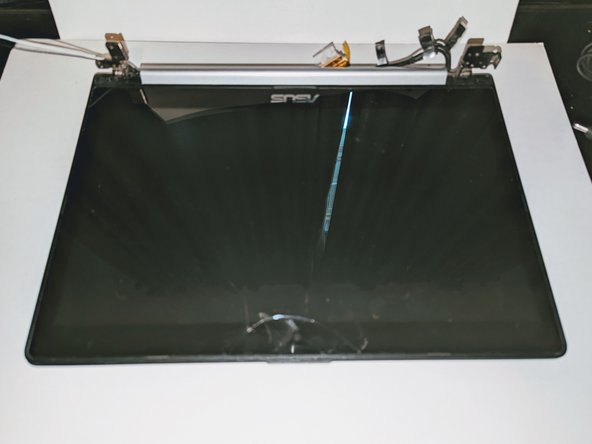
    • The display is now free.

  18. ASUS VivoBook S400C Trackpad Replacement, SSD Card: 步骤 18 中的图像 1,3 ASUS VivoBook S400C Trackpad Replacement, SSD Card: 步骤 18 中的图像 2,3 ASUS VivoBook S400C Trackpad Replacement, SSD Card: 步骤 18 中的图像 3,3
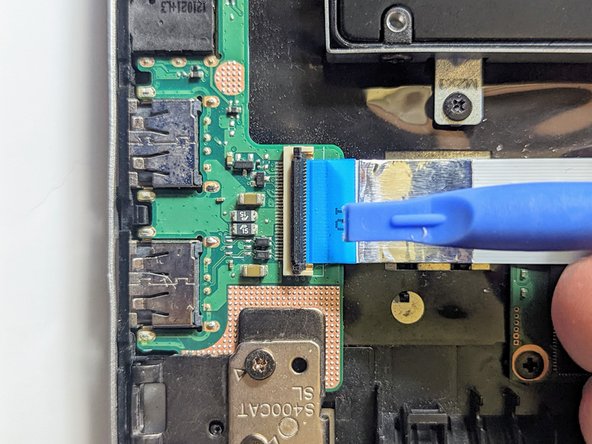
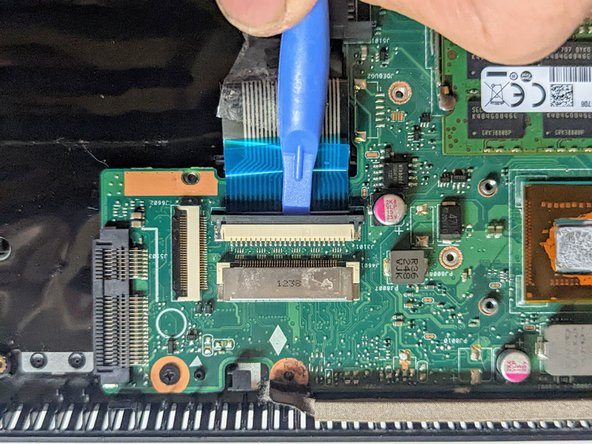
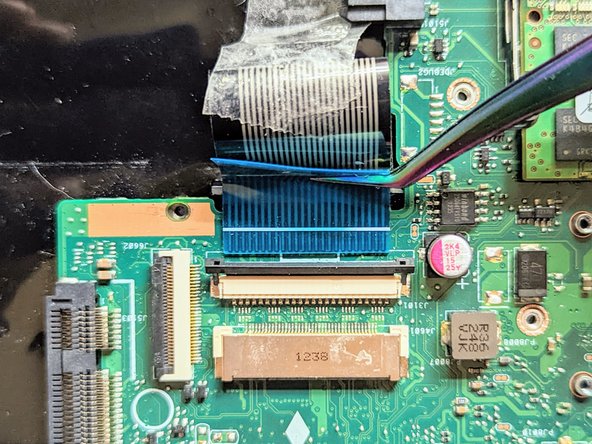
    • Disconnect the I/O Board ribbon cable from the motherboard.

    • Flip up the retaining latch with a spudger.

  19. ASUS VivoBook S400C Trackpad Replacement: 步骤 19 中的图像 1,2 ASUS VivoBook S400C Trackpad Replacement: 步骤 19 中的图像 2,2
    • Grasp the ribbon cable by the blue tab and pull it straight out from the connector.

  20. ASUS VivoBook S400C Trackpad Replacement: 步骤 20 中的图像 1,3 ASUS VivoBook S400C Trackpad Replacement: 步骤 20 中的图像 2,3 ASUS VivoBook S400C Trackpad Replacement: 步骤 20 中的图像 3,3
    • Disconnect the I/O Board ribbon cable from the I/O board.

    • Flip up the latch with a spudger.

  21. ASUS VivoBook S400C Trackpad Replacement: 步骤 21 中的图像 1,3 ASUS VivoBook S400C Trackpad Replacement: 步骤 21 中的图像 2,3 ASUS VivoBook S400C Trackpad Replacement: 步骤 21 中的图像 3,3
    • Grasp the ribbon cable by the blue tab and pull it straight out from the connector.

    • Remove the ribbon cable to expose the SSD device.

  22. ASUS VivoBook S400C Trackpad Replacement: 步骤 22 中的图像 1,1
    • If present, remove any insulating sheet covering the SSD.

    • Remove the single retaining screw.

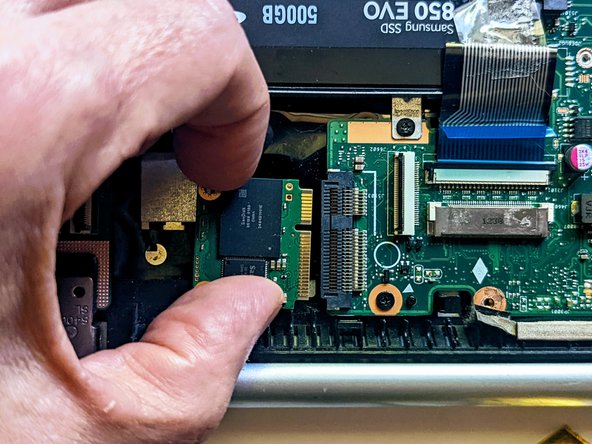
  23. ASUS VivoBook S400C Trackpad Replacement, Unplug the SSD from the motherboard: 步骤 23 中的图像 1,2 ASUS VivoBook S400C Trackpad Replacement, Unplug the SSD from the motherboard: 步骤 23 中的图像 2,2
    • Grasp the SSD by the sides and slide it out of the connector.

  24. ASUS VivoBook S400C Trackpad Replacement, Fan / Heatsink Assembly: 步骤 24 中的图像 1,1
    • The fan and heat sink do not need to be removed for this procedure.

    • Remove the screw securing the fan to the palm rest. All other fan and heatsink screws can remain in place.

  25. ASUS VivoBook S400C Trackpad Replacement, Motherboard: 步骤 25 中的图像 1,3 ASUS VivoBook S400C Trackpad Replacement, Motherboard: 步骤 25 中的图像 2,3 ASUS VivoBook S400C Trackpad Replacement, Motherboard: 步骤 25 中的图像 3,3
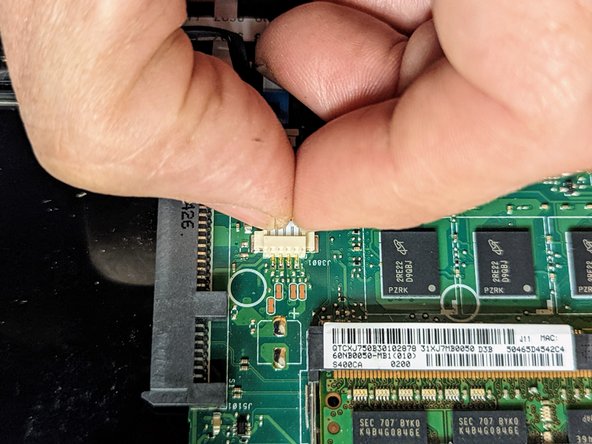
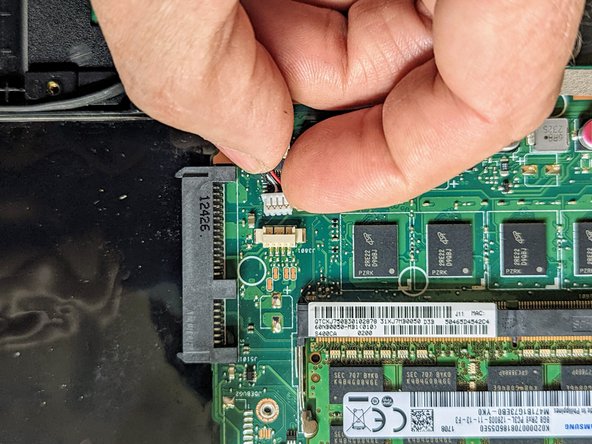
    • Unplug the black cable connecting the motherboard to the speakers.

  26. ASUS VivoBook S400C Trackpad Replacement, Disconnect the Trackpad: 步骤 26 中的图像 1,3 ASUS VivoBook S400C Trackpad Replacement, Disconnect the Trackpad: 步骤 26 中的图像 2,3 ASUS VivoBook S400C Trackpad Replacement, Disconnect the Trackpad: 步骤 26 中的图像 3,3
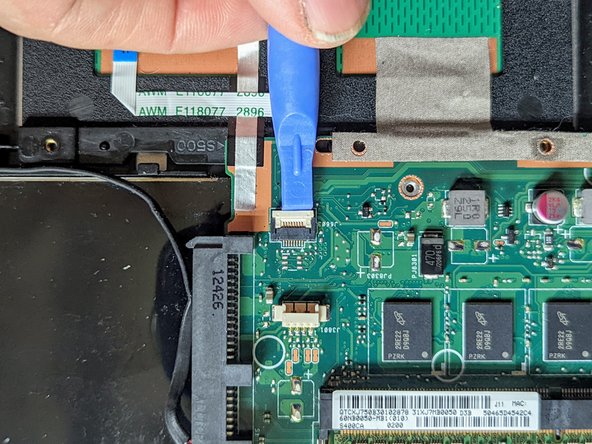
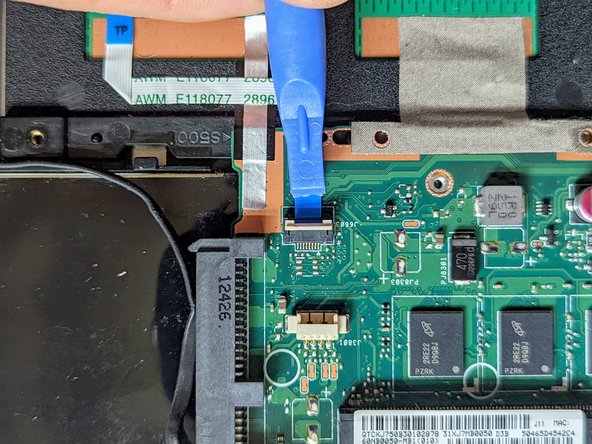
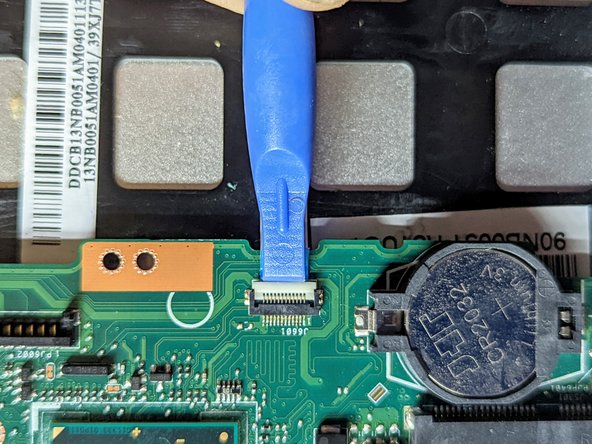
    • Flip up the trackpad ribbon cable retainer with a spudger.

  27. ASUS VivoBook S400C Trackpad Replacement: 步骤 27 中的图像 1,3 ASUS VivoBook S400C Trackpad Replacement: 步骤 27 中的图像 2,3 ASUS VivoBook S400C Trackpad Replacement: 步骤 27 中的图像 3,3
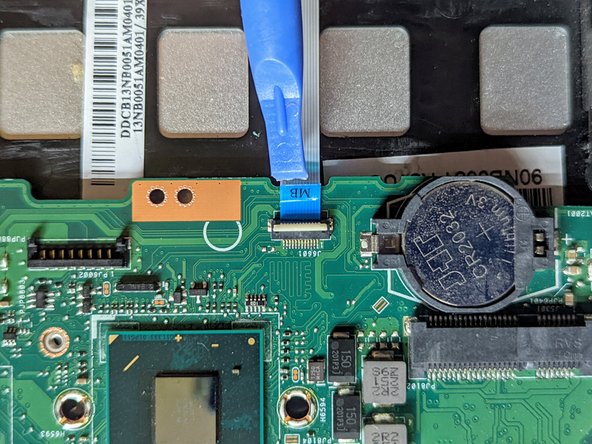
    • Pull the cable straight out from the connector.

    • Peel the trackpad cable off the conductive tape strip below it.

  28. ASUS VivoBook S400C Trackpad Replacement: 步骤 28 中的图像 1,2 ASUS VivoBook S400C Trackpad Replacement: 步骤 28 中的图像 2,2
    • Remove the first of the two conductive tapes grounding the trackpad.

  29. ASUS VivoBook S400C Trackpad Replacement: 步骤 29 中的图像 1,2 ASUS VivoBook S400C Trackpad Replacement: 步骤 29 中的图像 2,2
    • Remove the second conductive tape grounding the trackpad.

  30. ASUS VivoBook S400C Trackpad Replacement, Disconnect the LED Board Cable: 步骤 30 中的图像 1,3 ASUS VivoBook S400C Trackpad Replacement, Disconnect the LED Board Cable: 步骤 30 中的图像 2,3 ASUS VivoBook S400C Trackpad Replacement, Disconnect the LED Board Cable: 步骤 30 中的图像 3,3
    • Use a spudger to flip up the LED board cable retainer.

  31. ASUS VivoBook S400C Trackpad Replacement: 步骤 31 中的图像 1,2 ASUS VivoBook S400C Trackpad Replacement: 步骤 31 中的图像 2,2
    • Pull the ribbon cable straight out from the connector.

  32. ASUS VivoBook S400C Trackpad Replacement, Disconnect the Keyboard: 步骤 32 中的图像 1,3 ASUS VivoBook S400C Trackpad Replacement, Disconnect the Keyboard: 步骤 32 中的图像 2,3 ASUS VivoBook S400C Trackpad Replacement, Disconnect the Keyboard: 步骤 32 中的图像 3,3
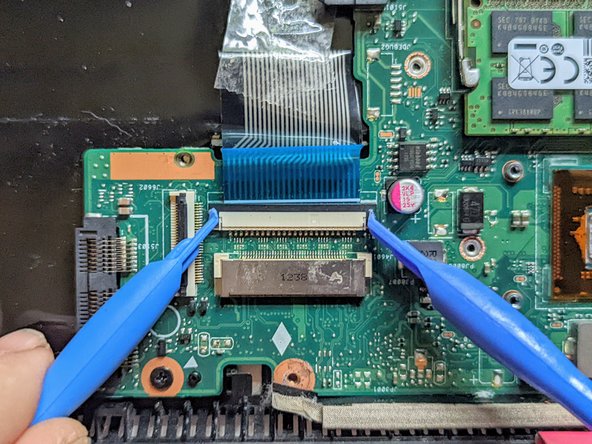
    • Place a spudger on the ears on either side of the keyboard ribbon cable connector and push evenly on both sides to release it.

    • The retainer will only move a very short distance then stop.

    • Lift it slightly to relieve the tension.

  33. ASUS VivoBook S400C Trackpad Replacement: 步骤 33 中的图像 1,2 ASUS VivoBook S400C Trackpad Replacement: 步骤 33 中的图像 2,2
    • Unplug the keyboard ribbon cable.

  34. ASUS VivoBook S400C Trackpad Replacement, Remove the Mounting Screws: 步骤 34 中的图像 1,1
    • Remove the two mounting screws.

    • There are triangular arrows printed on the board pointing to each of them.

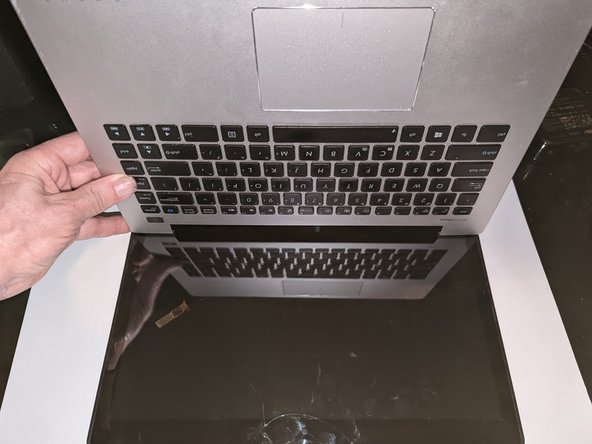
  35. ASUS VivoBook S400C Trackpad Replacement, Remove the Motherboard: 步骤 35 中的图像 1,2 ASUS VivoBook S400C Trackpad Replacement, Remove the Motherboard: 步骤 35 中的图像 2,2
    • Lift and slide the motherboard toward the hard drive to clear the connectors on the opposite side from the case.

  36. ASUS VivoBook S400C Trackpad Replacement, Trackpad: 步骤 36 中的图像 1,3 ASUS VivoBook S400C Trackpad Replacement, Trackpad: 步骤 36 中的图像 2,3 ASUS VivoBook S400C Trackpad Replacement, Trackpad: 步骤 36 中的图像 3,3
    • Flip the retaining latch on the trackpad ribbon cable connector up with a spudger.

  37. ASUS VivoBook S400C Trackpad Replacement: 步骤 37 中的图像 1,2 ASUS VivoBook S400C Trackpad Replacement: 步骤 37 中的图像 2,2
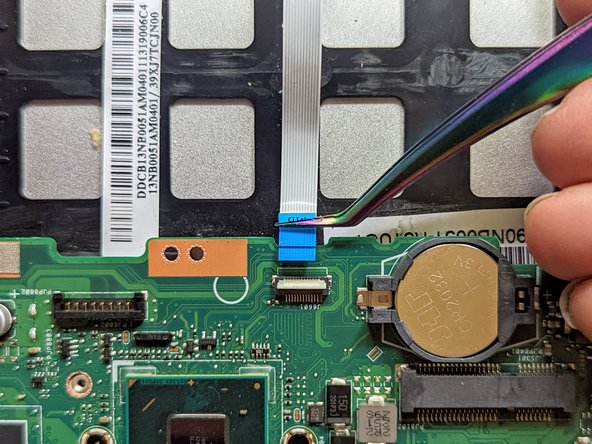
    • Grasp the blue tab with fine tip tweezers and pull the cable straight out from the connector.

    • Gently peel the trackpad ribbon cable off the trackpad.

  38. ASUS VivoBook S400C Trackpad Replacement, Remove the Trackpad: 步骤 38 中的图像 1,2 ASUS VivoBook S400C Trackpad Replacement, Remove the Trackpad: 步骤 38 中的图像 2,2
    • Lift the side of the trackpad farthest from the side of the case and slide it away from the edge to remove it.

结论

To reassemble your device, follow these instructions in reverse order.

Jerry Wheeler

于03/21/22注册

57,387 声望

创作了69篇指南

团队

Oregonians Oregonians 的会员

Community

7 名成员

创作了176篇指南

0条评论

添加评论

浏览统计数据:

过去 24 小时: 0

过去 7 天: 2

过去 30 天: 5

总计 228