跳转到主内容

ACER Aspire 7750G-6645 Fan Replacement

你所需要的

  1. ACER Aspire 7750G-6645 Fan Replacement, Keyboard: 步骤 1 中的图像 1,2 ACER Aspire 7750G-6645 Fan Replacement, Keyboard: 步骤 1 中的图像 2,2
    • Turn off the laptop, and open the lid.

    • Separate the first two layers by prying them apart, using a spudger.

  2. ACER Aspire 7750G-6645 Fan Replacement: 步骤 2 中的图像 1,3 ACER Aspire 7750G-6645 Fan Replacement: 步骤 2 中的图像 2,3 ACER Aspire 7750G-6645 Fan Replacement: 步骤 2 中的图像 3,3
    • Lift the keyboard, so that its ribbon is visible.

    • Remove the ribbon from the board by using a small metal spudger or flathead screwdriver. (if needed)

  3. ACER Aspire 7750G-6645 Fan Replacement, Fan: 步骤 3 中的图像 1,2 ACER Aspire 7750G-6645 Fan Replacement, Fan: 步骤 3 中的图像 2,2
    • Remove the two 3mm screws using the Phillips #00 screwdriver.

    • Remove the two 6mm screws using the same screwdriver.

    • Remove the fan cover to gain access to the fan.

  4. ACER Aspire 7750G-6645 Fan Replacement: 步骤 4 中的图像 1,2 ACER Aspire 7750G-6645 Fan Replacement: 步骤 4 中的图像 2,2
    在这个步骤中使用的工具:
    Desoldering Pump
    $3.99
    购买
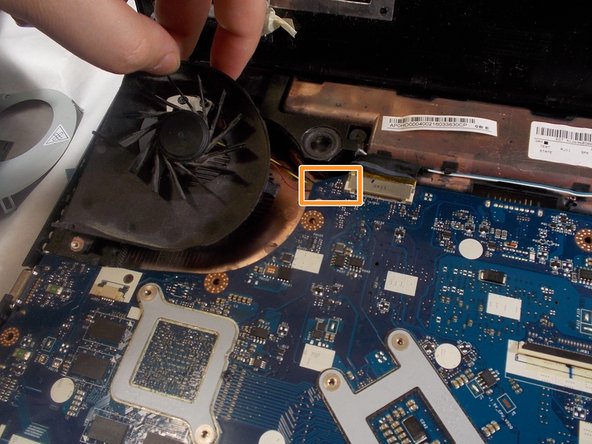
    • Lift the fan up and away from the device. Do not remove the fan from the device.

    • Desolder the attached part using a Soldering Iron to heat it up and remove the leftover heated lead by using a Desoldering Pump.

    • If you aren't familiar with soldering, read our How to Solder and Desolder Connections guide for more information.

结论

To reassemble your device, follow these instructions in reverse order.

taylan ergil

于03/08/19注册

85 声望

撰写一个指南

团队

0条评论

添加评论

浏览统计数据:

过去 24 小时: 0

过去 7 天: 1

过去 30 天: 7

总计 611