跳转到主内容

任天堂 Switch 左 Joy-Con 外壳更换

你所需要的

  1. 任天堂 Switch 左 Joy-Con 外壳更换, 打开手柄 (1/3): 步骤 1 中的图像 1,2 任天堂 Switch 左 Joy-Con 外壳更换, 打开手柄 (1/3): 步骤 1 中的图像 2,2
    • 首先从背板上拧下 四颗 Y字螺丝(“Y00”)。

    • 将螺丝放在安全且有序的地方。

  2. 任天堂 Switch 左 Joy-Con 外壳更换, 打开手柄(2/3): 步骤 2 中的图像 1,3 任天堂 Switch 左 Joy-Con 外壳更换, 打开手柄(2/3): 步骤 2 中的图像 2,3 任天堂 Switch 左 Joy-Con 外壳更换, 打开手柄(2/3): 步骤 2 中的图像 3,3
    • 将三角翘片插入手柄底部边缘的接缝中( L 和 ZL 按钮的对角)。

    • 慢慢地从开口处向Joy-Con 的侧面滑开。

  3. 任天堂 Switch 左 Joy-Con 外壳更换, 打开手柄 (3/3): 步骤 3 中的图像 1,2 任天堂 Switch 左 Joy-Con 外壳更换, 打开手柄 (3/3): 步骤 3 中的图像 2,2
    • 充电滑轨背对着您,像打开笔记本电脑一样打开 Joy-Con。

    • 不要完全分离背板;背板上有两根带状排线将充电滑轨与主板相连。

  4. 任天堂 Switch 左 Joy-Con 外壳更换, 断开电池: 步骤 4 中的图像 1,1
    • 使用塑料撬棒轻轻地将电池接口从主板上的底座上撬开(避免使用金属撬棒,降低组件短路的风险)。这将使 Joy-Con 在维修期间无法开机。

    • 在电池接口附近操作的时候要小心边上震动马达的排线。

    • 在处理电子产品和/或电池时,最好佩戴防静电手环。

  5. 任天堂 Switch 左 Joy-Con 外壳更换, 取出电池: 步骤 5 中的图像 1,2 任天堂 Switch 左 Joy-Con 外壳更换, 取出电池: 步骤 5 中的图像 2,2
    • 在电池和 Joy-Con 电池壳之间插入一个撬片。

    • 轻轻撬开电池。

    • 电池是被粘性很弱的胶布粘在当前位置的。

    • 小心不要使电池变形、刺穿或损坏。

  6. 任天堂 Switch 左 Joy-Con 外壳更换, 卸下电池壳: 步骤 6 中的图像 1,1
    • 从电池壳上卸下三 (3) 颗3½mm 金色十字 #00 螺丝。

  7. 任天堂 Switch 左 Joy-Con 外壳更换, 检查手柄的主板: 步骤 7 中的图像 1,1
    • 小心地将电池壳翻转过来,远离主板,就像翻书页一样。

    • 带状排线非常容易损坏。建议使用非尖头的镊子而不是徒手操作。

  8. 任天堂 Switch 左 Joy-Con 外壳更换, 断开带状排线: 步骤 8 中的图像 1,2 任天堂 Switch 左 Joy-Con 外壳更换, 断开带状排线: 步骤 8 中的图像 2,2
    • 使用镊子打开排线底座的ZIF 接口锁。

    • ZL 按钮由主板上的小型 ZIF 接口锁定到位。

    • 使用镊子轻轻地将 ZL 按钮柔性电缆从其 ZIF 接口底座中拉出。电池壳现在已断开连接,可以卸下。

  9. 任天堂 Switch 左 Joy-Con 外壳更换, 移除 L 按钮: 步骤 9 中的图像 1,2 任天堂 Switch 左 Joy-Con 外壳更换, 移除 L 按钮: 步骤 9 中的图像 2,2
    • 解锁滑轨顶部的 ZIF 接口,然后断开电缆。

    • 解锁导轨底部的 ZIF 接口并断开排线。我们现在可以从背板上取下滑轨。

    • 拆下 L 按钮及弹簧。

    • 要小心,因为弹簧很容易弹飞

  10. 任天堂 Switch 左 Joy-Con 外壳更换, 拆下滑轨: 步骤 10 中的图像 1,3 任天堂 Switch 左 Joy-Con 外壳更换, 拆下滑轨: 步骤 10 中的图像 2,3 任天堂 Switch 左 Joy-Con 外壳更换, 拆下滑轨: 步骤 10 中的图像 3,3
    • 卸下固定滑轨的螺丝。从背板上拆下滑轨,放在一边。

  11. 任天堂 Switch 左 Joy-Con 外壳更换, 卸下锁定按钮: 步骤 11 中的图像 1,1
    • 取下锁定按钮,放在一边

  12. 任天堂 Switch 左 Joy-Con 外壳更换, 移除肩键1/2: 步骤 12 中的图像 1,2 任天堂 Switch 左 Joy-Con 外壳更换, 移除肩键1/2: 步骤 12 中的图像 2,2
    • 使用镊子按下肩键下方的锁扣。轻轻撬开肩键。

    • 请务必注意肩键下方两个弹簧的位置,因为它们需要装到新壳的同一位置。

  13. 任天堂 Switch 左 Joy-Con 外壳更换, 移除肩键 2/2: 步骤 13 中的图像 1,2 任天堂 Switch 左 Joy-Con 外壳更换, 移除肩键 2/2: 步骤 13 中的图像 2,2
    • 卸下固定肩键的螺丝。

    • 取下线路板

  14. 任天堂 Switch 左 Joy-Con 外壳更换, 卸下摇杆 1/2: 步骤 14 中的图像 1,2 任天堂 Switch 左 Joy-Con 外壳更换, 卸下摇杆 1/2: 步骤 14 中的图像 2,2
    • 卸下固定摇杆的螺丝。

    • 左上角的螺丝被 L 按钮的柔性电缆覆盖。

    • 解锁 ZIF 接口并使用镊子取下带状排线。

  15. 任天堂 Switch 左 Joy-Con 外壳更换, 卸下摇杆 2/2: 步骤 15 中的图像 1,2 任天堂 Switch 左 Joy-Con 外壳更换, 卸下摇杆 2/2: 步骤 15 中的图像 2,2
    • 卸下摇杆。

  16. 任天堂 Switch 左 Joy-Con 外壳更换, 卸下顶部弯曲的电缆: 步骤 16 中的图像 1,3 任天堂 Switch 左 Joy-Con 外壳更换, 卸下顶部弯曲的电缆: 步骤 16 中的图像 2,3 任天堂 Switch 左 Joy-Con 外壳更换, 卸下顶部弯曲的电缆: 步骤 16 中的图像 3,3
    • 卸下固定减号和 L 按钮的弯曲电缆(用红色圆圈标记)的螺丝。

    • 取下柔性电缆。

  17. 任天堂 Switch 左 Joy-Con 外壳更换, 移除减号按钮: 步骤 17 中的图像 1,1
    • 移除减号按钮

    • 减号按钮覆盖者硅胶垫。重新组装过程中,确保其放回在减号按钮上。

  18. 任天堂 Switch 左 Joy-Con 外壳更换, 卸下主板 3/3: 步骤 18 中的图像 1,1
    • 卸下固定主板的螺丝。

  19. 任天堂 Switch 左 Joy-Con 外壳更换, 移除震动马达: 步骤 19 中的图像 1,3 任天堂 Switch 左 Joy-Con 外壳更换, 移除震动马达: 步骤 19 中的图像 2,3 任天堂 Switch 左 Joy-Con 外壳更换, 移除震动马达: 步骤 19 中的图像 3,3
    • 在使用撬棒,轻轻地将马达从外壳中撬出。

    • 卸下马达和主板。

  20. 任天堂 Switch 左 Joy-Con 外壳更换, 卸下剩余的按钮: 步骤 20 中的图像 1,1
    • 取出剩余在外壳上的五个按钮。

结论

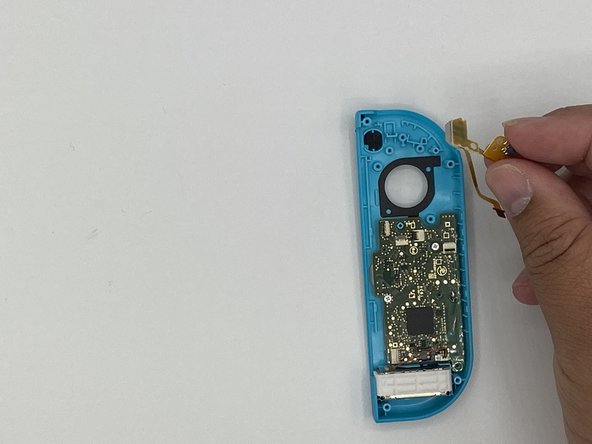
要重新组装设备,请按照以下说明相反的顺序进行操作。

74等其他人完成本指南。

由衷感谢以下译者:

en zh

100%

这些译者帮助我们修补全世界! 您也想加入吗?
开始翻译 ›

11条评论

This guide was very helpful! A picture of the latch location on the trigger (step 12) would have been a big help, that step took a minute because I was putting pressure on the wrong spot.

I also noticed that most of the #00 screws were more receptive to a J00 bit. Might be worth noting in the tools section since swapping between them can strip a screw.

Fitz Montville - 回复

Used this guide for reference on the tools needed, someone else pointed out to use the J00 bit instead of the P00 and I’ll second that as the fit for the screws was much better, thanks for the guide much appreciated!

Lee Whittaker - 回复

Exactly what I needed! Dropped a set of controllers on a tile flow and the rail popped out and pulled the ribbon cables too. I picked up another iFixit toolkit with some J bits to put it back together. I don’t know why I waited this long to fix it. Charged the controllers overnight and I’m up another set now!

energy96 - 回复

Others above have mentioned that they needed to use a J00 bit instead of P00, but mine did not work with a J00 and was better with a P000

Jeremy Johnson - 回复

Small thing. In the tools list, it incorrectly says Y0 while the rest of the post correctly says Y00 for the back screws.

William Doering - 回复

添加评论

浏览统计数据:

过去 24 小时: 58

过去 7 天: 281

过去 30 天: 1,439

总计 71,651