简介
三星盖乐世 Note9 显示屏更换
你所需要的
-
-
开始拆卸之前,请关闭手机电源。
-
使用吹风机,热风枪或准备一个iOpener,然后将其应用到手机背面的右边缘约一分钟,以软化下方的粘合剂。
If using an iOpener it will need to be fully heated and set on for at least 5 minutes. You’ll know the phone is hot enough when its almost too hot to touch.
Just came here to say exactly that. The instructions should be amended to state that: "Get it fully hot and leave it there for at least three minutes solid."
-
-
-
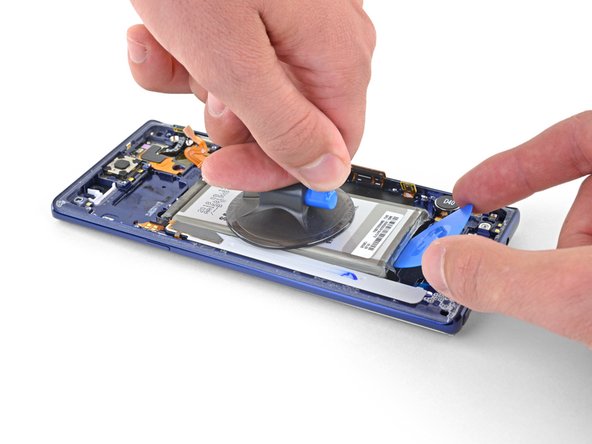
将吸盘按压在后盖上。
-
用吸力提手抬起,以在手机后盖和手机框架之间留出空隙。
-
在间隙中插入一个三角撬片。
It takes so much heat that it is concerning that damage might be caused to the internal parts. It is difficult to heat the glue, pull the case apart and insert the pick at same time. May need some more pointers to handle these situations first, to prevent possible damage. Also what about the glue that is heated and then cooled before opening? Does it run inside and cause greater adhesion after it cools? Another thing, the handling may cause the phone to turn back on while working to separate. Don't know that that is of concern.
-
-
-
请注意,沿手机顶部边缘和相机边框周围的胶粘剂比手机其余部分胶粘剂多。
-
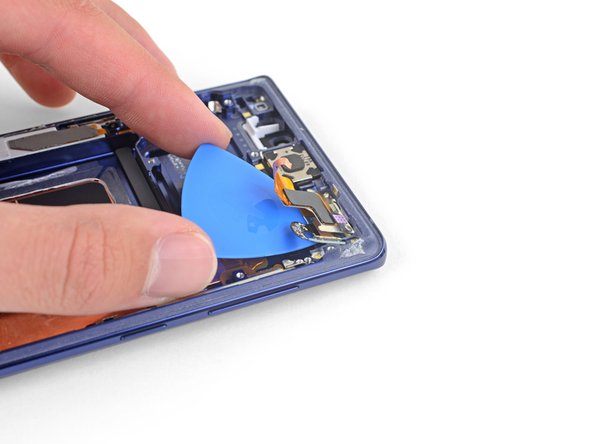
在指纹传感器附近的左边缘处小心切开,否则有损坏内部带状电缆的风险。
It's extremely easy to crack the back glass when nearing and rounding the corners. It's probably a good idea to soften the adhesive with heat as you go.
Step 5 is NOT "cut through the adhesive", that's steps 5-10. Step 5 is "Begin the careful process of cutting through the adhesive, starting at the right side where you already softened it. Proceed carefully, slowly, and warmly through the following steps."
These comments are spot-on. I never break a phone, and I cracked the back glass following the instructions without seeing these comments first. Heat the back much more than you think you need and go super, super slow.
-
-
-
在右上角留下一个空缺。
-
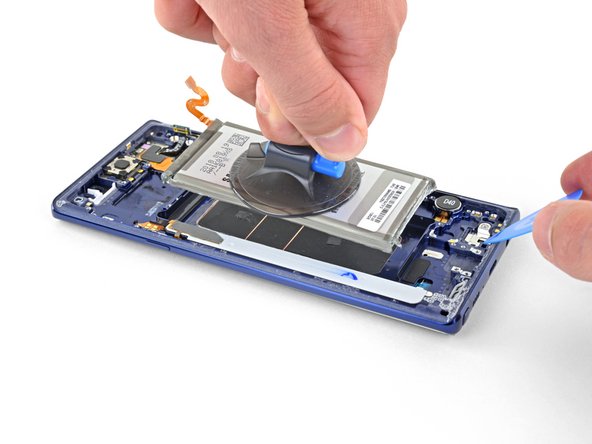
使用另一个三角撬片在右下角周围切割粘合剂。
-
留在手机侧面。
There seems to be a lot of glue at the bottom, I broke the glass as I was cutting past the charging port - not sure if it was already fractured or just not enough heat (I used Sellotape so it didn't break up into pieces!)
I think LOTS of heat & patience is the key!
Be very careful around the corners and bottom (probably top too, but I didn't have a problem there). Make sure you've cut in far enough down the side first (go in about 1cm) but less round the corners and work in slowly.
-
-
-
使用热风枪或吹风机,或者将加热的iOpener施加到后面板的左侧约一分钟,以软化下面的粘合剂。
If using an iOpener it will need to be fully heated and set on for at least 5 minutes. You’ll know the phone is hot enough when its almost too hot to touch.
-
-
-
使用插入的三角撬片,小心地切掉后面板左上角的粘合剂。
-
最后,沿着手机顶部剪下最后的粘合剂。
Be VERY patient as you slide the opening picks around the periphery of the glass, and use heat very liberally. Make sure the smooth, clear aspect of the iOpener is against the glass, not the rough black portion.
-
-
-
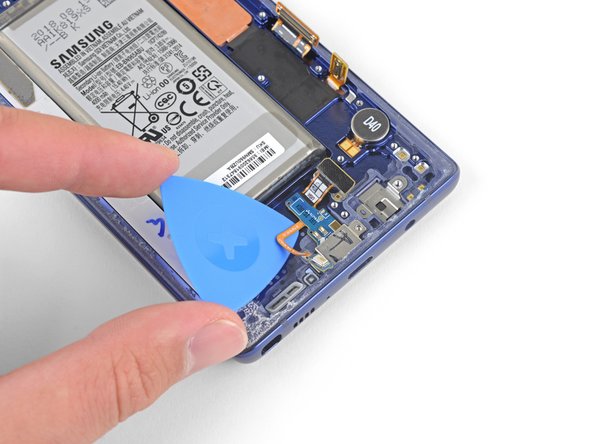
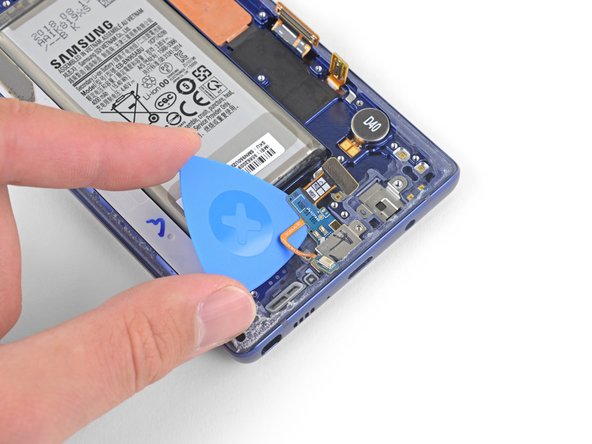
首先分离后盖的右侧。
-
沿左边缘向上倾斜护盖,以露出指纹传感器带状电缆。
Thought I'd done something wrong here as there wasn't a cable attached to the back - the fingerprint reader hadn't come away with the back, but had stayed with the phone.
Exactly the same experience. Made life a little easier.
Happened to me as well.
-
-
-
用撬棒的尖端向上撬起指纹传感器带状电缆,然后将其从插座中拔出。
-
-
-
卸下后盖。
-
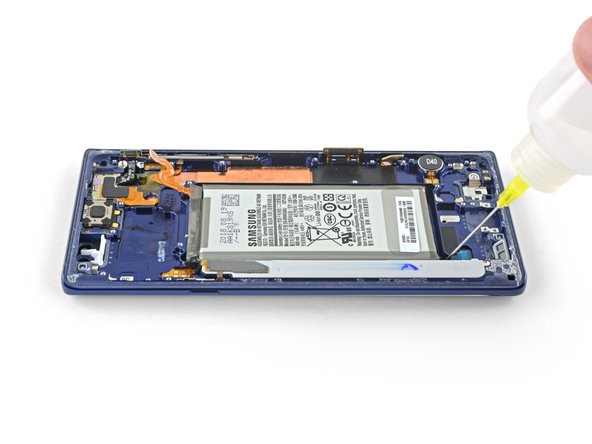
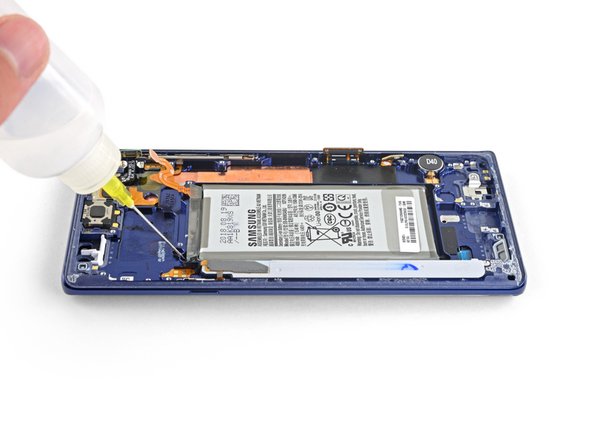
使用镊子将手机机壳上残留的胶粘剂剥离掉。然后用高浓度异丙醇(至少90%)和无绒布清洁粘合区域,以准备用于新粘合剂的表面。
-
小心地将新粘合剂涂在后盖上,然后将玻璃的一个边缘对准手机底盘,然后将玻璃牢固地按入手机中。
I am installing a new backplate (this is my first repair; I was CERTAIN that I would crack the back glass, and I was NOT wrong) but I’m not sure how tweezers are meant to remove gooey adhesive! I simply used the blue plastic pry tool as a scraper and gently rolled up the goo. Maybe the glue is different because I have a refurbished phone? That may also explain why I had so much trouble with Step 1. Hope that this helps!
-
-
-
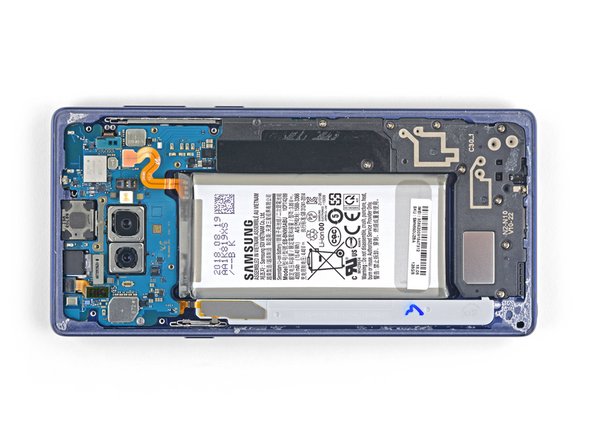
步骤 15 卸下上中框
注意:步骤 15-18 源自标记为进行中的 指南。
-
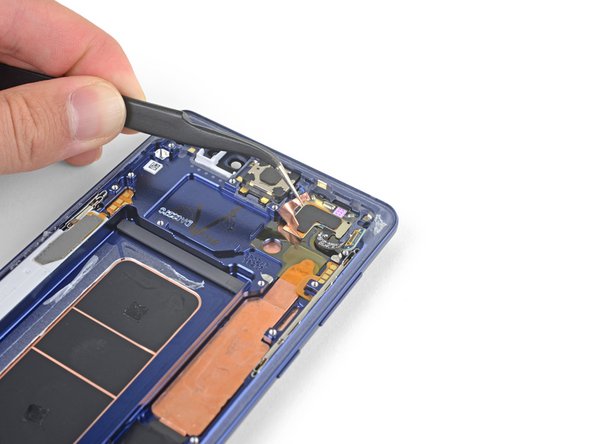
使用十字螺丝刀卸下固定上中框的9颗4毫米螺丝。
There are two more screws on the bottom right corner of the little side frame that the Qi plate is glued to. I took those out as it put less stress on it.
John Stone - 回复
It helps to hold the fine tweezers with your non-dominant hand to support the screw heads and ensure they come straight out; you can also gently lift as you unscrew.
-
-
-
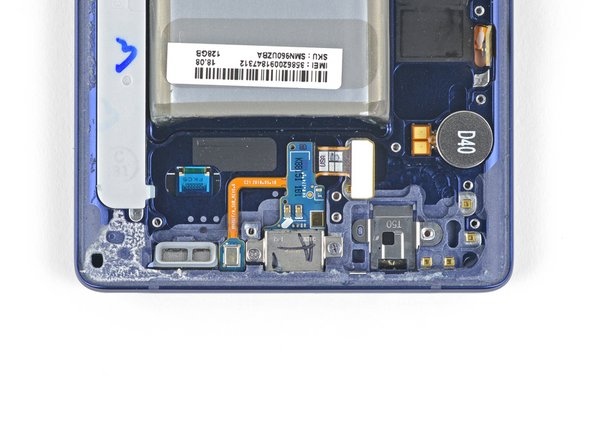
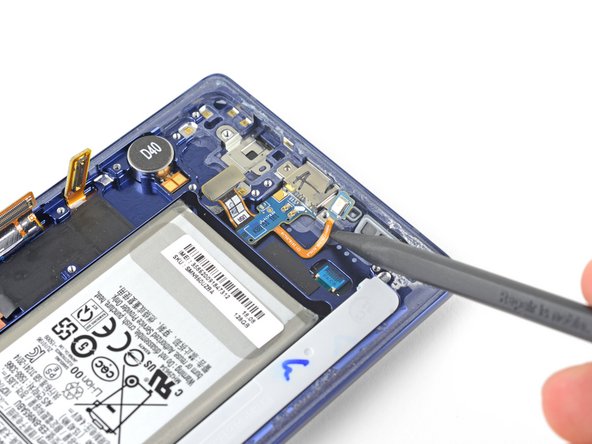
使用撬棒的平端将充电装置与主板断开。
These screws are supposed to be 3.2 mm because when I took out these screws, they were shorter than the ones you take out first
-
-
-
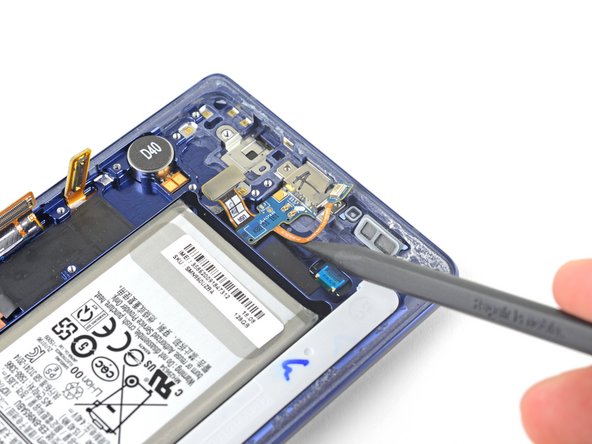
从充电组件上卸下两颗3.2毫米十字螺丝。
Please add a step that mentions the round item labeled “D40”. It, similarly to the headphone jack, is tediously removed by adding some isopropyl alcohol to the groove above/under it and then sliding a spudger or tweezers into the same groove. Slowly wiggle it with your prod while the isopropyl alcohol does its job.
Brody Wood - 回复
This is necessary If your new display assembly does not include the vibration motor (labeled D40). The pointed end of a spudger may not be small enough to get leverage under it, so use angled tweezers if you have to.
-
-
-
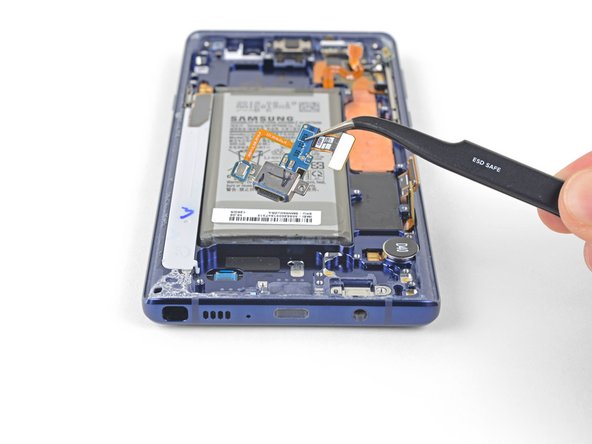
用镊子将背胶的铜箔剥离。
-
到达传感器阵列后,请停止剥离。
-
-
-
使用镊子去除前传感器阵列。
Buen día, excelente tutorial...sigan con ese mismo interes...Bendiciones para todo el grupo.
Desde Santa Cruz, Bolivia.
esistema17 - 回复
-


要重新组装设备,请按逆序执行上述步骤。
将你的电子垃圾带到R2或e-Stewards认证回收商。
维修没有按计划进行吗?请查看我们的社区,以获取疑难解答帮助。
将新的替换零件与原始零件进行比较——在安装之前,你可能需要转移剩余的组件或从新零件上取下粘性衬板。
要重新组装设备,请按逆序执行上述步骤。
将你的电子垃圾带到R2或e-Stewards认证回收商。
维修没有按计划进行吗?请查看我们的社区,以获取疑难解答帮助。
将新的替换零件与原始零件进行比较——在安装之前,你可能需要转移剩余的组件或从新零件上取下粘性衬板。
46等其他人完成本指南。


15条评论
Make sure you transfer over the vibration motor if the new frame does not have it… didn’t realize my replacement didn’t have it until I put the glass back on :/
Thank you for pointing this out! I almost missed it! I wish this guide showed how to put it back together instead of just saying “okay now do it again but backwards.” Anyway, I appreciate this comment right here haha.
The guide assumes that you have a new display unit containing all the parts that are left after the last step (display, front glass, screen, cooling system, vibration motor and so on.)
Since replacement parts vary from seller to seller, you’ll have to compare yours to the original and transfer any remaining components. This guide was written for the display assembly that we were selling at the time.
When transferring other components such as the vibration motor just be sure to use the same methods as with similar components. Work slowly, always use heat or ≥90% isopropyl alcohol to soften adhesives, and search the internet for more information as necessary.
But what about the actual replacement of the display screen? The instructions stops at removing the front sensor array
Jason Khim - 回复
Because it is an OLED screen the entire assembly has to be replaced. If the guide is followed and the part was purchased from iFixit, once the front sensor array is removed you can begin working backwards transferring all components into the new display assembly. Unfortunately replacing the screen from the front is not possible. If you purchase the part from somewhere other than iFixit you may need to transfer additional components.
The guide does not explain how to glue the front and back together once everything is put back together.
Do I have to buy a specific glue or does the new part have pre-applied glue and do I need heat to activate?
Thanks
The new part most likely won’t have pre-installed adhesive. This generic perimeter adhesive guide for Samsung Galaxy phones will help!
Any suggestions on getting the suction cup to stick to the battery? I cant seem to get mine to hold.
I just flooded the battery space with rubbing alcohol and let it sit for a minute. Then the battery more or less lifted out. If you still think you need it a smaller suction cup or even dental floss to run under the battery may help.
It was very informative and clear. Thank You.
Hello! I would ask, but the display is the same for version 128 or 512gb, right?
I have never had a digitizer not power on. Is it just a bad digitizer or what? I also brought a new battery.
The gasket and adhesive kit came with a great set of components. However it's not clear when and where they are put. Would be nice if iFixit had notes about these for reassembly.