跳转到主内容

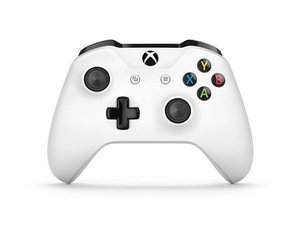
Xbox One 手柄在2016年随着 Xbox One S 的推出而问世,并增加了对 Windows 10/11 的蓝牙支持。 该手柄修复了 Model 1537/1697 手柄上的许多设计缺陷,更加可靠。该手柄已被改进版 Model 1914 手柄所取代。

163 个问题 查看全部

Drift on right joystick without visible fix

I’ve been trying to fix the drift on my Xbox One controller for a while, but nothing has seemed to work so far. Currently, the right joystick is consistently registering a left input while at center. This is a FULL left input, though, as I’ve gone into a game with this malfunction and it would make the camera in the game rotate left at full speed.

I have taken apart the controller already, and tried to replace the circular sensors that are held within the green portions of the joystick module on the motherboard. I’ve even turned on the controller with the sensors completely removed, and there is still a left input on the joystick.

I have a replacement module, but I’m unable to get the current one off since my soldering iron doesn’t seem to be hot enough to melt the contacts. Is it a lost cause? Should I just get a new controller?

UPDATE: I was able to replace the joystick module, but nothing had changed. There is still a full leftward input on the right joystick. The new module is working, as I’m able to see inputs from the joystick as I move it around, but only up, down, and press. So I’m guessing it has less to do with the actual module and something a bit deeper.
回答此问题 我也有这个问题

这是一个好问题吗?

得分 2
添加一条评论

1个答案

最有帮助的答案

You need another tool to remove the joysticks off a controller. As long as the solder when melting turns shiny / malleable then that means the soldering iron is hot enough but needs help with another tool mentioned below:

This is the tool you need it is called a “Solder Sucker”. Basically what this does is sucks the melted solder into the tool so that it helps you with having the pins under the object that you are de-soldering not to be soldered together with the pad on the board.

Here is a link to the aforementioned tool: https://www.amazon.com/Solder-Sucker-Des...

Filling the pins and pads with leaded solder will make this process easier. Simply add leaded solder to these pads, heat them up for about 5-10 seconds then use the solder sucker with the nozzle propped against the pad and press the button on the tool to have it suck up the melted solder.

You’ll need to do this a few times so that it gets rid most of it properly on all the joystick pads. Once that’s done you may need to use solder wick to remove excess / residue solder on the pads so that you can mount the replacement joystick in place and solder that one into it’s respective pads on the board.

这个答案有帮助吗?

得分 3

2条评论:

Ah, thank you. I'll check this out.

完成的

Saw your update on your post. At this point this problem will need to be diagnosed at board-level.

The cause of the problem in this case would usually be one of the following either liquid damage or physical damage from dropping the controller on the board.

For what it's worth in terms of cost and time it may be time for another controller.

完成的

添加一条评论

添加你的答案

Bryan Christian 将永远感激不已
浏览统计数据:

过去 24 小时: 0

过去 7 天: 2

过去 30 天: 5

总计 1,446