跳转到主内容

How to open Logitech MX Air mouse to replace battery

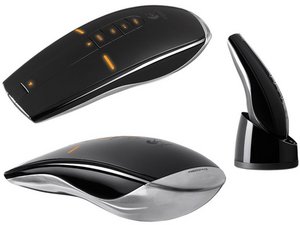
I have a Logitech MX Air mouse. It still works perfectly but the rechargeable battery has pretty much worn out and is not holding a charge. I purchased a new battery for it, but can’t figure out how to open the mouse to replace the battery. There are two screws underneath the mouse, near the top, but removing them didn’t seem to do anything and I don’t want to force it and end up breaking the mouse. Can anyone offer a little advice on how to open the mouse? Any help would be greatly appreciated. Thank you!
回答此问题 我也有这个问题

这是一个好问题吗?

得分 2
1条评论

Hi, I also have an MX Air and relly like it. Were you able to install a new battery? Where did you find the battery and was it easy to do?

Thanks

完成的

添加一条评论

2个答案

最有帮助的答案

Once the 4 first screw are remove, use some plastic lever to open a bit inbetween silver and black parts.

There is 4 other black screw on the black plastic inside ( behind the silver back)

Then you have to gently slide the top of the mouse to the rear.

Then you can serarate the top a bit and access to the battery.

这个答案有帮助吗?

得分 1

1条评论:

Why dont you make a You tube video, with a link to a battery store ?

完成的

添加一条评论

Look at the mouse from the back side . First, make sure the mouse is shut off. There are 2 small short screws near the top and two small longer screws near the contacts at the bottom. Remove all 4 screws ( I needed a #0 Phillips screwdriver). Carefully open the two halves being careful not to stretch the wires too much. Without disconnecting any cables, slide the larger ribbon cable out from it's retainer. It should come out easily, but don't put stress on it. This will allow you to get the back further out of the way. Then see 4 larger short screws holding the front on (I needed a #1 Phillips screwdriver). These screws are all near the battery. This separates the front, but you have to lift the front at the bottom and slide it down to get it open. Once that's open you will see the battery. It is not secured with screws, but can be dropped out. Notice that there are 3 contacts on the battery, so insert the new battery so the contacts meet the spring contacts that are part of the mouse. Carefully slide the front back on towards the top. It can be a little tricky to get it lined up properly. Once that's slid in from the bottom you can press the bottom of the front in place. Then reinsert the 4 larger screws to secure the front, replace the ribbon cable under its retainer and replace the back. Finally replace the 4 small screws and put the mouse in its charger. If you did everything correctly the mouse should start to charge.

这个答案有帮助吗?

得分 0
添加一条评论

添加你的答案

Dean 将永远感激不已
浏览统计数据:

过去 24 小时: 0

过去 7 天: 5

过去 30 天: 24

总计 1,810