跳转到主内容

2.3GHz, 2.6GHz, or 2.7GHz quad-core Intel Core i7 processor (Turbo Boost up to 3.7GHz) with 6MB shared L3 cache.

560 个问题 查看全部

Replacing only the keyboard without full Topcase

Hello,

I´ve poured some coffee over my MacBook Pro 15" Retina Mid 2012 and now some keys of the Keyboard are not working anymore. The rest still works fine.

I just wanted to ask, if it is possible to replace just the Keyboard itself without replacing the whole TopCase ?

Best regards and thanks in advance.

Tom

已回答! 显示答案 我也有这个问题

这是一个好问题吗?

得分 6
1条评论

Hellow,

I am using Mac Book Pro 15 inch retina, it has battery draining issue and Charging port burnt. I have submitted the Mac for repairing at Apple service centre, they said its need to change Top case with battery and Magsafe board 2.

My concern is that is there any need to change Top case if the problem in battery or the batteries comes along with the Top Case.

I just wanted to know can we change only battery and magsafe board 2 instead of changing Top Case with Battery.

完成的

添加一条评论

15个答案

已选择的解决方案

Sorry Tom no dice ;-{

The keyboard is riveted to the top case.

Depending on how much coffee you spilled in and what you had in it (Cream and/or Sugar) you could try popping the key caps off and carefully blot up the spillage up with swabs and using distilled water (not tap!) wipe the areas down to dissolve and remove the water soluble elements and neutralize the acids. Coffee & cream will also need to be cleaned out with a good quality Isopropyl alcohol (reagent grade is the best) as the fats in them will need to be dissolved and removed. Isopropyl alcohol also is a great dryer as well to remove some of the water from within the coffee and what you needed to clean up the sugar afterwards.

If this fails to fix things then you'll need to take the top case off and remove as much stuff off as you can (key caps etc...) and with distilled water wash the keyboard area down to help control things I use a large medical syringe (no needle) to control where I bathe and control the run off as you don't want water every where. After I do the water treatment on the effected areas I try to shake out as much water as I can then I repeat the process this time with Isopropyl alcohol to remove the fats and to help speed up the drying of the water. I still let the cover dry out a good day or two where the sun warms it by my window before putting it back together.

It's still a 50-50% chance recovery, sometimes I still can't get a key or two working at which point I try again or I just replace the upper case.

The trick here is time, the longer one waits to address the spillage the more damage could be happening not just within the upper case, your main logic board and battery could be wet as well - Tick - Tock!

As I'm paid by a company I have a bit more latitude on trying extreme repairs like this. You may want to see if an independent Apple Authorized repair center can help you (Apple won't service you - in their eyes it's water damaged). The independent may just tell you they will only replace the top cover and may refuse the repair if the coffee has gotten into the logic bd and battery.

Good Luck!

这个答案有帮助吗?

得分 4

1条评论:

Mid 2012 macbookpro w/retina replaced just keyboard. Keyboard soldered in but broke old keyboard out by careful pulling. Secured new keyboard with aluminum tape around perimeter and superglue gel on broken solder heads. $30 instead of $300+. Works great, beats trash can.

完成的

添加一条评论
最有帮助的答案

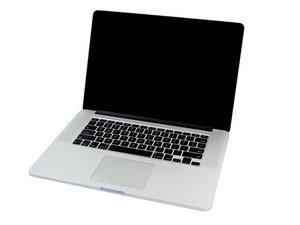
Just completed replacing the keyboard on the 15" Retina MBP (A1398, late 2012, early 2013). I found this article to be quite helpful. A few extra notes I thought I'd add;

1. I found the keyboard and screws on eBay, the screws are the standard PH #000 screws that are used in the unibody MBP. You'll need 101 new screws for the 15" Retina MBP after all the rivets are removed.

2. Don't try to take the battery out, it can stay where it is, it's glued in and it isn't at all fun to remove.

3. There are two black PH #000 screws at the bottom of the keyboard, one on each side of the ribbon cable (under the battery connections). You'll have to remove them before you take the keyboard out. Those 2 plus the new 101 screws, make for a total of 103 screws.

4. Make sure you completely remove the display, when you take out the keyboard and all the rivets come flying out, it's very easy to get parts of the rivets/metal shavings on the display (when the display is closed it's right under the keyboard). Wouldn't want any scratches on that perfect retina image!

5. After you've completely removed the keyboard, you'll find that some of the rivets were stuck in the holes where the screws will go, and the rivet head is now missing. You'll want to remove as many as you possibly can, or the keyboard will give a little in the places where you can't screw it in.

I laid the top palm rest face down on a flat surface and used a flat head screw driver and hammer (angled the flat head @ ~45 degrees against each rivet) and just hard enough gave it a nice tap. This caused the remaining part of the rivet to pop out of the hole. I was able to get all but 8 of them out by doing this method. Those remaining 8 simply sheered the top of the rivet off.

You'll want to be very very careful if you do this (you were warned!), the parts that separate the keys aren't too fragile, but you wouldn't want to have any dents or stress marks appear on the visual side, it helps if you clamp the top rest down so it doesn't move on you.

6. For the remaining rivets, I used a drill press and a 1/32" drill bit to drill the remaining rivets out. The drill bit is just smaller than the holes the screws go into, so I had to be careful not to allow the bit to move at all or the hole would be too big for the screw.

I first tried a hand drill but it was way to hard to keep the tiny drill bit in place and I ended up /w 1 hole that was too big to screw into.

The actual tool I used was the Dremel 8100 and the Dremel drill press station, together @ Home Depot with the drill bits and chuck, are less than $160 - though you could probably find a much cheaper setup on Amazon or using some other type of drill press.

Hope this helps!
这个答案有帮助吗?

得分 12

1条评论:

Instead of a drill, and because of the complexity of disassembly, I bought a new keyboard cover with new screws - went into 64 euro (ebay).

So you do not have to struggle with rivets etc.

True, I bought a new battery also (ifixit) - because the old was 6 years old.

So the keyboard replacement was comfortable.

I was lucky to find this article. helped a lot. Many thanks... :-) Zatika

完成的

添加一条评论

Just to clarify a few details, it is possible to remove the keyboards in the retina display machine, but is not the greatest job to undertake... They look like they are riveted, as dan said, but they are actually metal plugs (they function a bit like a snap rivet) so are removable. You have to pull the keyboard fairly hard, then each plug will pop out. You will then need a keyboard screw set from the 15" Unibody MacBook Pro machine for when you replace the keyboard, as the screws are able to drill their own thread into the aluminium. (just be careful you dont thread the screw heads when you do this)

The difficulty after that, is actually finding the keyboards on their own... its no easy task, thats for sure. Apple dont sell them separately (in fact, they sell the top case unit with the battery, and trackpad as well, which makes it much more expensive)

The other details Dan mentioned are clear enough. I use isopropyl alcohol, cotton buds and a cloth to clean liquid damage, but the residue is often difficult to fully clear up, and if its slid under components, it can corrode with time, causing an assumed fully working machine to slowly degrade with time.

这个答案有帮助吗?

得分 5

3条评论:

I had a few dead keyboards in top cases which I did try to open up. I was never able to get either one working as I suspected I had killed it in the process of pulling it off (after fulling cleaning what had spilled in). At the time I couldn't find replacement keyboards. So it did not make sense wasting the effort which is why I don't bother trying (getting cut up fingers in the process).

完成的

Jon, Do you have a source to find the bare replacement keyboards? Please share.

完成的

Not as of yet unfortunately, but i have been doing a lot of work on these ranges, so have removed the keyboards on their own... i had this explained to me by a company we purchase complete displays from, but i am based in the UK so have different supply chains than US based companies. I will almost certainly be able to source some, but it will take time, as i was only told it was possible 2 weeks ago! we would generally source them via china or taiwan in bulk though, so not easy for an individual consumer unfortunately...

完成的

添加一条评论

When I removed my keyboard, all but three of the rivets stayed in even though the heads all came off. My luck...!

I didn't want to use the screwdriver and hammer method to remove the rivets, because I was concerned that rocking them out in that way will tend to cause the hole to become oblong, and it may not hold the new screw thread as well.

Instead, I used an electronics wire cutter to pull out the rivets. You have to make sure the tool is what is known as a flush cutter, which has the cutting edge ground completely flat. The more common grind is slightly set back from the edge to create a more robust cutting edge, but it will not work here because the tool won't be able to grab enough of the rivet to pull it out. Nor will a large tool, for the same reason, so try to use a 4-1/2 inch or 5 inch cutter. It does not have to be hardened because the aluminum is not much harder than the copper that these tools are designed to cut.

You just put the tool completely flush on the aluminum, with the rivet about an eighth of an inch back from the front edge, and then squeeze and lift from the back at the same time. This will cause the tool to rock against its tip, and the rivet will pull straight out. It's very important to insure the tool is completely flat against the computer frame before you start to squeeze, and also to find the right amount of pressure to pull the rivet without cutting it.

In the end I got all but two of them out. It was easy enough to use a small drill to get the rest, as explained in John Ohl's previous post.

这个答案有帮助吗?

得分 5
添加一条评论

I have used a different approach to replace the keyboard on an A1502 MacBook Pro. The rivets are difficult to remove on the A1502 (ripping out the old keyboard almost always leaves the rivets in place). I leave the rivets on the frame, install the new keyboard, and then apply very small dabs of epoxy over each rivet. This often requires clamping down the keyboard to hold it in place, and sometimes several iterations of clamping + glueing are required. But the result is a keyboard that's solidly held in place by dozens of epoxy joints.

这个答案有帮助吗?

得分 4

1条评论:

Maybe its also a good idea to put those epoxy joints before removing the old keyboard? I think the chance that much more rivets will be removed is increased..

完成的

添加一条评论

I am looking at the riveted 15" MBPr backside of the keyboard now. Just to be clear...there are no threaded small black screws on the back of this thing like the pro, but you're saying once I strip the keyboard from here, I can use the unibody black small-as-!@#$ philips screws in the "plugs" place?

TIA

这个答案有帮助吗?

得分 1

2条评论:

I just press-fitted the rivets back in when I did it. Using the other keyboard screws in their place sounds like it's a little easier, I just would be careful with any metal shavings that might get into the works. You could get a tap and thread the holes first. The different model series have different setups some have screws others a mix and lastly, some have all rivets. This is the one area Apple could have done better in the design (both in manufacturing & repairability).

完成的

The 11" and 13" macbook air range (2010 and onwards) have screws around the outside, but rivets in the middle section. The retina display models of macbook pro have rivets all over, whereas all the standard macbook pro models use solely screws. The 13" has about 48 screws, and the 15" uses about 56.

Because the rivets are sunk into the top case unit, it really doesn't take much to thread the screws into their slots, as it doesn't need to notch it with the soft aluminium casing, but its always advisable to make sure no metal shavings have been made and that they are cleaned up if they have, yes.

完成的

添加一条评论

That's very good info, thanks! The problem with those rivets is you never know how many will stay and how many will go. If you rip the old keyboard out carefully and at the right angle you can minimize the amount of stuck rivets. Don't be afraid to use force (and perhaps The Force :)) to get them out.

I will certainly try the screwdriver method mentioned above. Sounds promising.

这个答案有帮助吗?

得分 1
添加一条评论

I just went through the process of replacing this keyboard. 60% of the rivets stayed in place. After putting a minor scratch on the screen trying to "knock" one out, I came to my senses and just put dabs of gorilla glue in the places the rivet still sat, and screws everywhere else. It worked like a charm and I would recommend it to anyone going down this path.

There were exactly 100 rivets on my keyboard.

The keyboard ribbon is a complete nightmare to get back in. I thought I had it back in several times. But I did not and of course the machine would not start up from the power button. It doesn't help that there is only a tiny piece to work with. I eventually wedged a 2 mm thick piece of plastic between the battery section and the ribbon, and that gave me enough leverage to push down with the flat of my thumb and force the cable all the way in. It went way further in than I thought was required and after that it worked.

Do take the time to clean up every last bit of rivet that pops out. You don't want any of that in the machine when you are done. I taped two pieces of copier paper over the screen to catch pieces as well.

这个答案有帮助吗?

得分 1

1条评论:

A comment on putting the keyboard flex cable in place in the connector: If you put a piece of adhesive tape on the backside of the flex, leaving the end to stick a bit out, you can use the tape as a "handle" and pull the flex terminals into the connector. You must then just steer the terminals in place and pull the flex cable in place. This is much easier that trying to push the flex cable into the connector. On some of the Macbook Pros this "handle" is actually installed on the original cable.

完成的

添加一条评论

You can replace those rivets with those black tiny keyboard screws. Works for me. In fact, you can reuse those rivets again if you want, done it in Macbook Air. Apply cellophane tape before pulling the keyboard, so you can safe all those rivets.

这个答案有帮助吗?

得分 1
添加一条评论

As Jon Ridley suggested I tried the keyboard swap using 15in MBP screws. It was definitely NOT a pleasant job to undertake. It requires quite a bit of strength and stamina because you basically have to manually drill through aluminum using your hands. And there are many screws. I would venture a guess of around 50-60 to do. Lots of time and patience. Due to the fact that some of the rivets leave their bodies behind the final creation is a little less sturdy than the original because it's not held in place everywhere. But it's very usable and not bad.

这个答案有帮助吗?

得分 0
添加一条评论

Has anyone tried manually disabling (unplugging) the keyboard and leaving it? While researching this repair I've bought an Apple Wireless keyboard and have been using it instead. The only problem is that the liquid spilt on my original keyboard periodically engages the power button. If I could just unplug the original keyboard then using the wireless one would suit just fine. It's thin enough to throw in the laptop case while traveling.

这个答案有帮助吗?

得分 0

1条评论:

Unplugging it is relatively simple - it's attached via a ribbon cable to the logic board. Lift the little retainer socket, gently pop the cable out - you're done. Problem is - you won't be able to power your machine up anymore. Older systems had a special power on pads which allowed powering it up shorting those 2 pads but new machines don't have it iirc. But even if they did, do you really want to take it apart and shorten them out every time you need to turn it on/off? It ain't fun!

完成的

添加一条评论

Ya I ran into that problem on the way. I figured you could set a "power on" timer and also in terminal set it to power on after power failure. But both of those aren't ideal.

This is what I ended up doing: I removed the power button, removed the plastic lift frame under it, cut out the rubber nipple under than and clipped the black plastic "frame" it was connected to. This gave me access to the actual button activator. It is two leads each with its own pad. When the button is pressed the pads touch, activating the button. The pads are laminated in a tough plastic sheet. I clipped the plastic sheet away from the black plastic "frame", then trimmed the top of the plastic until I was close to the pads. Then I got a razor and separated the plastic laminate to release the plys. Now I can pull the pads away from each other and the power button isn't activated anymore. I discarded the trimmed off pieces and the rubber nipple. Then I got a thin piece of cardboard paper to slide between the pads. Then put the plastic lift frame back and connected it back to the metal hooks. Then popped the power button back on. Problem solved! The machine no longer turns off AND if I do need to use the power button then it's as easy as popping the power button off and sliding the piece of cardboard paper out to activate the power button and then putting it back. Not as great as a perfectly functioning power key but it beats a lot of the other options.

这个答案有帮助吗?

得分 0
添加一条评论

Ok I didn't read everything but I've just found the perfect and easiest way to get rid of the rivet.

From now on I'll do them all by this method (retina air etc).

Flat thin screwdriver and hammer:

Screwdriver was PARALLEL to the keyboard, as FLAT as possible, in order to make the rivet's head go up and leave its hole.

I killed many rivet before finding that, I was mostly cutting them..

Screwdriver as parallel as possible and gentle (almost) hit with the hammer and they just pop out in half a second.

Really easy cause the rivet isn't that much attached to the case..

这个答案有帮助吗?

得分 0
添加一条评论

There is no easy way to do it. You must take everything apart then rip the keyboard out since there are no keyboard screws like Mid 2012 and before. Check this video out for detailed explanation on how it’s done https://youtu.be/_yfRgs1VXKo and good luck

这个答案有帮助吗?

得分 0
添加一条评论

I replaced my similar Early 2013 15" MacBook Pro's keyboard using...

This part, which includes replacement screws:

https://smile.amazon.com/gp/product/B017...

These tools:

https://smile.amazon.com/gp/product/B01M...

This tutorial:

MacBook Pro 15" Retina 显示屏 2013 晚期 更换键盘壳(C壳)

I printed every page of the tutorial and laid out all pages on a table. When I removed screws, I placed them on the circles representing them on their respective pages. When I removed parts, I placed them on the pages instructing their removal.

(note: the tutorial was for Late 2013 but I found the internals of my Early 2013 MBP to be physically identical)

Removing the keyboard (not covered in the tutorial) was a destructive process but it was very straightforward and all of the rivets popped out easily when I peeled the keyboard back. The replacement screws went in easily. There were not quite enough of them for all the rivet holes, so if I did it again I would buy additional ph#000 screws with the repair parts.

The computer worked immediately upon reassembly. Everything is perfect!

这个答案有帮助吗?

得分 0

1条评论:

Instead of a drill, and because of the complexity of disassembly, I bought a new keyboard cover with new screws - went into 64 euro (ebay).

So you do not have to struggle with rivets etc.

True, I bought a new battery also (ifixit) - because the old was 6 years old.

So the keyboard replacement was comfortable.

I was lucky to find this article. Helped a lot. Many thanks... :-)

完成的

添加一条评论

添加你的答案

Tom 将永远感激不已
浏览统计数据:

过去 24 小时: 0

过去 7 天: 4

过去 30 天: 50

总计 50,040