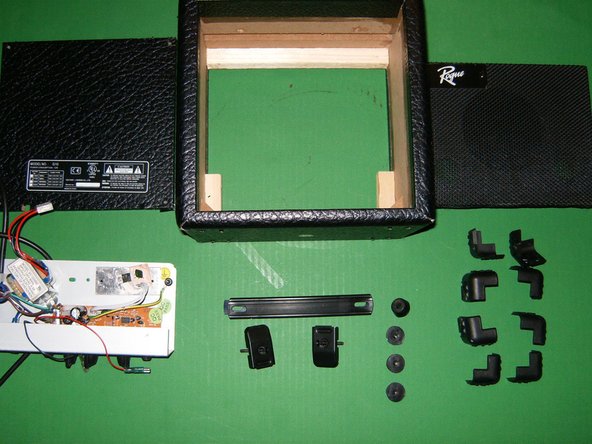
跳转到主内容

你所需要的

这个拆解是不是维修指南。 要维修你的的Rogue G10,请使用我们的维修手册

  1. Rogue G10 Teardown, Rogue G10 Teardown: 步骤 1 中的图像 1,3 Rogue G10 Teardown, Rogue G10 Teardown: 步骤 1 中的图像 2,3 Rogue G10 Teardown, Rogue G10 Teardown: 步骤 1 中的图像 3,3
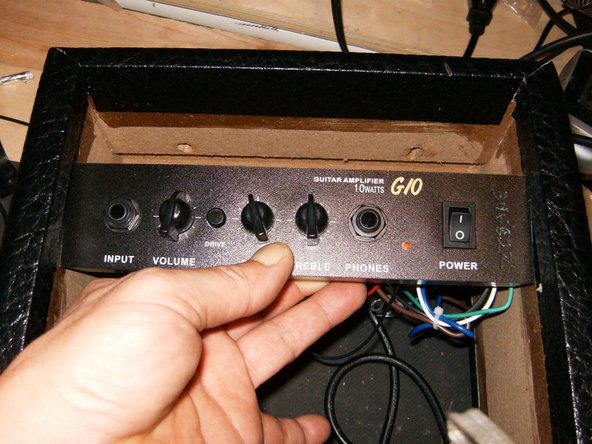
    • Here is the front view of the Rogue G10 amp.

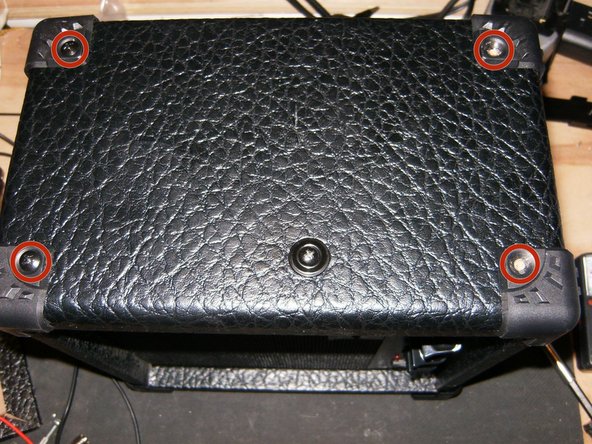
    • Back side shows 4 Phillips head screws that need to be removed.

    • Here are the 4 #6x1" screws

  2. Rogue G10 Teardown: 步骤 2 中的图像 1,3 Rogue G10 Teardown: 步骤 2 中的图像 2,3 Rogue G10 Teardown: 步骤 2 中的图像 3,3
    • Use a small screwdriver or other small suitable prying instrument to remove the back cover.

    • With the back cover removed the speaker and amp become visible.

    • Remove the 2 Phillips head screws from the carrying handle. These two screws also attach the amp to the onside of the case.

  3. Rogue G10 Teardown: 步骤 3 中的图像 1,3 Rogue G10 Teardown: 步骤 3 中的图像 2,3 Rogue G10 Teardown: 步骤 3 中的图像 3,3
    • Here are the two screws from the handle. They are 1/8"x1 1/4"

    • Remove the 16 screws from the plastic corners. These corners serve no purpose other than decoration.

    • There are 4 rubber feet on the bottom of the amp.

  4. Rogue G10 Teardown: 步骤 4 中的图像 1,3 Rogue G10 Teardown: 步骤 4 中的图像 2,3 Rogue G10 Teardown: 步骤 4 中的图像 3,3
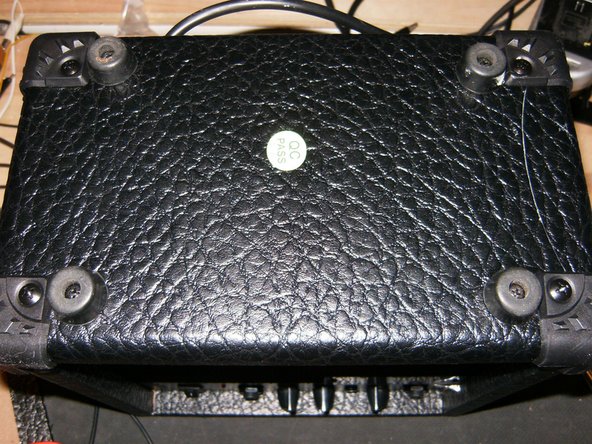
    • This shows the corners with the screws removed.

    • Remove the rubber feet by removing the Phillips head screws.

    • On the left and right side of the amp is a Phillips head screw, located 1/3 down from the top and to the front. These two screws hold the front panel to which the speaker is attached. Remove those.

  5. Rogue G10 Teardown: 步骤 5 中的图像 1,3 Rogue G10 Teardown: 步骤 5 中的图像 2,3 Rogue G10 Teardown: 步骤 5 中的图像 3,3
    • Here is the one on the right side, same location.

    • Remove it as well

    • With those two screws removed, the front panel which houses the speaker, can be simply removed

  6. Rogue G10 Teardown: 步骤 6 中的图像 1,3 Rogue G10 Teardown: 步骤 6 中的图像 2,3 Rogue G10 Teardown: 步骤 6 中的图像 3,3
    • remove the front panel and place aside.

    • With the front panel removed, the amp will now simply lift out as well

    • Here is the amp totally disassembled. Straight forward job. No glue, no hidden screws.

oldturkey03

于09/29/10注册

781,658 声望

创作了119篇指南

团队

Global Fixers Global Fixers 的会员

Community

32 名成员

创作了531篇指南

4条评论

Do these models have tubes in them?

Camron Buxton - 回复

No, they do not. Strictly solid state

oldturkey03 -

Thank you so much

Camron Buxton - 回复

What may be causing the scratchy sound only when playing on my G10? Tried multiple cables and cleaned the input with electrical contact cleaner and there was no change. If I run a cable from the Phones jack to my computer input then the noise is not there.

Brian Day - 回复

添加评论

浏览统计数据:

过去 24 小时: 1

过去 7 天: 3

过去 30 天: 7

总计 3,116