简介
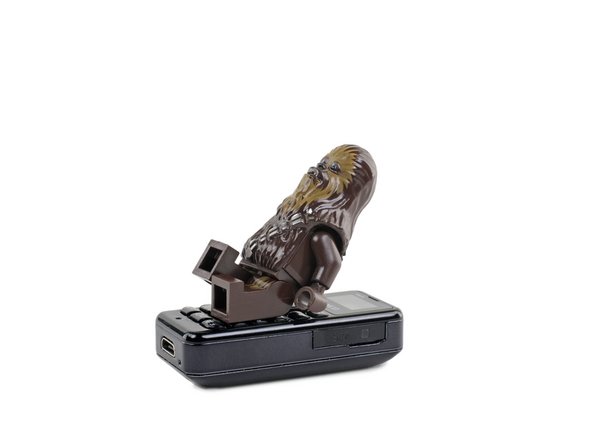
We’ve seen (and torn down) pretty much everything, but now Zanco’s Tiny T1 is here. It’s oblivious to your obsession with screen-to-body ratios, impervious to your petty PPI comparisons, and contemptuous of those quadruple-digit smartphone price tags—but it might just take the thin-and-light crown for good. Join us for the Tiniest teardown we’ve ever done. It’s gonna be big.
你所需要的
-
-
The Tiny T1 may be small—but is it mighty? We'll let its specs do the talking:
-
Mediatek MTK6261D SoC
-
0.49" OLED display with 64 x 32 pixel resolution (146 ppi)
-
Built-in voice changer
-
32 MB RAM and 32 MB ROM
-
Backlit keyboard
-
2G network connectivity
-
MicroUSB port
-
-
-
While it's not the most popular tiny phone form factor, the T1's chocolate bar layout makes dialing and texting with human-sized fingers a breeze.
-
The metal back case is smooth except for a regulatory sticker and speaker grille. No fragile glass panel to shatter. No unsightly rear camera bump.
-
-
-
A "micro"-USB port occupies the bottom of the phone—and Zanco has managed to squeeze in a pinhole microphone alongside it.
-
Nano is such a relative word, as the "nano" SIM slot dominates the right edge of the phone.
-
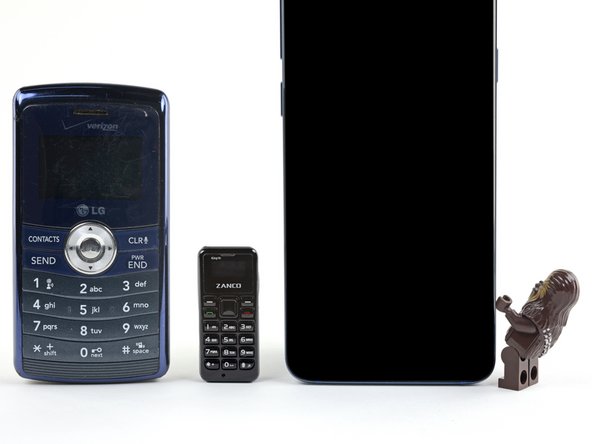
Does size matter? We compare the Tiny T1 to its modern compatriots: a tech writer's LG ENV3 and a Samsung Galaxy S9+.
-
-
-
-
Opening a phone of this scale requires specialty tools. Fortunately, iFixit has got it covered.
-
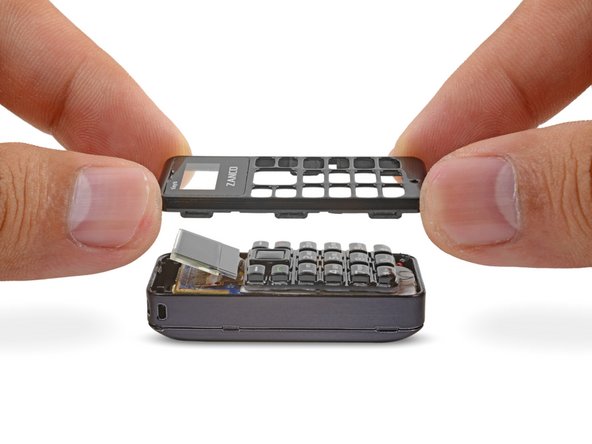
Despite its retro aesthetic, this opening procedure is far from obsolete. Some micro spudger action frees up the front clips, and the top plastic plate is free!
-
We move the keypad aside and find the button pad soldered to the board beneath.
-
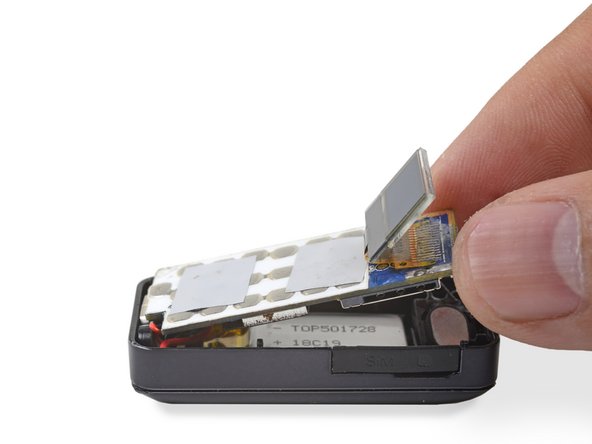
To supply backlight to the keypad, two white adhesive pads diffuse light from four surface-mounted LEDs underneath.
-
-
-
While most modern phones are held together by an army of screws and nasty adhesives, the Tiny T1 has none of that. Zero screws! Zero adhesives!
-
The entire innards pop out with a single pry with a (normal) sized spudger.
-
-
-
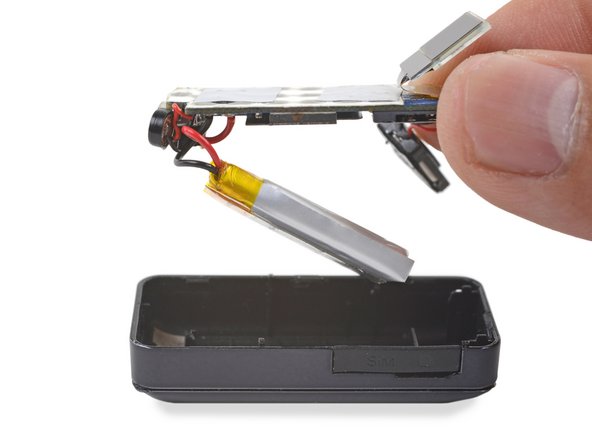
Here we have the inner workings of the Tiny T1—all of them. It's just one board, with (nearly) everything soldered to it:
-
Speaker
-
Microphone capsule
-
High tech Bluetooth antenna (it's a wire)
-
"Nano" SIM slot, ironically hogging nearly half the board
-
Two mysterious pogo pins, which are accessible from outside—possibly for charging? Accessory port? A tiny taser?
-
200 mAh 0.74 Wh battery (for comparison, the ENV3 has 3.5 Wh, while the Galaxy S9+ weighs in at 13.48 Wh)
-
-
-
That's a wrap to this Tiny Teardown!
-
The T1 shows you can make a working phone with just a little hardware—and with technological advancements, you can make it that much little-er.
-
We've come a long way from the first mobile phones of over forty years ago, even surpassing the wildest concepts from spy films and science fiction.
-
- The phone is held together by clips alone, making the opening procedure easy and painless.
- The front plastic plate, which is prone to cracking, is easily replaceable.
- Most components, including the battery, are soldered to the motherboard, making repairs difficult.


最后的想法
可修复性评分


(10是最容易修复)
13条评论
Nice tear down. I did notice the tiny pliers with blue handles. I believe that is from one of the Pocher 1/8 scale car kits, possibly from the Ferrari Testarossa tool kits. Obviously it is just for decoration!
rayramirez - 回复
Oh no, this phone has a definite purpose. Although chances are if you don’t know what that purpose is, you probably don’t need one 😂
IDK if I edited it correctly, but I tried to get the “Y” in “N.I.F.T.Y!” at the top to link to the ifixit YouTube channel.
Tommy, that’s a genius idea! It didn’t turn out properly but I got it worked out.