跳转到主内容

这个拆解是不是维修指南。 要维修你的的WD blue Hard Drive,请使用我们的维修手册

  1. WD Blue Hard Drive Teardown, Exterior of Hard drive: 步骤 1 中的图像 1,3 WD Blue Hard Drive Teardown, Exterior of Hard drive: 步骤 1 中的图像 2,3 WD Blue Hard Drive Teardown, Exterior of Hard drive: 步骤 1 中的图像 3,3
    • Pre-disassembly

  2. WD Blue Hard Drive Teardown, Remove circuit board: 步骤 2 中的图像 1,2 WD Blue Hard Drive Teardown, Remove circuit board: 步骤 2 中的图像 2,2
    • Remove four screws and circuit board lifts out

  3. WD Blue Hard Drive Teardown, Circuit board interfaces: 步骤 3 中的图像 1,1
    • Motor contacts

    • Head contacts

  4. WD Blue Hard Drive Teardown, Removing top cover: 步骤 4 中的图像 1,3 WD Blue Hard Drive Teardown, Removing top cover: 步骤 4 中的图像 2,3 WD Blue Hard Drive Teardown, Removing top cover: 步骤 4 中的图像 3,3
    • Remove 6 perimeter screws

    • Remove screw from under sticker

    • Lift cover off

  5. WD Blue Hard Drive Teardown, Inside details: 步骤 5 中的图像 1,3 WD Blue Hard Drive Teardown, Inside details: 步骤 5 中的图像 2,3 WD Blue Hard Drive Teardown, Inside details: 步骤 5 中的图像 3,3
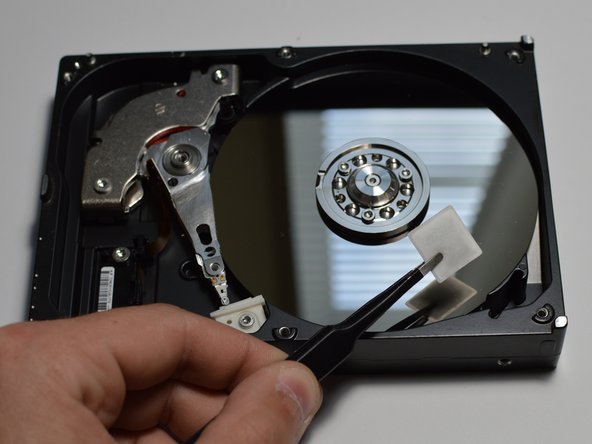
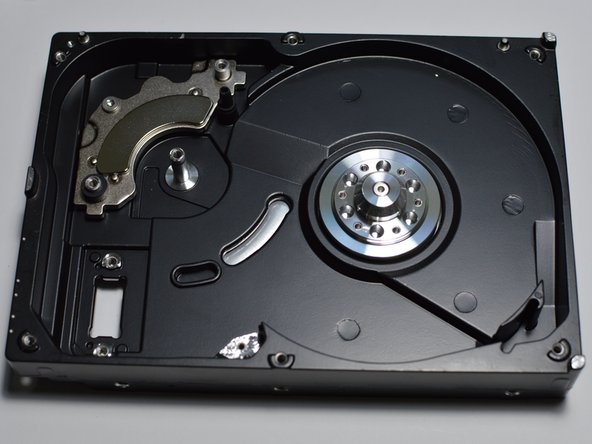
    • Inside of hard drive

    • Desiccant packet removed from lower right corner
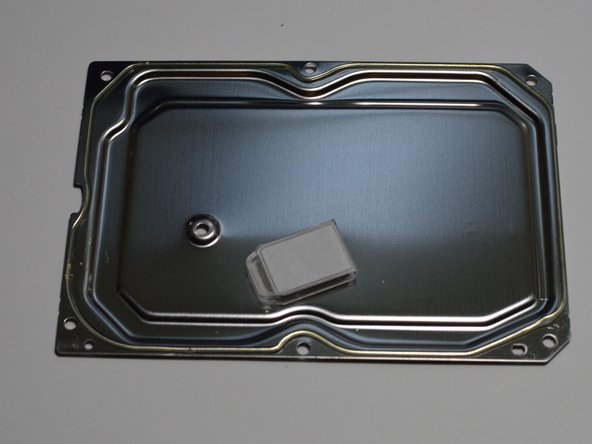
    • Inside of cover

  6. WD Blue Hard Drive Teardown, Head details and dock removal: 步骤 6 中的图像 1,3 WD Blue Hard Drive Teardown, Head details and dock removal: 步骤 6 中的图像 2,3 WD Blue Hard Drive Teardown, Head details and dock removal: 步骤 6 中的图像 3,3
    • Head in dock

    • Head on disk

    • Dock removed

  7. WD Blue Hard Drive Teardown, Head removal p1: 步骤 7 中的图像 1,3 WD Blue Hard Drive Teardown, Head removal p1: 步骤 7 中的图像 2,3 WD Blue Hard Drive Teardown, Head removal p1: 步骤 7 中的图像 3,3
    • Head before bridge removed

    • Remove two screws

    • Lift bridge away

  8. WD Blue Hard Drive Teardown, Head travel limits: 步骤 8 中的图像 1,2 WD Blue Hard Drive Teardown, Head travel limits: 步骤 8 中的图像 2,2
    • Stops to limit head travel

    • Red coil over magnet cause the head to rotate

  9. WD Blue Hard Drive Teardown, Head contact removal: 步骤 9 中的图像 1,2 WD Blue Hard Drive Teardown, Head contact removal: 步骤 9 中的图像 2,2
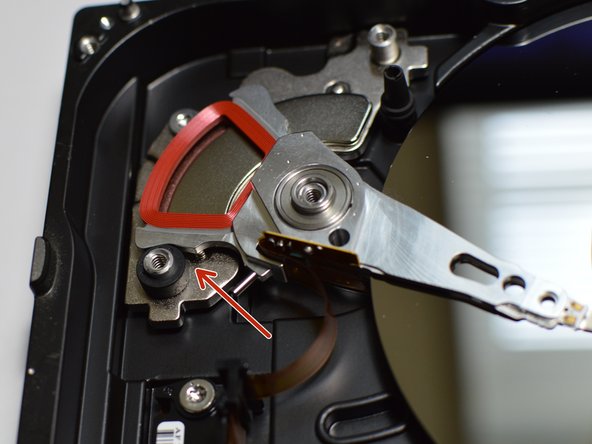
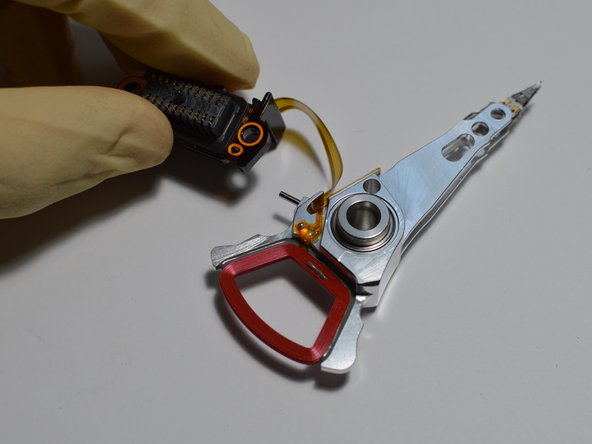
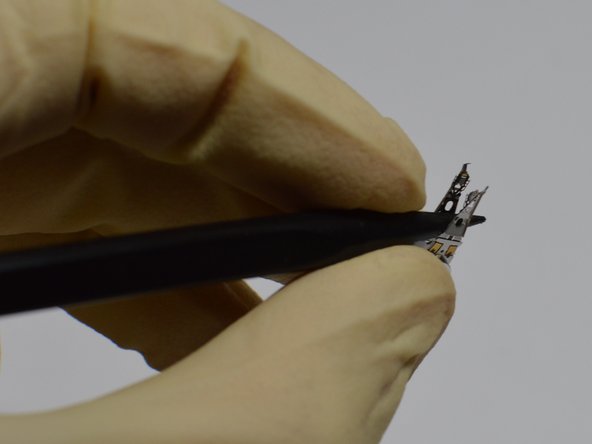
    • Contact block installed

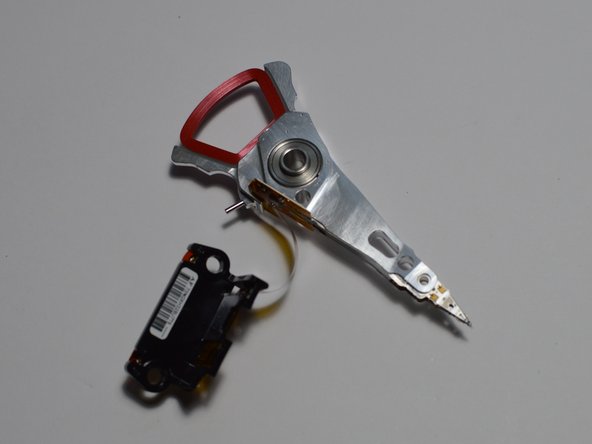
    • Remove two screws, contact block is now loose but connected to head by a ribbon cable

  10. WD Blue Hard Drive Teardown, Disk removal p1: 步骤 10 中的图像 1,3 WD Blue Hard Drive Teardown, Disk removal p1: 步骤 10 中的图像 2,3 WD Blue Hard Drive Teardown, Disk removal p1: 步骤 10 中的图像 3,3
    • Disk installed

    • Remove 3 screws holding down collar

    • Remove collar

  11. WD Blue Hard Drive Teardown, Disk removal p2: 步骤 11 中的图像 1,2 WD Blue Hard Drive Teardown, Disk removal p2: 步骤 11 中的图像 2,2
    • Lift disk out of case

    • Collar after removal

  12. WD Blue Hard Drive Teardown, Head removal p2: 步骤 12 中的图像 1,3 WD Blue Hard Drive Teardown, Head removal p2: 步骤 12 中的图像 2,3 WD Blue Hard Drive Teardown, Head removal p2: 步骤 12 中的图像 3,3
    • Head installed, simply lift head out of case

    • Remove head

    • Case without head

  13. WD Blue Hard Drive Teardown, Head details: 步骤 13 中的图像 1,3 WD Blue Hard Drive Teardown, Head details: 步骤 13 中的图像 2,3 WD Blue Hard Drive Teardown, Head details: 步骤 13 中的图像 3,3
    • Removed head

    • Contacts for data and head control

    • Head interface to disk

  14. WD Blue Hard Drive Teardown, Empty case: 步骤 14 中的图像 1,2 WD Blue Hard Drive Teardown, Empty case: 步骤 14 中的图像 2,2
    • Remove magnet

    • Remove stop for head on disk

    • Remove head docked stop

  15. WD Blue Hard Drive Teardown, Components laid out: 步骤 15 中的图像 1,3 WD Blue Hard Drive Teardown, Components laid out: 步骤 15 中的图像 2,3 WD Blue Hard Drive Teardown, Components laid out: 步骤 15 中的图像 3,3
    • All components arranged

Wieli

于01/08/23注册

1,707 声望

创作了10篇指南

一条评论

Well done Wieli! Your photographs are very clear and well lighted. Should you decide to edit the guide may I suggest (1) you add what screwdriver tips you used to remove screws and (2) at step 10, highlight the three screws. The screw tips blend in with the collar.

Jim Fogle - 回复

添加评论

浏览统计数据:

过去 24 小时: 0

过去 7 天: 36

过去 30 天: 185

总计 3,534