跳转到主内容

Twentieth Anniversary Mac Teardown

你所需要的

  1. Twentieth Anniversary Mac Teardown, Logic Board: 步骤 1 中的图像 1,1
    • Use the release tabs to remove the rear cover

  2. Twentieth Anniversary Mac Teardown: 步骤 2 中的图像 1,1
    • Remove any ComSlot II or PCI cards that may be installed and their risers.

  3. Twentieth Anniversary Mac Teardown: 步骤 3 中的图像 1,1
    • Unplug the logic board connections to the PRAM battery and fan.

    • Remove the PRAM battery from it's Velcro mounting.

    • Remove the four #0 Philips screws securing the hard drive and processor fan assembly.

    • Remove the hard drive and processor fan assembly.

  4. Twentieth Anniversary Mac Teardown: 步骤 4 中的图像 1,1
    • Remove the two T6 Torx screws securing the A/V input board.

    • Remove the A/V Input board

  5. Twentieth Anniversary Mac Teardown: 步骤 5 中的图像 1,1
    • Remove the white plastic shield

    • Remove the T6 torx screw securing the logic board to the frame.

  6. Twentieth Anniversary Mac Teardown: 步骤 6 中的图像 1,2 Twentieth Anniversary Mac Teardown: 步骤 6 中的图像 2,2
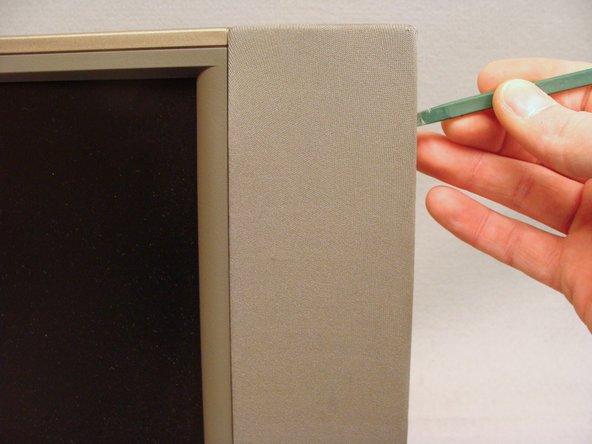
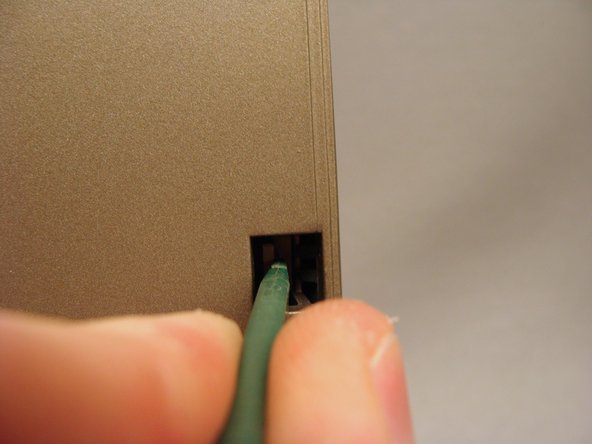
    • Turn the TAM around with the front facing you.

    • Use a spudger to gently loosen the speaker covers from their press-fit snaps. Remove the speaker covers.

  7. Twentieth Anniversary Mac Teardown: 步骤 7 中的图像 1,1
    • Remove the six T8 torx screws securing the front case to the rear case.

  8. Twentieth Anniversary Mac Teardown: 步骤 8 中的图像 1,3 Twentieth Anniversary Mac Teardown: 步骤 8 中的图像 2,3 Twentieth Anniversary Mac Teardown: 步骤 8 中的图像 3,3
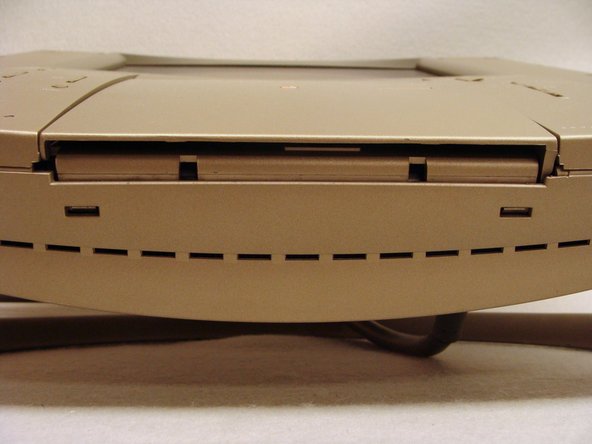
    • Gently pull the tabs toward the center to release the latches hold the front and back together. These tabs are fragile but release easily. Use caution.

    • Lean the top forward and lift up to pull the front case from it's bottom latches.

    • DO NOT TRY TO REMOVE THE FRONT CASE. It is still connected to the back case by several wires and cables.

  9. Twentieth Anniversary Mac Teardown: 步骤 9 中的图像 1,3 Twentieth Anniversary Mac Teardown: 步骤 9 中的图像 2,3 Twentieth Anniversary Mac Teardown: 步骤 9 中的图像 3,3
    • Disconnect the pink and white backlight inverter cable and the black and white right speaker cable from behind the floppy disk drive on the right side.

    • On the left side, disconnect the 50-pin SCSI ribbon cable, analog audio cable and power cable from the CD-ROM drive.

    • Disconnect the black and white left speaker cable.

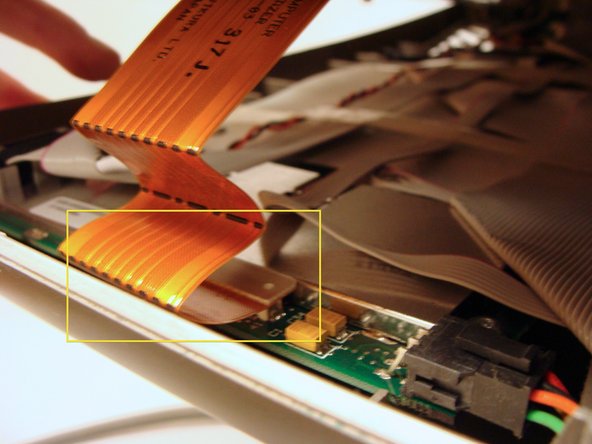
    • Disconnect the flat, orange display data cable.

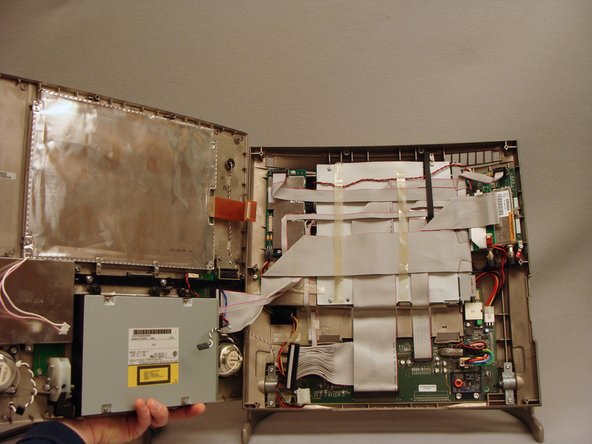
    • Open the top case to the left like a book. There will be one more 50-pin cable to disconnect from the front control panel board.

  10. Twentieth Anniversary Mac Teardown: 步骤 10 中的图像 1,1
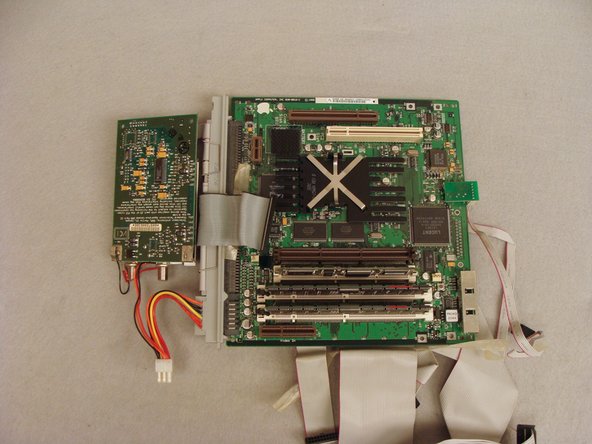
    • The easiest method to remove the logic board is to remove it with the tuner card and cabling.

    • Disconnect the five cables illustrated.

  11. Twentieth Anniversary Mac Teardown: 步骤 11 中的图像 1,1
    • Remove the T10 torx screw and extract the stiff wire cable brace from the left side

  12. Twentieth Anniversary Mac Teardown: 步骤 12 中的图像 1,1
    • Carefully peel back the tape securing the cables to the white, plastic logic board cover. Pull the cables back to reveal the back side of the logic board.

    • Remove the five T10 screws holding the logic and tuner boards to the back case.

  13. Twentieth Anniversary Mac Teardown: 步骤 13 中的图像 1,3 Twentieth Anniversary Mac Teardown: 步骤 13 中的图像 2,3 Twentieth Anniversary Mac Teardown: 步骤 13 中的图像 3,3
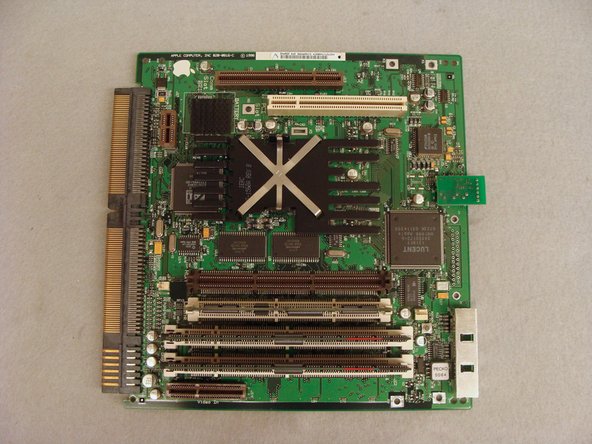
    • Lift the logic board from the left edge then straight up to remove it from the rear case.

    • The logic board slides out of the cabling connector.

结论

To reassemble your device, follow these instructions in reverse order.

7等其他人完成本指南。

Dylan

于02/04/13注册

511 声望

撰写一个指南

4条评论

Hi,

One of the member of my Forum is looking for the Bose subwoofer including the power cable. Have you an idee on where could he find it ?

Thx.

Raziel

vitalisfrance - 回复

It's missing the step to remove the two torx screws on the upper back side, below the cover with all the holes, after Step 5

Deagol - 回复

Dose anybody know what goes in the top-most chip slot that is empty? Is that for an L2 Cache chip?

garo211 - 回复

To echo the comment from 2014, i just performed this guide and there is a critical step missing between steps 6 & 7. The small plastic grille at the top rear needs to be removed; There are two tabs at the bottom and two on the sides. Flex it to remove. Then remove the two visible torx screws to release the top.

coryheisterkamp - 回复

添加评论

浏览统计数据:

过去 24 小时: 3

过去 7 天: 9

过去 30 天: 43

总计 10,946