跳转到主内容

你所需要的

这个拆解是不是维修指南。 要维修你的的Tungsten E,请使用我们的维修手册

  1. Tungsten E Teardown, Tungsten E Teardown: 步骤 1 中的图像 1,3 Tungsten E Teardown, Tungsten E Teardown: 步骤 1 中的图像 2,3 Tungsten E Teardown, Tungsten E Teardown: 步骤 1 中的图像 3,3
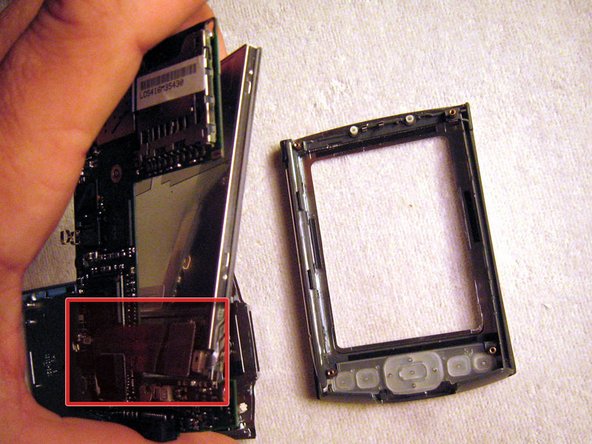
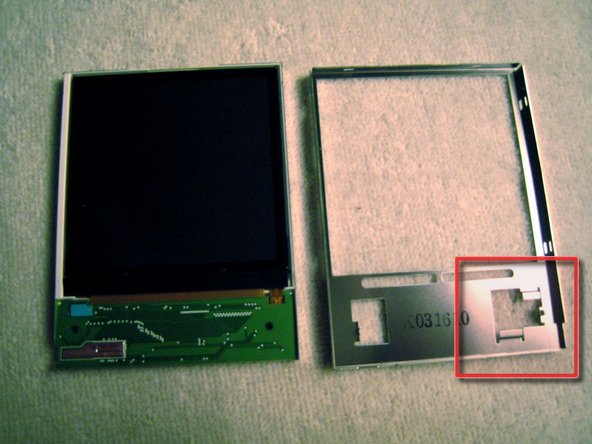
    • There are quite a few parts to keep track of. While many of these parts will easily snap back into place, there are several that result in "oops" and will probably make your Palm useless. Proceed with caution!!

  2. Tungsten E Teardown: 步骤 2 中的图像 1,3 Tungsten E Teardown: 步骤 2 中的图像 2,3 Tungsten E Teardown: 步骤 2 中的图像 3,3
    在这个步骤中使用的工具:
    T6 Torx Screwdriver
    $9.99
    购买
    • There are four T6 screws on the backside of the Palm which must be removed for access into the inner workings. The tool is a T6 screwdriver, available in the parts store. Either purchased separately as the T6 Torx screwdriver or as a kit in the 20 Piece Bit Driver Kit.

  3. Tungsten E Teardown: 步骤 3 中的图像 1,3 Tungsten E Teardown: 步骤 3 中的图像 2,3 Tungsten E Teardown: 步骤 3 中的图像 3,3
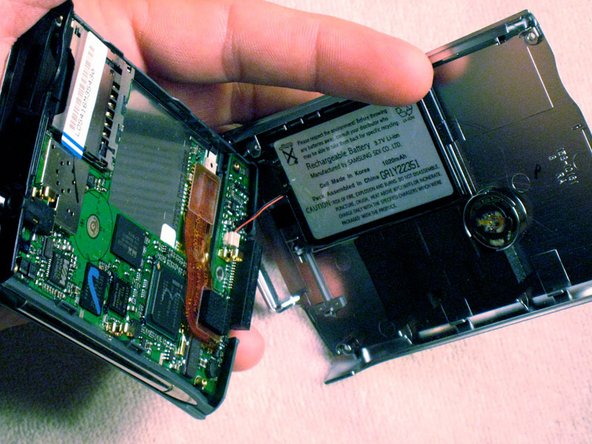
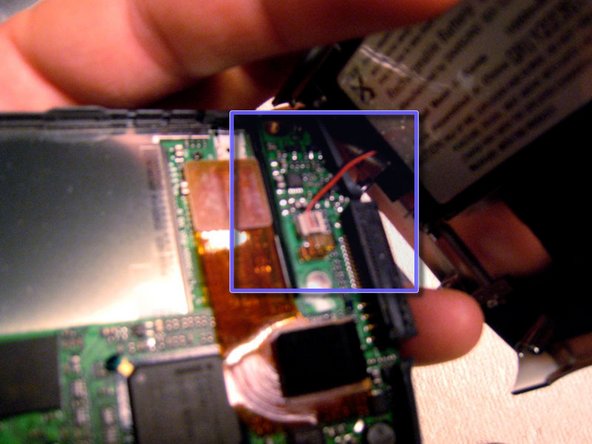
    • To detach the back cover use your fingernail to gently pry the top edge. It will come apart like a clamshell. Be careful for the red and black cord attaching the two pieces. This is the battery cable. Use your fingers to unclip the cable connector from the circuit board. The battery is glued to the back cover.

  4. Tungsten E Teardown: 步骤 4 中的图像 1,3 Tungsten E Teardown: 步骤 4 中的图像 2,3 Tungsten E Teardown: 步骤 4 中的图像 3,3
    • The back panel has been removed, note the small red rectangle which highlights the battery terminal. The circuit board and the screen can now be separated. They are connected by the brownish flat cable which is clipped into the clippydohah on the screen. Unclip and proceed.

  5. Tungsten E Teardown: 步骤 5 中的图像 1,1
    • Seen in this photo is the clear keypad. You might want to clean this off if you've spilled a soda on it or otherwise got it sticky.

  6. Tungsten E Teardown: 步骤 6 中的图像 1,2 Tungsten E Teardown: 步骤 6 中的图像 2,2
    • The screen is sandwiched in a metal case. It didn't seem clipped together but it was a snug fit. I pushed on the circuit board through the cutouts in the metal to pry the pieces apart.

  7. Tungsten E Teardown: 步骤 7 中的图像 1,1
    • The touchscreen part of the screen assembly is glued to the LCD panel. It will peel off. Notice the cable connecting the two. It pulled out and I couldn't figure out how to make it stay again. Pulling out is NOT a good method!!!

  8. Tungsten E Teardown: 步骤 8 中的图像 1,3 Tungsten E Teardown: 步骤 8 中的图像 2,3 Tungsten E Teardown: 步骤 8 中的图像 3,3
    • There are about 6 layers which make up the screen. A clear hard plastic, a shiny flimsy opaque one, a polorizing film, and a really nifty one that either magnifies or reflects depending on the lighting.

  9. Tungsten E Teardown: 步骤 9 中的图像 1,3 Tungsten E Teardown: 步骤 9 中的图像 2,3 Tungsten E Teardown: 步骤 9 中的图像 3,3
    • fun with the films

  10. Tungsten E Teardown: 步骤 10 中的图像 1,3 Tungsten E Teardown: 步骤 10 中的图像 2,3 Tungsten E Teardown: 步骤 10 中的图像 3,3
    • more fun with the films and a shot of the screen.

  11. Tungsten E Teardown: 步骤 11 中的图像 1,1
    • The final discombobulationess of fully non-functioning bits and pieces. The sum of all its parts was never as purdy. To the recycle bin. Bye bye!!

0条评论

添加评论

浏览统计数据:

过去 24 小时: 0

过去 7 天: 1

过去 30 天: 3

总计 9,299