简介
Because of a recent problem of my earbuds no longer charging when I put them inside of the charging case and Anker's main means of repair being just sending another refurbished pair of earbuds (which had the same problem after only a few weeks) I decided to open up one of the charging cases myself.
As I do not really know what solved the problem, opening everything up and putting things back together did the trick for me (twice actually. I repaired my originally broken one, and the refurbished broken one Anker sent me). I'm pretty sure it was the two charcing pins of the bottom circuit board that caused the problem. I used the teardown to fix my problem to make my first ever ifixit guide.
你所需要的
-
-
Jimmy a pick between the inner and outer casing as depicted on the picture. Carefully use it as a bit of a lever to lift the inner casing a little. A sturdier item is required.
-
-
-
Once loosened a little, you can use the holes (as marked on the image) next to the magnets and the outer case as a lever to lift the inner case out of the outer case. You should be able to to fully seperate outer and inner case.
-
-
-
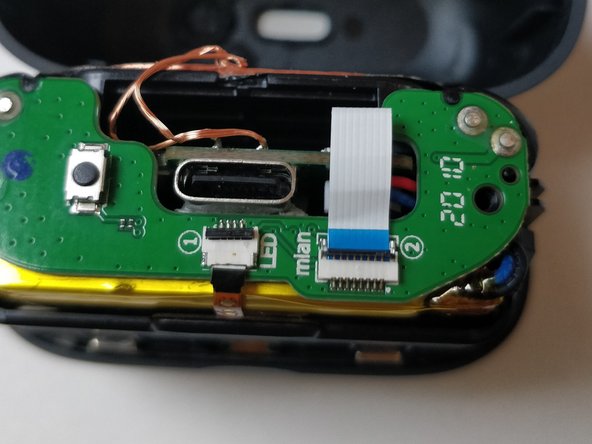
Remove the two screws of the bottom print plate using a phillips #00 screwdriver
-
-
-
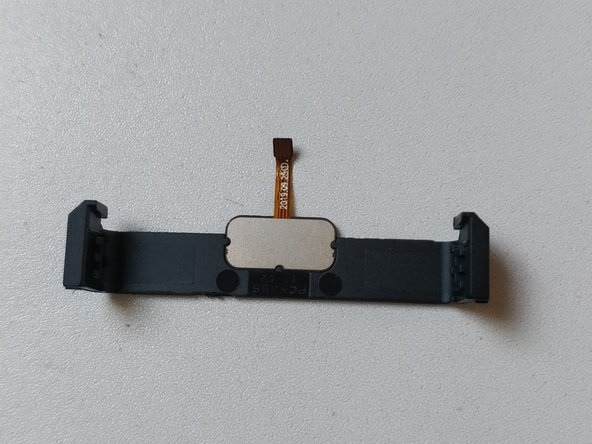
Lift the black plates and remove the connection to the LED (small one with black end) and the connection to the main circuit (big one with blue end) using tweezers
-
-
-
-
Remove the circuit board by placing a spudger or pick between the circuit board and casing and lifting the circuit board free from the case
-
-
-
You can easily remove the LED strip by wedging a pick between one of the sides of the strip and lift it out of the case
-
-
-
This one easily slides downwards. Just apply some gentle lever action with a pick, tweezer or spudger
-
-
-
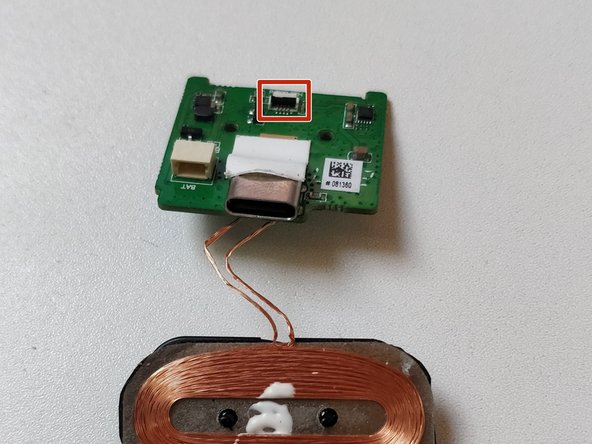
Remove the battery connector from the main circuit board using a spudger or a pick
-
-
-
Remove the two phillips #00 screws from the main circuit board
-
There is a connector cable that needs to be removed from the print plate. This can be removed by gently pulling out the main circuit board from the inner case
-


10条评论
This helped me fix my Liberty air pro 2 case. I think most likely the battery connector was lose. Maybe it was caused by the case falling.
I wasn't as lucky. I couldn't find anything wrong, that is, loose or damaged. Reassembly didn't help. But I appreciate your clear guide.
Please can you help me one of my ear plugs is not connecting to the phone
Have you tried the earplugs pairing mode? Put the earplugs in the charging case and keep the button at the bottom of the case pressed in. This should start pairing mode.