A general guide to takedown and disassemble the PlayStation 2 Slimline. This will give the user access to a number of internal components such as the motherboard, the optical drive, the cooling fan, and hard drive, among others.
这个拆解是不是 维修指南。 要维修你的的PlayStation 2 Slimline,请使用我们的维修手册 。
On a flat working surface, flip the PlayStation 2 Slimline so that the bottom side is facing up.
Remove the covers over the screws, circled in red on the second image.
Take a Phillip's #1 screwdriver and remove the five screws circled in red on the second image.
You will have to remove the "Do Not Void" seal in order to remove the last screw.
Make sure you haven't forgotten the screw under the "Do Not Void" seal.
Take a metal spudger and separate the upper half of the chasis from the lower half.
For later models the DVD drive assembly is not screwed in and will fall off if you open it upside down.
With the chassis open you can see the motherboard and its attachments.
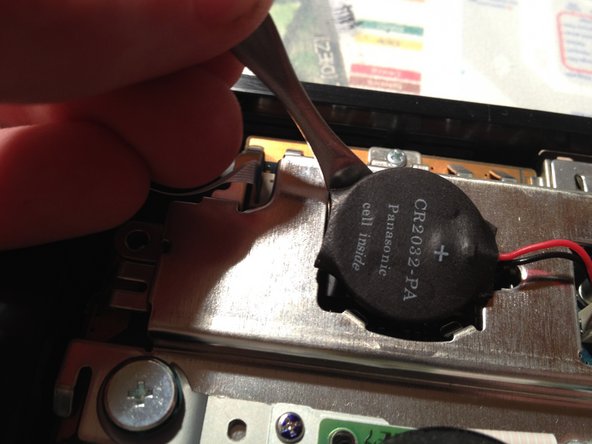
Identify the battery, then use a spudger to pry it out. Disconnect the battery from the motherboard with your hands.
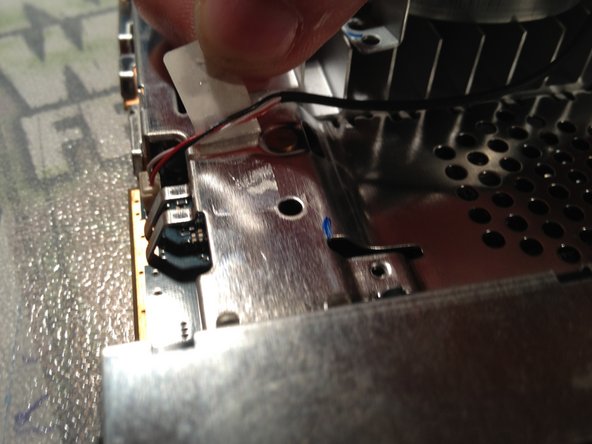
Gently disconnect the three ribbon cables.
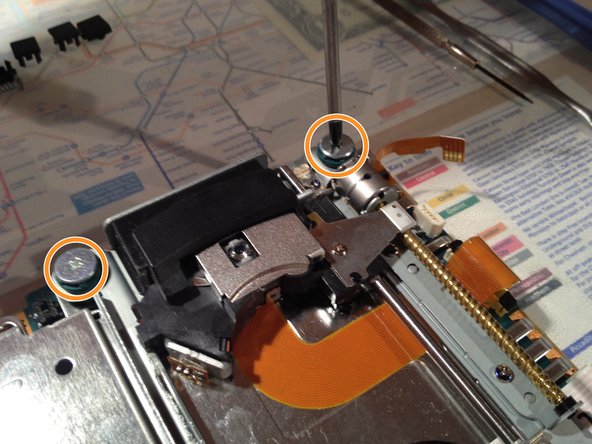
Take a Phillips #1 screwdriver and remove the four screws on the optical drive.
Two of the screws can't be seen on the picture, they are located on the opisite side from the visable ones.
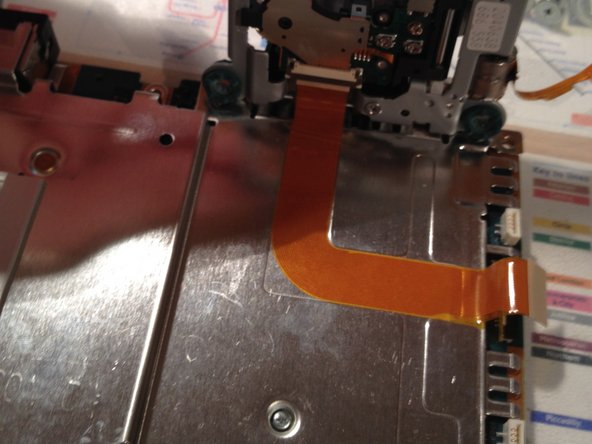
Pull up the optical drive and carefully peel the flex cable, attached underneath the drive, from the metal plate.
Remove the four screws marked on the picture. These are located on the bottom side of the motherboard.
Then flip the motherboard back over and remove the two rating screws on the upside.
Now both metal plates should be ready to remove.
Remove the metal plate from the bottom side of the motherboard.
Now everything should be disconnected and you successfully torn your PlayStation 2 Slimline down.
To reassemble, follow these steps in reverse.
嵌入本指南
选择一个尺寸并复制下面的代码,将本指南作为一个小插件嵌入到你的网站/论坛中。
单个步骤
完整指南
小——600像素
中——800像素
大——1200像素
预览