简介
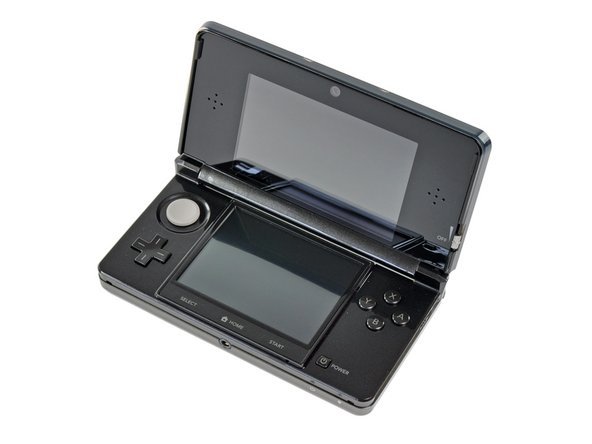
虽然3DS直到3月27号才在美国发布,但早在2月26号,3DS就在日本亮相,我们从这台日版3DS上获取了一些关于3DS的信息,并了解了他如此火爆的原因。立刻加入我们,一起看看任天堂全新硬件内部的样子。
你所需要的
-
-
来自太阳升起的地方的那个令人期待已久的小设备——任天堂3DS,它的质感令人非常惊喜
-
拥有DS家族最新的外观
-
裸眼3D的上屏(唉
-
可用于游戏和摄影的双摄(领先于iPhone!)
-
“圆盘”摇杆
-
IR接口
-
金属触点
-
修改了开始/选择按钮,增加了主页按钮
-
-
-
3D调节滑杆。通过上下滑动来选择3D显示效果的深度。
-
3DS的上屏幕通过视差效应来显示3D图像。上屏幕LCD中的一层结构可以根据3D调节滑杆的位置让双眼看到略微不同的画面。当从推荐的距离观看时,画面就会产生3D效果。
-
任天堂并非第一次尝试3D游戏。Virtual Boy曾经用超酷的技术实现类似的3D效果,但当时并未获得较好的评价。
-
-
-
这块 3.7V 1300mAh 5Wh 的锂离子电池仅仅可以提供3到5小时的游戏时长。3D游戏体验伴随着减少续航的代价。即便是游玩传统DS游戏,3DS也只能坚持5到8小时。
-
更快的处理器,上屏幕的双LCD元件(通过视差效应提供3D效果),以及对硬件要求更高的软件,都是造成电池续航减少的因素。
-
考虑到电池续航较短,任天堂为3DS提供充电底座,以便充电。根据任天堂的数据,充满电需要3.5小时。
-
-
-
-
用我们值得信赖的54合一螺丝刀套组卸下几个Phillips螺丝之后,整个底部外壳可以被取下。
-
取下底部外壳之后,我们可以一览主板及其连接的部件。摇杆和SD卡读卡器位于独立的小板上,大幅简化个别部件损坏之后的维修工作。
These screws strip INCREDIBLY easily. PH00 works, but you need to press down fairly hard and sorta jerk the screwdriver around a few degrees at a time. Even after working this out (by stripping the first one) I accidentally stripped the next-to-last screw I was removing, requiring me to cut the screw well.
Another vote for using a PH000 bit for the smaller internal screws, it is a much better fit. Apply downward pressure to the bit as you turn.
Matt Cooke - 回复
what are each ribbon cables on this bottom? the one behind the battery broke and i dont know if its worth replacing, ds works fine without
sonic sega - 回复
-
-
-
继续拆解,下一步取下IR小板。
-
目前还不清楚3DS会如何使用红外线通信功能,但是我们猜测3DS会把它用在某种面对面通信之上。
-
IR控制芯片由NXP制造,上面刻有印记:
-
S750 0803 TSD031C
The guide skims over this part - though it's one of the most important.
-
The speaker ribbon cable (first picture, lower left, topmost cable/smallest of the 3 ribbons in this area) connects to the mobo goldteeth facing away from keyboard (damage/improper assembly will result in a non-bootable 3ds that has the power LED flash for less than a second before turning off). The white line shows where a fold should be.
-
The camera cable (directly underneath speaker cable, largest of the 3 ribbon cables) connects with goldteeth facing the mobo.
The top LCD (non-touchscreen) cable (opposite side of mobo, medium in width) connects with goldteeth away from mobo. This should be the last cable removed in disassembly, and the first reattached.
-
If you plan on removing the top part of the 3ds, note of how the 3 cables are oriented (what direction goldteeth face) and layered (which cable is on top of which cable). Doing this incorrectly will likely result in cables not reaching where they need to go (see step 18).
Removing the cables must come after step 13 (step 12 if you fudge things) - but the pictures in step 11 are better suited to showing cable order.
Tai -
-
-
-
摇杆的底部紧挨着SD卡插槽,两个部件都可以轻松取下。
-
这是任天堂有史以来第一次在掌机上使用不是十字键的方向键,而索尼在2004年末推出第一代PSP时就已使用模拟摇杆。
-
每台3DS都配有一张2GB得SD卡。如果你需要拍摄大量3D照片,或者从 Nintendo eShop 购买数字版游戏,你也可以升级成更大容量的SD或SDHC卡。
on some models i think the sd slot is soldered on to the mother board so be careful
-
-
-
3DS主板上的芯片(点击此处预览高清版本)
-
任天堂 1048 0H ARM 处理器
-
富士通 MB82M8080-07L 128MB FC-RAM
-
东芝 THGBM2G3P1FBAI8 2 GB NAND 闪存
-
德州仪器 PAIC3010B 0AA37DW
-
UC CTR 041KM73 KG10
-
Invensense ITG-3270 MEMS 陀螺仪
-
ST Micro 2048 33DH X1MAQ 加速度计 型号 LIS331DH
The card reader pad to the bottom right of the red chip. Can that be jumper wired to the trace line, if that pad was ripped off when removing the card reader??
-
-
-
旧款DS机型使用四个橡胶垫盖住前屏幕边框的螺丝,但任天堂在新机器上选择更优美的做法:将前面板粘贴在边框上来隐藏螺丝。
-
在 热风枪 和 撬开工具 的帮助下,上屏幕的螺丝暴露出来。
-
-
-
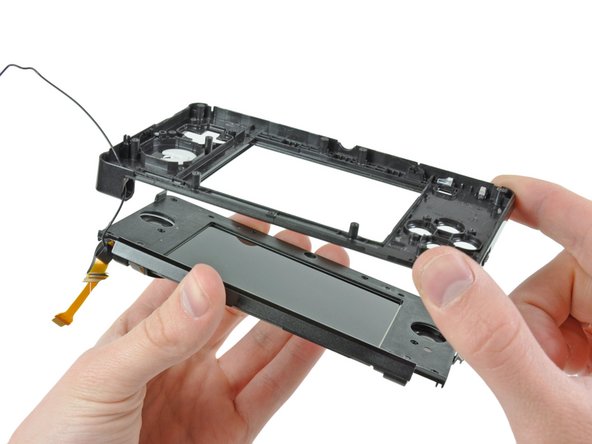
卸下六颗Phillips螺丝之后,后边框从屏幕上抬起,露出扬声器,Wi-Fi天线,以及上LCD屏幕。
-
为了继续拆解,我们必须分离转轴,并从空心的转轴之中取出电缆线。
-
任天堂无疑使用了机器自动装配,来将上屏幕和相机的电缆线穿过细小的转轴。
This is not shown well - but to separate the top part of the 3DS from the bottom (sorta as shown in step 21 but not done in step 18) - refer to step 18's picture of the circuitry, LCD, and speakers. Be careful, damaging a cable here = potentially dead 3DS.
-
First, the 3 ribbon cables from step 11 must fed through a plastic slot in the bottom part (where the cutouts of the d-pad + buttons are), then GENTLY coiled sideways like an ice cream cone through small hollow silver cylinder (that's narrower than the cables are wide) and through a cylinder on the top part (where the non-touchscreen is), pictured in step 18 near where the brown/black ribbon cables intersect.
-
On the opposite side, left of the notification LED, there is a removable silver dowel (solid cylinder). With a T-pin (or a sturdy needle), pry the dowel to the left, "toward" the LCD. There is a little notch on the dowel that will help. Once the dowel is fully to the left, the two halves of the 3DS can be separated, and the dowel removed.
-
-
-
立体声喇叭提供了
浑厚低音和清脆高音在便携设备上合情合理的微弱声响。 -
这些喇叭不仅播放游戏中的声音;任天堂3DS支持播放MP3和AAC文件,但我们怀疑在可见的未来它是否会替代掉人们的iPod。
-
喇叭的排线也连接着调节3D景深的滑杆,以及双摄像头的状态指示灯。
Whaere can i get this my 3D slider is broken but I wol dbuy from here but ifixet dos not have it?
AppleTopic - 回复
-
-
-
在拆掉喇叭之后,上屏幕LCD组件即可被拆下。
-
有三根排线连接到这块屏幕上 -- 提供画面信号,控制视差障壁来让3DS游戏产生3D效果。
-
Nikkei Electronics' Tech-On 的朋友对这块LCD屏幕做了更深入的拆解研究,并找到了六个分离的的光学组件。
-


18条评论
Lack of details : "Removing the remaining pesky screws securing the motherboard to the lower case." (where and how many?)
********Note: If your top or bottom screen was working before disassembly and doesn't work after reassembly, then it's likely that the connector is loose or dirty or damaged or not clipped or PLACED UPSIDE-DOWN. I had this issue with my Super3DS XL(2015 New3DS XL) and it turns out that the reason why my top screen wasn't working after put together, was because I had the top LCD connector upside-down. After I correctly put the connector in, It worked again! :) ********
Thanks for great guide - I could'nt find the access to the screws on the top screen until I read your guide.
Only problem I had was that I rounded out 2 of the screws in Step 9 and had to carefully drill the heads off and remove the shanks later. So I strongly recommend using the correct and good quality screwdriver as these are very tight
********Note: If your top or bottom screen was working before disassembly and doesn't work after reassembly, then it's likely that the connector is loose or dirty or damaged or not clipped or PLACED UPSIDE-DOWN. I had this issue with my Super3DS XL(2015 New3DS XL) and it turns out that the reason why my top screen wasn't working after put together, was because I had the top LCD connector upside-down. After I correctly put the connector in, It worked again! :) *********
Where does that black plastic piece directly above the blue SD card go? I can't seem to find a picture of it in place
Hey there! This is a teardown, not a real repair guide, you should check out the 3DS repair manual! We don't have a guide for replacing the reader itself, as that requires some very specialized soldering, but you can follow the motherboard replacement guide, and if you are a microsolderer, you can replace the reader itself! Best of luck!
Is there a similar guide for the 3DS XL? I am replacing the middle part of the case after the hinge broke, and it seems that I have to pull the whole thing to pieces just to replace it...
Hey there! This is a teardown, not a real repair guide. I'm not sure which middle piece you're looking to replace, but we have lots of 3DS XL repair manuals on its device page!
@sam I've tried several of these manuals, and as helpful as they are, none of them separate the hinge from the 3DS XL, what I need to do to replace the top-part of the lower half of the case, where it has split from the notification (StreetPass/SpotPass) light to the Wifi connection light, and every time the 3DS XL is closed, the crack gets bigger.
Hi, I'm going to have to take out the cable from the battery placement that leads to the board to remove static buildup. Is there any way I can do that, like is there any cables that connect to it? I haven't taken the 3DS apart yet.
UPDATE: there was no static, had it looked at by a repair guy. I’ve been looking at the board components, and I’m starting to wonder if the power cable connector is loose or out, if not, the board or other components. While I am at it, figuring out (this may be for a year or so, don’t have a job yet :( ) why my Nintendo is not turning on (replaced the battery, nothing happens), I’m almost considering upgrading the speakers to a higher-quality speaker, if not, at least louder and more efficient. Anyone toyed around upgrading components, and have any advice how to and how not to do it? I would greatly appreciate it, as Nintendo no longer performs repairs on my model (original CTR type)
The stupid screw right below where the battery goes is totally jammed in there and none of my screwdrivers fit it. What do I do I'm so lost
Does anyone know the manufacture and type of the zif connector that is used for the bottom lcd.
NOT the digitiser and power.
For the old 3ds(first)
so my volume slider is broken and the actual slider inside works its just the plastic pice you slide that is in the outside, where can i buy one. now if i need to adjust the volume i have to open it and slide the volume with twisers.
AppleTopic - 回复
I give up on my 3ds, when trying to repair it more components got broken than before.
The power adapter didnt worked, so when exchanging it the replacement broke into half when I put the cover on it. Then when lifting up the cover the conection from curcuit board to sholder button ripped. And then when exchaning the next power adapter and shoulder button. Well both got destroyed, the adapter broke into two parts, and the wire of the button ripped.