跳转到主内容

你所需要的

这个拆解是不是维修指南。 要维修你的的Dell Inspiron 1750,请使用我们的维修手册

  1. Dell Inspiron 1750 Teardown, Battery: 步骤 1 中的图像 1,2 Dell Inspiron 1750 Teardown, Battery: 步骤 1 中的图像 2,2
    • Unplug the laptop before changing the battery to avoid electric shock.

    • Place the laptop on a flat stable surface.

    • Flip the laptop over so the underside is visible.

  2. Dell Inspiron 1750 Teardown: 步骤 2 中的图像 1,2 Dell Inspiron 1750 Teardown: 步骤 2 中的图像 2,2
    • Locate the battery lock switch.

    • Slide the lock switch to the left (away from the lock symbol).

    • Slide the battery out away from the laptop.

  3. Dell Inspiron 1750 Teardown, Dell Inspiron 1750 Teardown: 步骤 3 中的图像 1,1
    • Separate the screws by size and head type. Be sure to keep them in a safe place.

    • Remove the sixteen 2mm Phillips #00 screws from the bottom of the laptop.

    • Remove the two 2mm Phillips #0 screws from the hard drive port.

  4. Dell Inspiron 1750 Teardown: 步骤 4 中的图像 1,3 Dell Inspiron 1750 Teardown: 步骤 4 中的图像 2,3 Dell Inspiron 1750 Teardown: 步骤 4 中的图像 3,3
    • Keep your hand pressed firmly on the back panel to prevent it from falling.

    • Flip the laptop over horizontally and open up the lid.

    • Insert the tip of the plastic opening tool into the upper left corner of the panel.

    • Keeping its tip under the top panel, slide the plastic opening tool around the panel until the panel is completely loose. Next gently remove the panel.

    • Remove the four 2mm Phillips #0 screws at the top of the keyboard.

    • Slide the plastic opening tool around the keyboard until the keyboard is completely loose. Gently remove the keyboard.

  5. Dell Inspiron 1750 Teardown: 步骤 5 中的图像 1,3 Dell Inspiron 1750 Teardown: 步骤 5 中的图像 2,3 Dell Inspiron 1750 Teardown: 步骤 5 中的图像 3,3
    • Do not lift the keyboard completely free to avoid damaging its connections to the laptop interior.

    • Locate the small black latch attached to blue tape.

    • Lift the small latch with your finger and pull the blue tape from its port.

    • Slide the keyboard away from the mousepad and set it aside.

  6. Dell Inspiron 1750 Teardown: 步骤 6 中的图像 1,3 Dell Inspiron 1750 Teardown: 步骤 6 中的图像 2,3 Dell Inspiron 1750 Teardown: 步骤 6 中的图像 3,3
    • Always pull wires from their plastic ends, not their cables, to avoid wire damage.

    • Locate the three wires in the top left corner of the metal panel.

    • Use the spudger to push the two cables out of their ports.

    • Pull the blue tab directly up to remove middle wire.

  7. Dell Inspiron 1750 Teardown: 步骤 7 中的图像 1,2 Dell Inspiron 1750 Teardown: 步骤 7 中的图像 2,2
    • Remove the three 1mm Phillips #00 screws on the metal plate.

    • Lift the black cover and slide the blue tab away from the cover.

  8. Dell Inspiron 1750 Teardown: 步骤 8 中的图像 1,3 Dell Inspiron 1750 Teardown: 步骤 8 中的图像 2,3 Dell Inspiron 1750 Teardown: 步骤 8 中的图像 3,3
    • Always pull wires from their plastic ends, not their cables, to avoid wire damage.

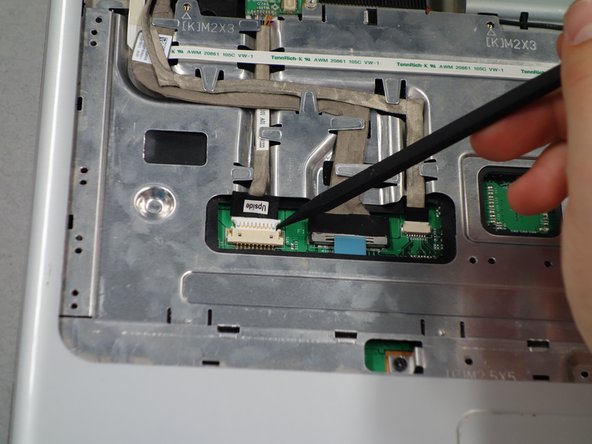
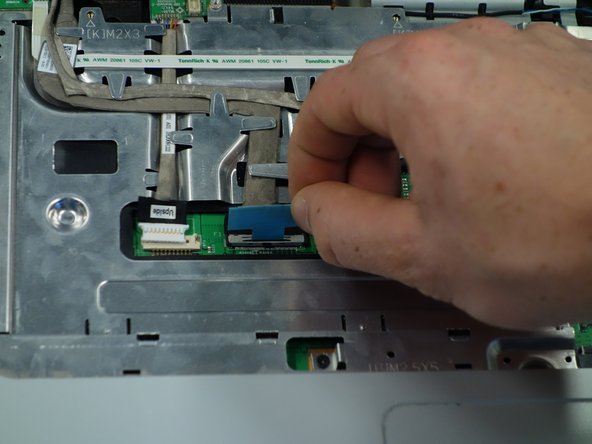
    • Gently remove the three grey wires from the metal tabs.

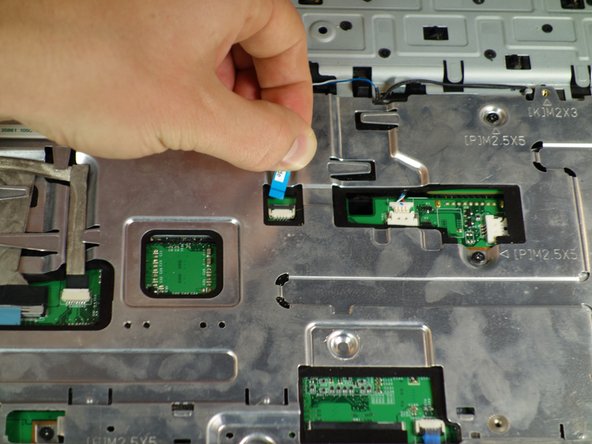
    • Insert the tip of the plastic opening tool into the bottom left corner of the panel.

    • Keeping its tip under the top panel, slide the plastic opening tool around the panel until the panel is completely loose.

    • Gently lift off the top metal panel.

附加文件

Jordan Nedbailo

于04/07/14注册

687 声望

创作了2篇指南

团队

Cal Poly, Team 6-3, Forte Spring 2014 Cal Poly, Team 6-3, Forte Spring 2014 的会员

CPSU-FORTE-S14S6G3

5 名成员

创作了7篇指南

0条评论

添加评论

浏览统计数据:

过去 24 小时: 0

过去 7 天: 1

过去 30 天: 12

总计 20,194