跳转到主内容

这个拆解是不是维修指南。 要维修你的的Brother P-Touch TZe Tape 12mm,请使用我们的维修手册

  1. Brother P-Touch TZe Tape 12mm Teardown, Cartridge Overview: 步骤 1 中的图像 1,1
    • Insert wisdom here.

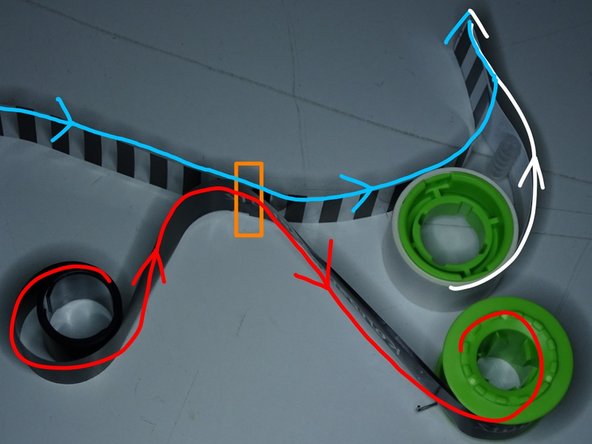
  2. Brother P-Touch TZe Tape 12mm Teardown, Tape Flow: 步骤 2 中的图像 1,1
    • Top clear tape

    • Thermal ink tape

    • White backing with adhesive

    • Thermal printer zone

  3. Brother P-Touch TZe Tape 12mm Teardown, Printing Process: 步骤 3 中的图像 1,3 Brother P-Touch TZe Tape 12mm Teardown, Printing Process: 步骤 3 中的图像 2,3 Brother P-Touch TZe Tape 12mm Teardown, Printing Process: 步骤 3 中的图像 3,3
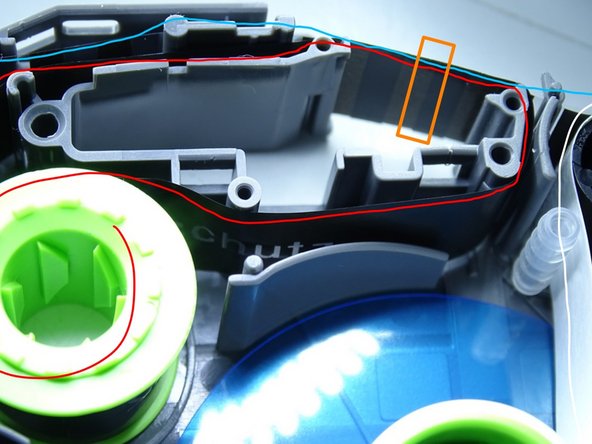
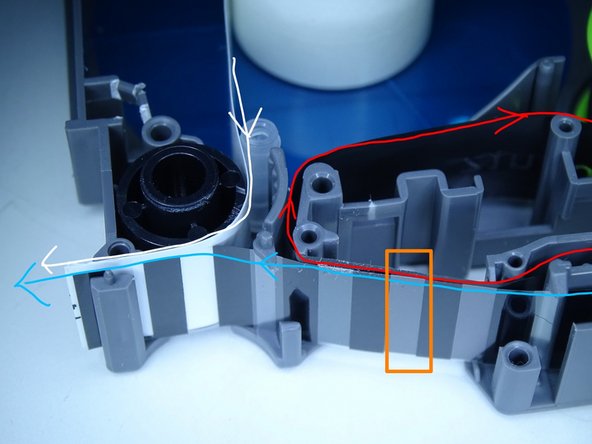
    • The clear top tape (light blue line) is usually completely clear.

    • The tape is empty and the zebra stripes indicates it to the user.

    • The thermal ink tape gets unrolled and again rolled onto another roller.

    • In the printing zone, a single column of heat "pixels" heats the thermal ink (red line) and sticks it to the clear top tape (blue line).

    • The clear top tape than gets laminated with the white backing (white line).

  4. Brother P-Touch TZe Tape 12mm Teardown, Inverted Image on Ink Tape: 步骤 4 中的图像 1,1
    • Since the ink from the printed spots is now on the label and not longer on the ink tape, you can see a inverted image of everything the cartridge ever printed.

    • Keep that in mind when printing sensitive information like passwords or PPI!

  5. Brother P-Touch TZe Tape 12mm Teardown, Resolution: 步骤 5 中的图像 1,2 Brother P-Touch TZe Tape 12mm Teardown, Resolution: 步骤 5 中的图像 2,2
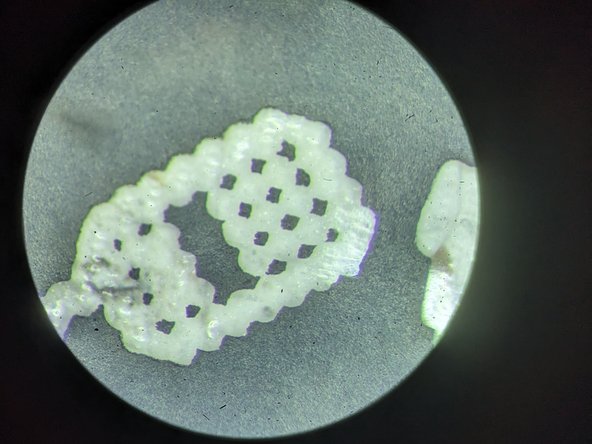
    • The resolution of the text font seems to be lower than the icons (this icon should resemble a old mobile phone).

    • The small dots on the mobile phone are about 180 µm apart.

    • Both images are captured using the same magnification. The image circle has a diameter of approximately 2.5 mm.

Quanten

于05/21/18注册

1,013 声望

创作了5篇指南

0条评论

添加评论

浏览统计数据:

过去 24 小时: 1

过去 7 天: 12

过去 30 天: 84

总计 447