跳转到主内容

why! W650SZ Motherboard Replacement

你所需要的

  1. why! W650SZ Motherboard Replacement, Battery: 步骤 1 中的图像 1,3 why! W650SZ Motherboard Replacement, Battery: 步骤 1 中的图像 2,3 why! W650SZ Motherboard Replacement, Battery: 步骤 1 中的图像 3,3
    • Slide the latch on the right to the unlocked position.

    • Slide the latch on the left to the unlocked position.

    • Remove the battery pack from the slot.

  2. why! W650SZ Motherboard Replacement, why! W650SZ Bottom Cover Replacement: 步骤 2 中的图像 1,3 why! W650SZ Motherboard Replacement, why! W650SZ Bottom Cover Replacement: 步骤 2 中的图像 2,3 why! W650SZ Motherboard Replacement, why! W650SZ Bottom Cover Replacement: 步骤 2 中的图像 3,3
    • With your #0 Philips screwdriver remove the 2 screws from the bottom panel.

    • Now you can remove the bottom cover.

  3. why! W650SZ Motherboard Replacement, Remove the CD/DVD Drive: 步骤 3 中的图像 1,3 why! W650SZ Motherboard Replacement, Remove the CD/DVD Drive: 步骤 3 中的图像 2,3 why! W650SZ Motherboard Replacement, Remove the CD/DVD Drive: 步骤 3 中的图像 3,3
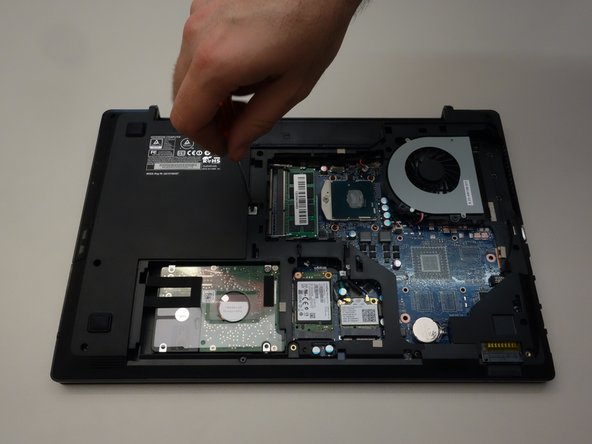
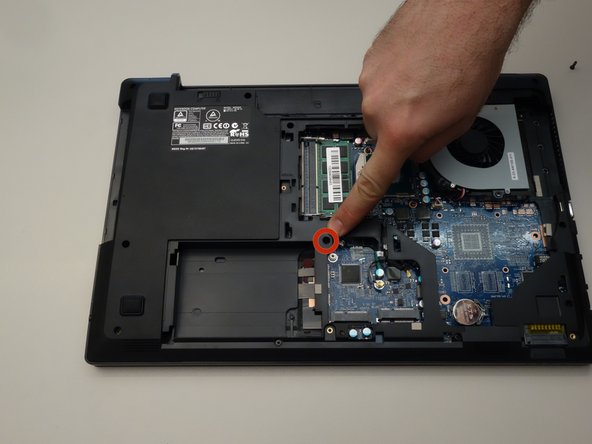
    • Locate the screw securing the CD/DVD drive.

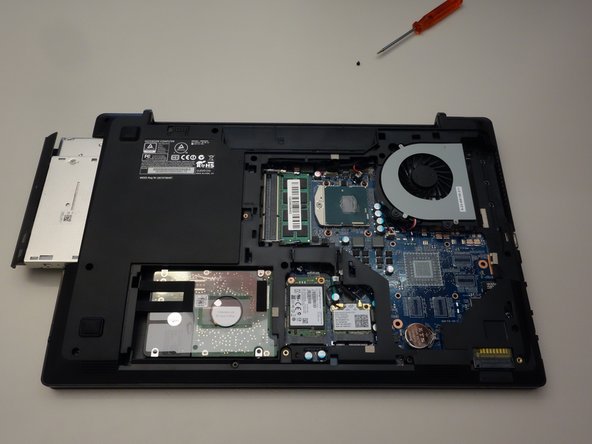
    • Remove the Phillips screw securing the drive.

    • Remove the CD/DVD drive by simply sliding it out from the chassis.

  4. why! W650SZ Motherboard Replacement, Remove the Hard Drive: 步骤 4 中的图像 1,2 why! W650SZ Motherboard Replacement, Remove the Hard Drive: 步骤 4 中的图像 2,2
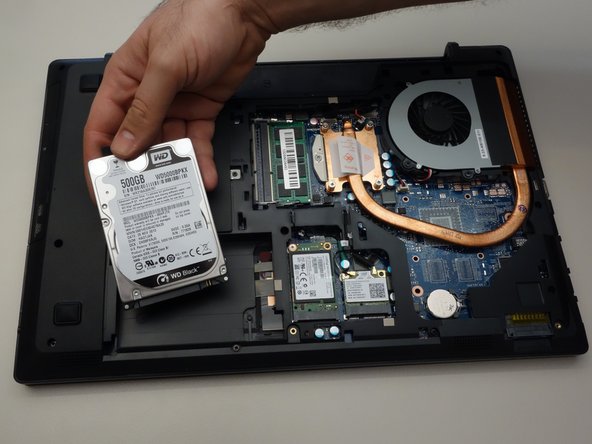
    • Lift out the plastic tab (including the rubber part that holds the HDD in its slot).

    • Slide the drive to the left to disengage the connector then lift to remove the HDD from its SATA3 port.

  5. why! W650SZ Motherboard Replacement, Remove the Solid State Drive (SSD): 步骤 5 中的图像 1,2 why! W650SZ Motherboard Replacement, Remove the Solid State Drive (SSD): 步骤 5 中的图像 2,2
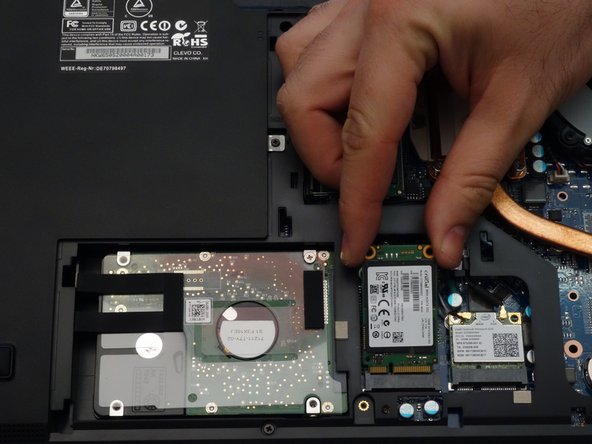
    • Using a Philips screwdriver #0, remove the screw securing the SSD.

    • Lift the end of the SSD slightly and pull it straight out to remove it.

  6. why! W650SZ Motherboard Replacement, Remove the WiFi chipset: 步骤 6 中的图像 1,1
    • Carefully unplug the MAIN and AUX antennas.

    • Remove the retaining screw with a Phillips #0 screwdriver.

    • Lift the chipset slightly and remove it from the connector.

  7. why! W650SZ Motherboard Replacement, Remove the Random Access Memory (RAM): 步骤 7 中的图像 1,1
    • Locate and separate the blade springs that hold the memory module in place.

    • Remove the memory module (RAM).

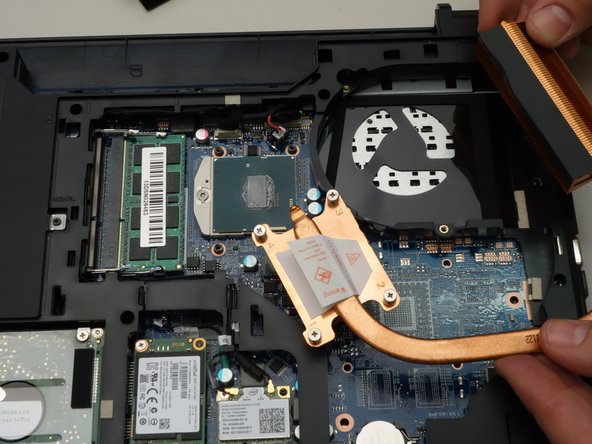
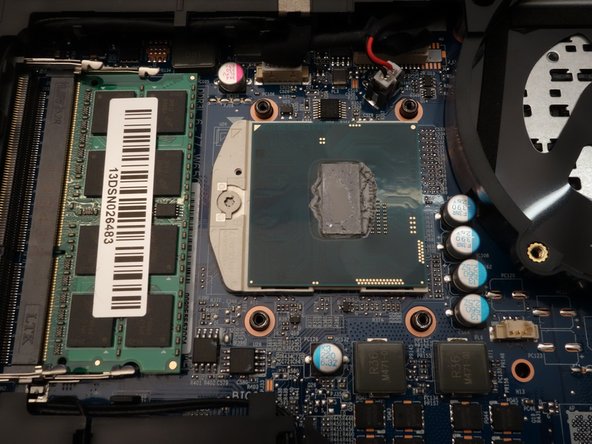
  8. why! W650SZ Motherboard Replacement, Remove the Heat Sink: 步骤 8 中的图像 1,3 why! W650SZ Motherboard Replacement, Remove the Heat Sink: 步骤 8 中的图像 2,3 why! W650SZ Motherboard Replacement, Remove the Heat Sink: 步骤 8 中的图像 3,3
    • Using a Phillips screwdriver, unscrew the four captive screws securing the heatsink to the motherboard.

    • Remove the heatsink.

    • The processor and its retention mechanism are now visible.

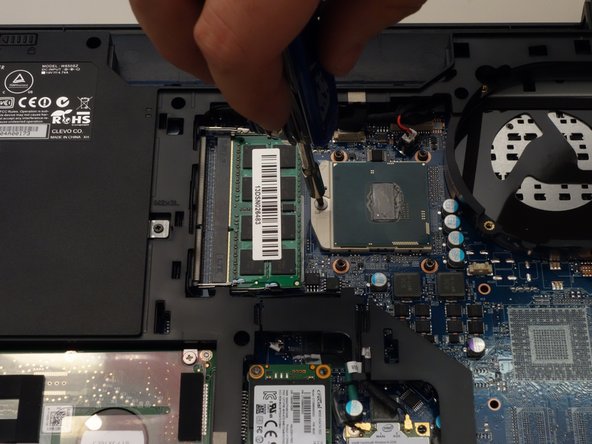
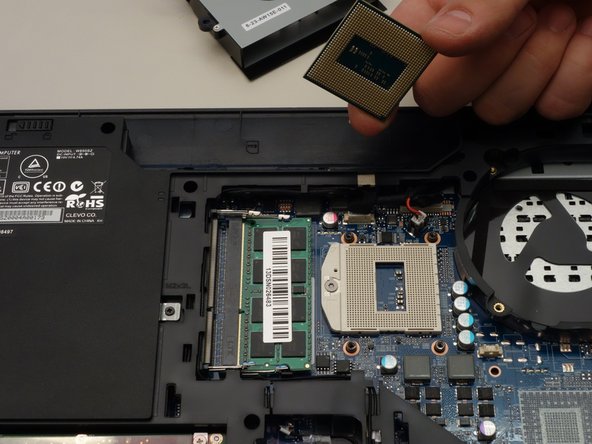
  9. why! W650SZ Motherboard Replacement, Remove the Processor: 步骤 9 中的图像 1,3 why! W650SZ Motherboard Replacement, Remove the Processor: 步骤 9 中的图像 2,3 why! W650SZ Motherboard Replacement, Remove the Processor: 步骤 9 中的图像 3,3
    • Unlock the processor using a small Torx screwdriver by turning the lock 180 degrees counterclockwise

    • Make sure the locking latch is pointing in the opposite direction.

    • You can now carefully remove the processor from its socket.

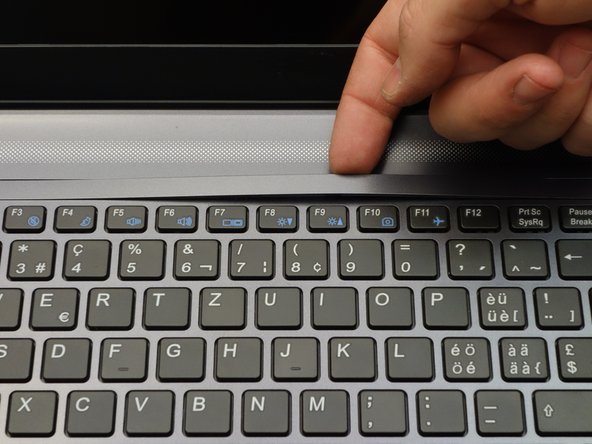
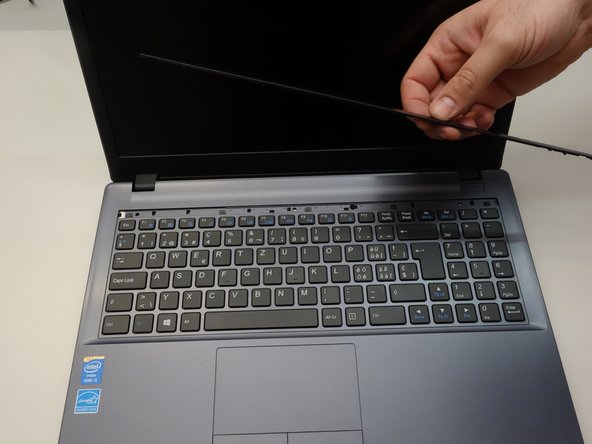
  10. why! W650SZ Motherboard Replacement, Remove the Keyboard: 步骤 10 中的图像 1,3 why! W650SZ Motherboard Replacement, Remove the Keyboard: 步骤 10 中的图像 2,3 why! W650SZ Motherboard Replacement, Remove the Keyboard: 步骤 10 中的图像 3,3
    • Press gently at the points indicated to release the LED cover strip.

    • Turn the laptop over, then lift the LED cover.

    • Remove the LED cover.

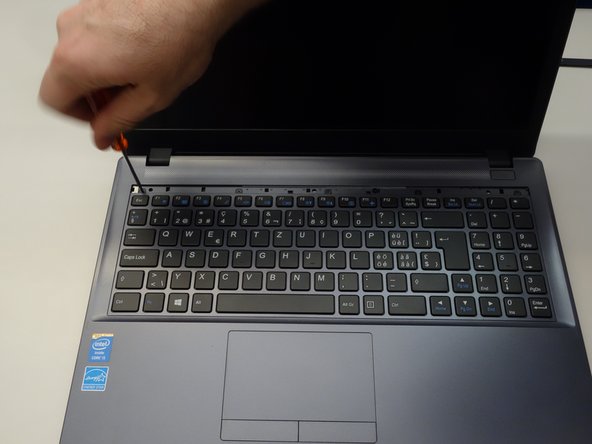
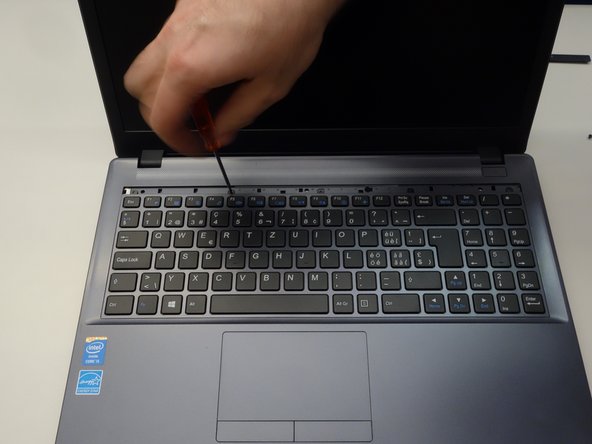
  11. why! W650SZ Motherboard Replacement, Remove Keyboard Screws: 步骤 11 中的图像 1,3 why! W650SZ Motherboard Replacement, Remove Keyboard Screws: 步骤 11 中的图像 2,3 why! W650SZ Motherboard Replacement, Remove Keyboard Screws: 步骤 11 中的图像 3,3
    • The five screws that anchor the keyboard are now visible.

    • Start by removing the first screw.

    • Remove the remaining screws (2-5).

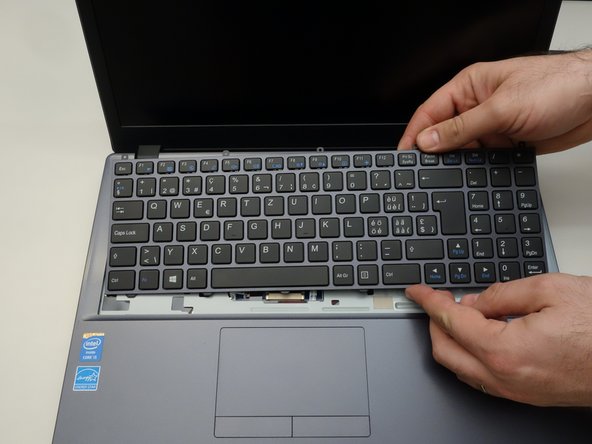
  12. why! W650SZ Motherboard Replacement, Dismount the Keyboard: 步骤 12 中的图像 1,3 why! W650SZ Motherboard Replacement, Dismount the Keyboard: 步骤 12 中的图像 2,3 why! W650SZ Motherboard Replacement, Dismount the Keyboard: 步骤 12 中的图像 3,3
    • Dismount the keyboard from the chassis.

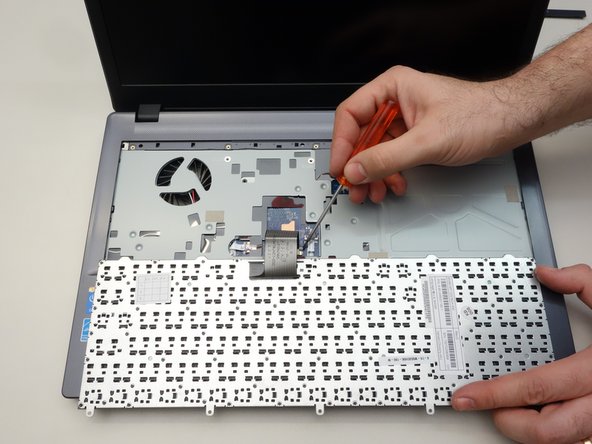
    • Flip the keyboard forward, taking care as it is still connected by a cable to the motherboard.

    • Release the cable latch on the right side of the motherboard connector with a small flat blade screwdriver.

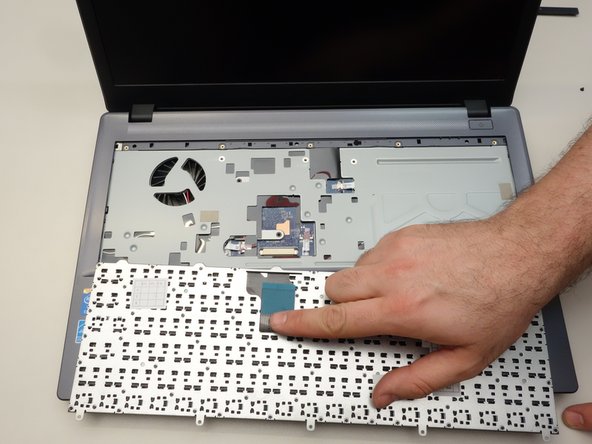
  13. why! W650SZ Motherboard Replacement, Remove the Keyboard: 步骤 13 中的图像 1,3 why! W650SZ Motherboard Replacement, Remove the Keyboard: 步骤 13 中的图像 2,3 why! W650SZ Motherboard Replacement, Remove the Keyboard: 步骤 13 中的图像 3,3
    • Release the cable latch on the left side of the motherboard connector.

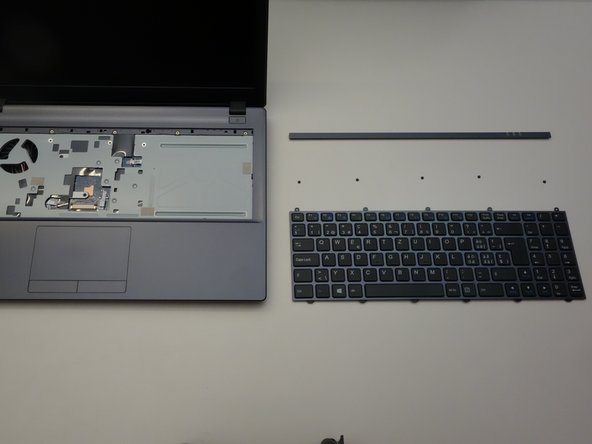
    • Slide the cable straight out from its connector.

    • Remove the keyboard.

  14. why! W650SZ Motherboard Replacement, Motherboard: 步骤 14 中的图像 1,3 why! W650SZ Motherboard Replacement, Motherboard: 步骤 14 中的图像 2,3 why! W650SZ Motherboard Replacement, Motherboard: 步骤 14 中的图像 3,3
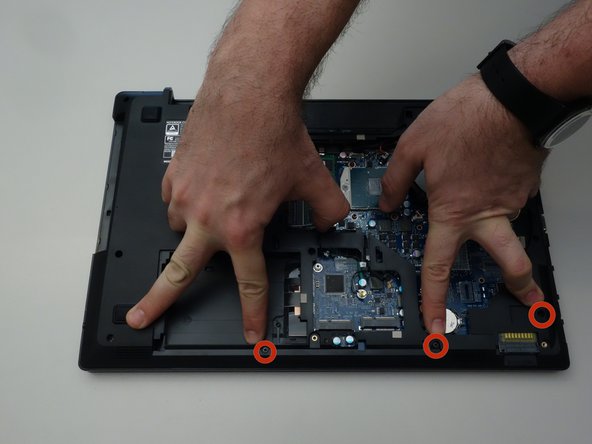
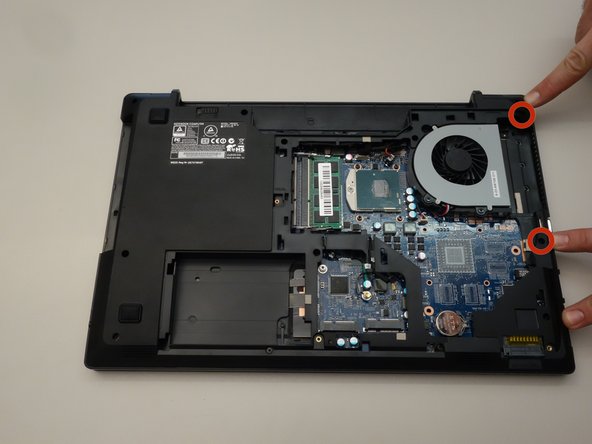
    • To access the motherboard first remove the three screws as shown in the first image of this step.

    • Remove the three screws as shown in the second image of this step.

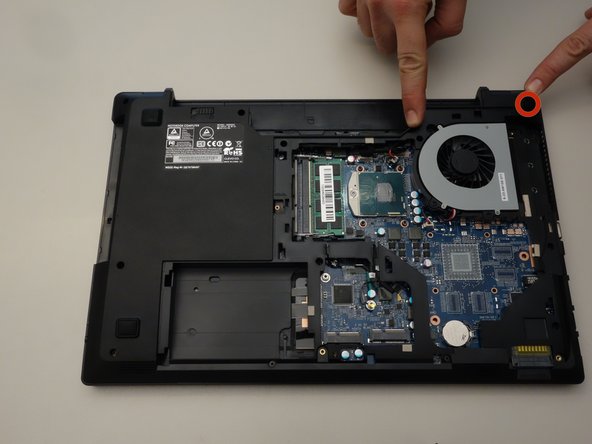
    • Remove the two screws as shown in the third image of this step.

  15. why! W650SZ Motherboard Replacement, Remove Mounting Screws: 步骤 15 中的图像 1,3 why! W650SZ Motherboard Replacement, Remove Mounting Screws: 步骤 15 中的图像 2,3 why! W650SZ Motherboard Replacement, Remove Mounting Screws: 步骤 15 中的图像 3,3
    • Remove the three screws as shown in the first image of this step.

    • Remove the screw as shown in the second image of this step.

    • Remove the last screw as shown in the third image of this step.

  16. why! W650SZ Motherboard Replacement, Motherboard (continued): 步骤 16 中的图像 1,3 why! W650SZ Motherboard Replacement, Motherboard (continued): 步骤 16 中的图像 2,3 why! W650SZ Motherboard Replacement, Motherboard (continued): 步骤 16 中的图像 3,3
    • Of all the screws you just removed the two screws that are longer than the others correspond to the locations shown in the first image of this step.

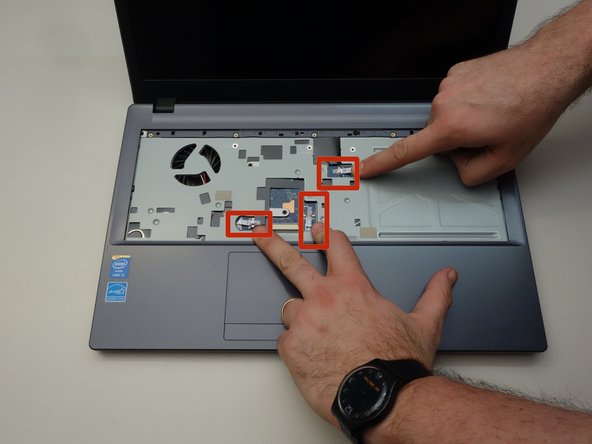
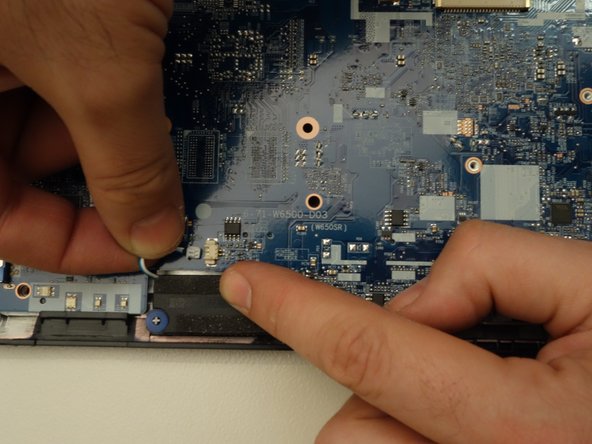
    • Flip the laptop over and locate the three connecting cables as shown in the second image of this step.

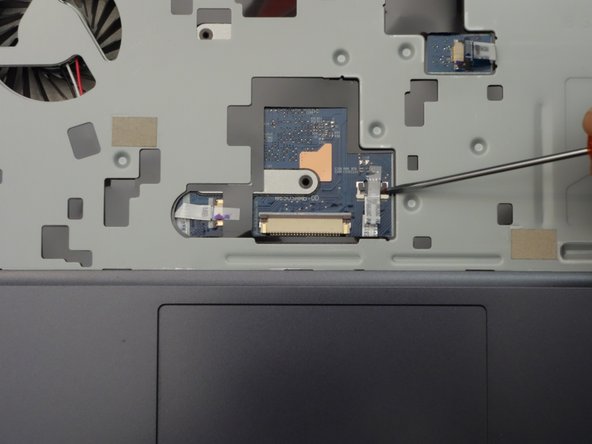
    • Use a small screwdriver to release the latch on the right of the flat cable.

  17. why! W650SZ Motherboard Replacement, Disconnect Cables: 步骤 17 中的图像 1,3 why! W650SZ Motherboard Replacement, Disconnect Cables: 步骤 17 中的图像 2,3 why! W650SZ Motherboard Replacement, Disconnect Cables: 步骤 17 中的图像 3,3
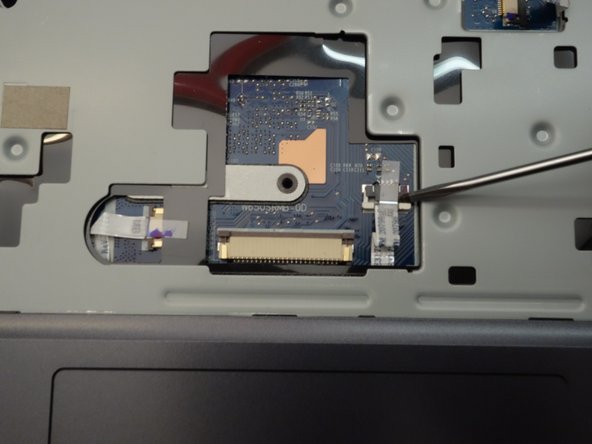
    • Release the lock on the left side of the ribbon cable.

    • Carefully remove the flat cable from its connector.

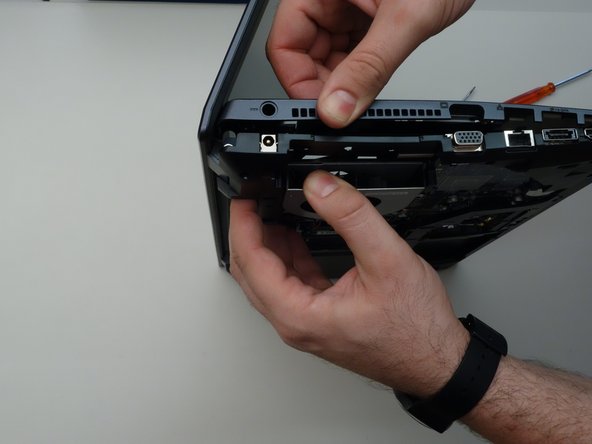
    • Repeat for the other two ribbon cables before you start removing the motherboard top cover.

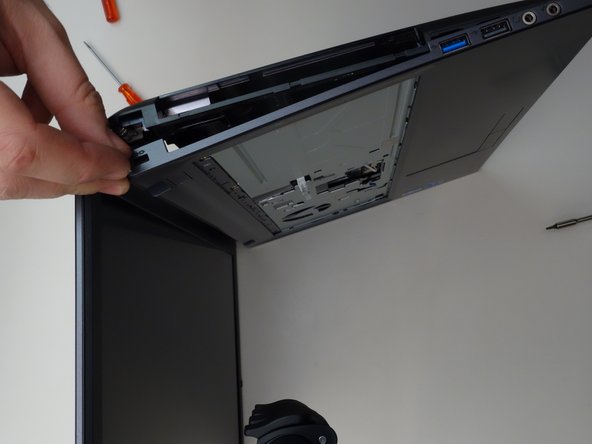
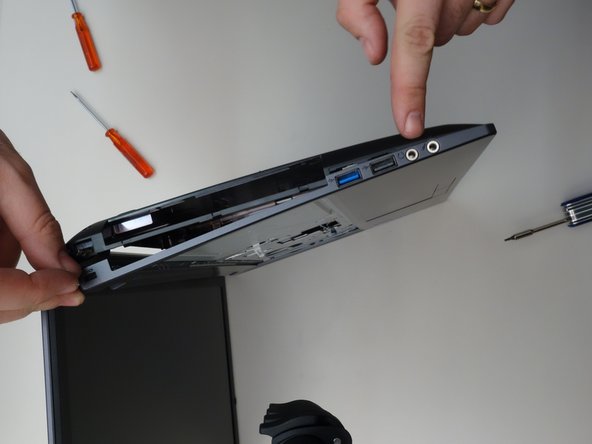
  18. why! W650SZ Motherboard Replacement, Remove the Top Cover: 步骤 18 中的图像 1,3 why! W650SZ Motherboard Replacement, Remove the Top Cover: 步骤 18 中的图像 2,3 why! W650SZ Motherboard Replacement, Remove the Top Cover: 步骤 18 中的图像 3,3
    • To remove the motherboard cover, follow the steps shown in the three images in this step.

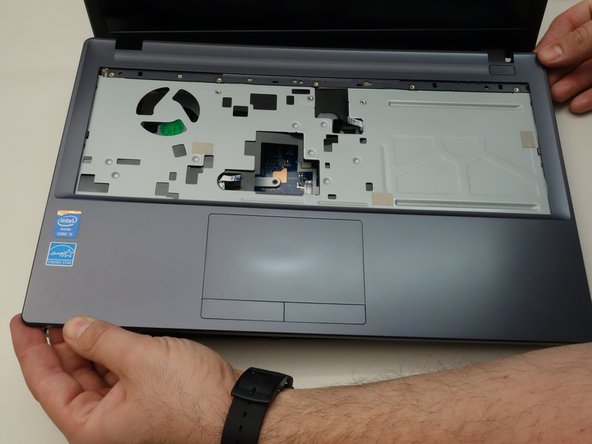
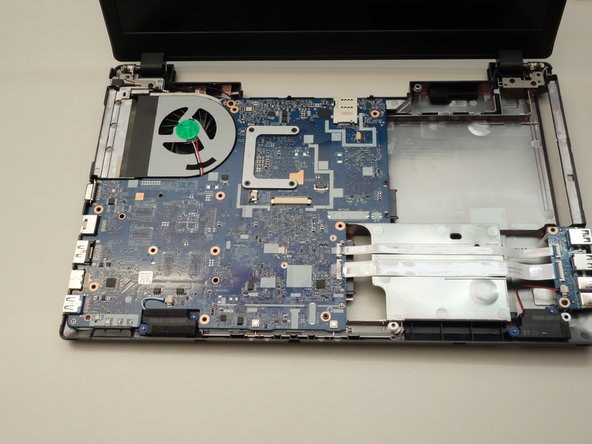
  19. why! W650SZ Motherboard Replacement, Remove the Top Cover (continued): 步骤 19 中的图像 1,3 why! W650SZ Motherboard Replacement, Remove the Top Cover (continued): 步骤 19 中的图像 2,3 why! W650SZ Motherboard Replacement, Remove the Top Cover (continued): 步骤 19 中的图像 3,3
    • Follow the steps shown in the first two images in this step.

    • Once the top cover has been removed, you can now clearly see the motherboard.

  20. why! W650SZ Motherboard Replacement, Disconnect Ribbon Cables: 步骤 20 中的图像 1,3 why! W650SZ Motherboard Replacement, Disconnect Ribbon Cables: 步骤 20 中的图像 2,3 why! W650SZ Motherboard Replacement, Disconnect Ribbon Cables: 步骤 20 中的图像 3,3
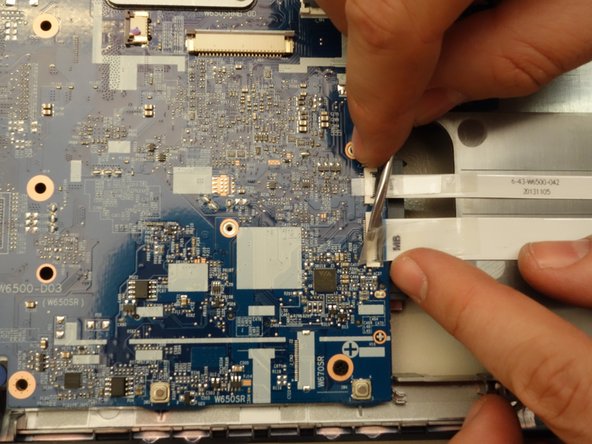
    • Locate the two ribbon cables as shown in the first image of this step. These two ribbon cables must be disconnected from the motherboard.

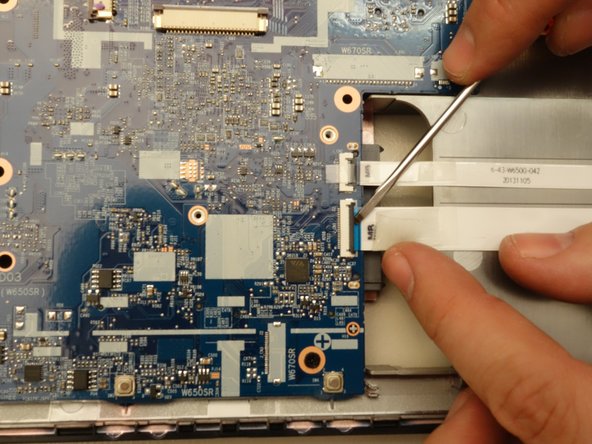
    • Release the latch on the first ribbon cable.

    • Once the latch is released,...

  21. why! W650SZ Motherboard Replacement, Disconnect Ribbon Cables (continued): 步骤 21 中的图像 1,3 why! W650SZ Motherboard Replacement, Disconnect Ribbon Cables (continued): 步骤 21 中的图像 2,3 why! W650SZ Motherboard Replacement, Disconnect Ribbon Cables (continued): 步骤 21 中的图像 3,3
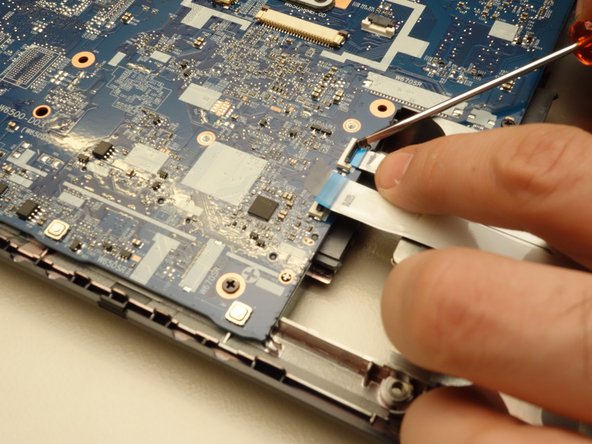
    • ... carefully remove the ribbon cable.

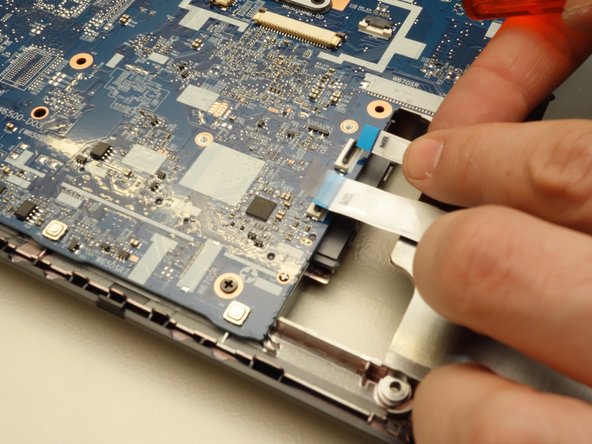
    • Unlatch the second ribbon cable.

    • Remove it too.

  22. why! W650SZ Motherboard Replacement, Disconnect Cables (continued): 步骤 22 中的图像 1,3 why! W650SZ Motherboard Replacement, Disconnect Cables (continued): 步骤 22 中的图像 2,3 why! W650SZ Motherboard Replacement, Disconnect Cables (continued): 步骤 22 中的图像 3,3
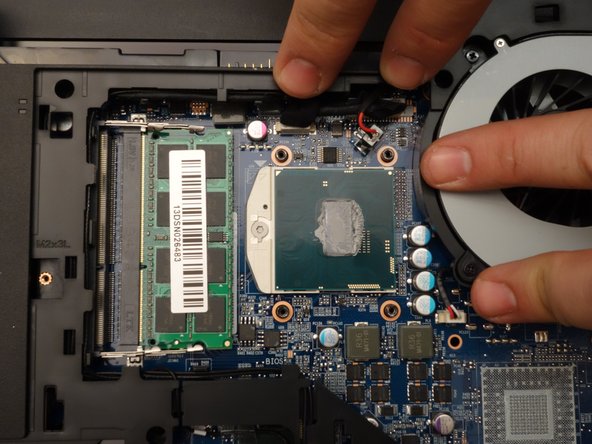
    • Locate the motherboard connector pointed to in the first image of this step.

    • Remove the connected cable.

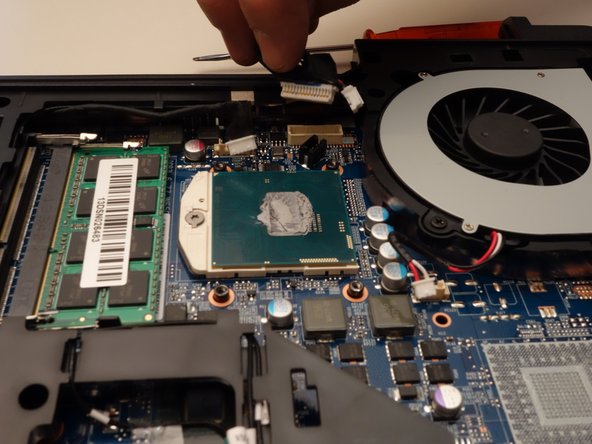
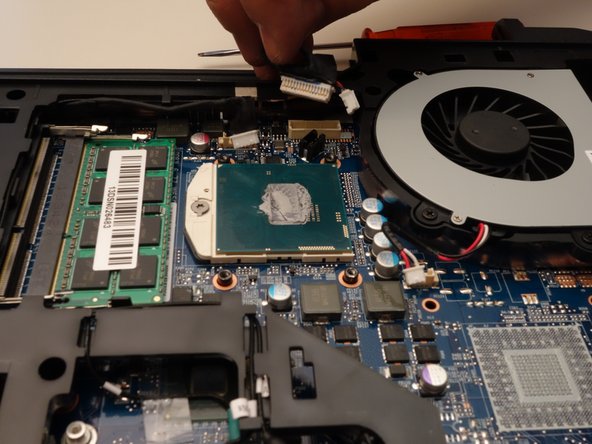
    • Locate the two motherboard connectors shown in the third image of this step.

  23. why! W650SZ Motherboard Replacement, Disconnect Cables (continued): 步骤 23 中的图像 1,3 why! W650SZ Motherboard Replacement, Disconnect Cables (continued): 步骤 23 中的图像 2,3 why! W650SZ Motherboard Replacement, Disconnect Cables (continued): 步骤 23 中的图像 3,3
    • Remove the first cable.

    • Remove the second cable.

  24. why! W650SZ Motherboard Replacement, Remove the Motherboard: 步骤 24 中的图像 1,3 why! W650SZ Motherboard Replacement, Remove the Motherboard: 步骤 24 中的图像 2,3 why! W650SZ Motherboard Replacement, Remove the Motherboard: 步骤 24 中的图像 3,3
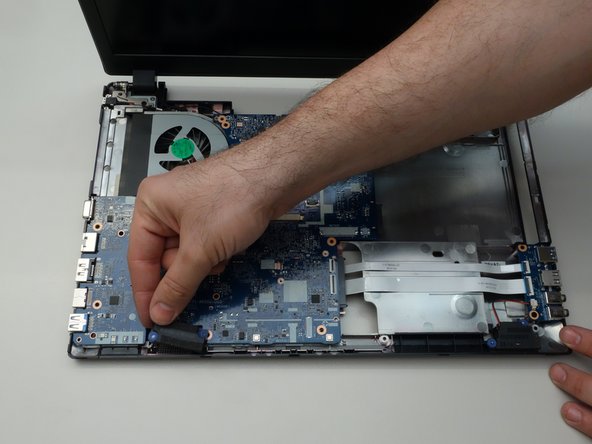
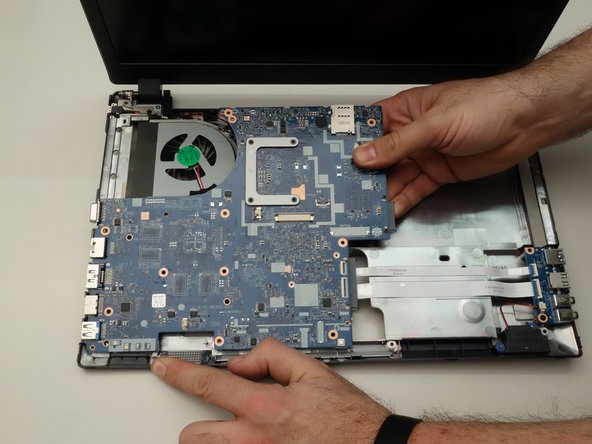
    • Locate and remove the two screws securing the motherboard.

    • Before lifting the motherboard, remove the speakers.

    • Carefully remove the motherboard.

结论

To reassemble your device, follow these instructions in reverse order.

由衷感谢以下译者:

fr en

100%

Jerry Wheeler正在帮助我们修复这个世界! 您也想加入吗?
开始翻译 ›

Felice Suglia

于06/15/13注册

30,884 声望

创作了264篇指南

0条评论

添加评论

浏览统计数据:

过去 24 小时: 0

过去 7 天: 3

过去 30 天: 4

总计 188