跳转到主内容

iPad Mini 3 Wi-Fi LCD Austausch

注:你正在编辑的一份前提条件指南。你所做的任何更改将影响包括此步骤的20指南

英语
德语

正翻译步骤 4

步骤 4
iPad Mini 3 Wi-Fi LCD Replacement: 步骤 0 中的图像 1,3 iPad Mini 3 Wi-Fi LCD Replacement: 步骤 0 中的图像 2,3 iPad Mini 3 Wi-Fi LCD Replacement: 步骤 0 中的图像 3,3
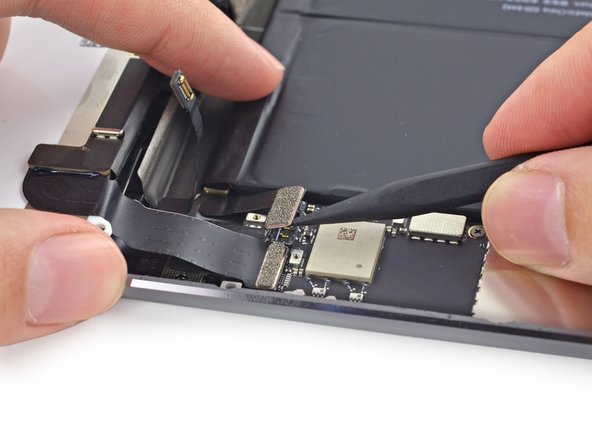
  • Use the tip of a spudger to gently lift the battery connector up off its socket on the logic board.

  • Be very careful to only pry up on the battery connector and not on the socket itself. If you pry up on the logic board socket, you may break the connector entirely.

Benutze die Spitze eines Spudgers, um den Stecker der Batterie vorsichtig aus seiner Fassung am Logicboard zu heben.

Achte darauf, nur den Stecker anzuheben und nicht den gesamten Anschluss. Falls du den Anschluss vom Logicboard anhebst, kannst du ihn irreparabel beschädigen.

您的所有投稿皆享有基于开源创作共享许可协议(CC BY-NC-SA)著作权利