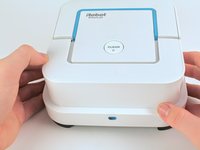
跳转到主内容

iRobot Braava Jet 240 Back Shell Replacement

你所需要的

  1. iRobot Braava Jet 240 Back Shell Replacement, Battery: 步骤 1 中的图像 1,1
    • Turn the device off.

  2. iRobot Braava Jet 240 Back Shell Replacement: 步骤 2 中的图像 1,2 iRobot Braava Jet 240 Back Shell Replacement: 步骤 2 中的图像 2,2
    • Use your fingers to gently pop out the battery.

  3. iRobot Braava Jet 240 Back Shell Replacement, Mop Pad: 步骤 3 中的图像 1,2 iRobot Braava Jet 240 Back Shell Replacement, Mop Pad: 步骤 3 中的图像 2,2
    • Lift up the handle to reveal the eject button.

  4. iRobot Braava Jet 240 Back Shell Replacement: 步骤 4 中的图像 1,3 iRobot Braava Jet 240 Back Shell Replacement: 步骤 4 中的图像 2,3 iRobot Braava Jet 240 Back Shell Replacement: 步骤 4 中的图像 3,3
    • Use your finger to push the eject button forward.

  5. iRobot Braava Jet 240 Back Shell Replacement: 步骤 5 中的图像 1,1
    • Tilt the robot on its side and let the mop pad slide out.

  6. iRobot Braava Jet 240 Back Shell Replacement, Front Shell: 步骤 6 中的图像 1,2 iRobot Braava Jet 240 Back Shell Replacement, Front Shell: 步骤 6 中的图像 2,2
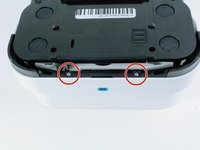
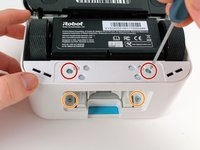
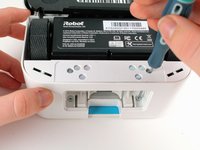
    • Remove the two 22.0 mm screws on the bottom-front of the robot using a Phillips #1 screwdriver.

  7. iRobot Braava Jet 240 Back Shell Replacement: 步骤 7 中的图像 1,2 iRobot Braava Jet 240 Back Shell Replacement: 步骤 7 中的图像 2,2
    • Use a Phillips #1 screwdriver and an iFixit opening tool to remove the two 15.0 mm screws on the front sides of the robot.

  8. iRobot Braava Jet 240 Back Shell Replacement: 步骤 8 中的图像 1,3 iRobot Braava Jet 240 Back Shell Replacement: 步骤 8 中的图像 2,3 iRobot Braava Jet 240 Back Shell Replacement: 步骤 8 中的图像 3,3
    • Carefully pull back on the front shell to remove it from the robot.

  9. iRobot Braava Jet 240 Back Shell Replacement, Back Shell: 步骤 9 中的图像 1,2 iRobot Braava Jet 240 Back Shell Replacement, Back Shell: 步骤 9 中的图像 2,2
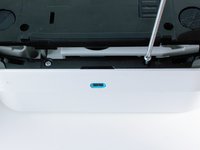
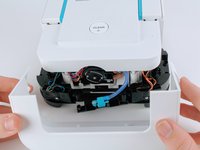
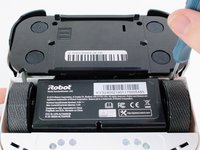
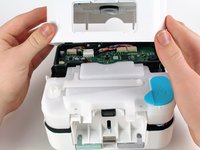
    • Insert a Phillips #1 screwdriver through the screw holes.

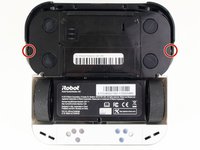
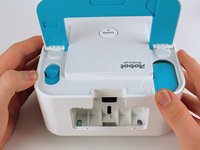
    • Unscrew the two 9.7 mm screws.

  10. iRobot Braava Jet 240 Back Shell Replacement: 步骤 10 中的图像 1,2 iRobot Braava Jet 240 Back Shell Replacement: 步骤 10 中的图像 2,2
    • Unscrew the four 9.7 mm screws using a long neck #1 Phillips screwdriver.

    • If the screws are unscrewed but do not come out easily, turn the robot upside down and gently shake it.

  11. iRobot Braava Jet 240 Back Shell Replacement: 步骤 11 中的图像 1,3 iRobot Braava Jet 240 Back Shell Replacement: 步骤 11 中的图像 2,3 iRobot Braava Jet 240 Back Shell Replacement: 步骤 11 中的图像 3,3
    • Pull up on the back shell to remove it from the robot.

    • For reassembly, pop the mop pad release trigger back into place if it fell out during back shell removal.

结论

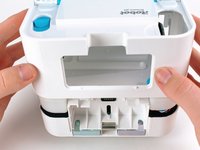
To reassemble your device, follow these instructions in reverse order.

Claire Franz

于02/10/20注册

2,772 声望

创作了7篇指南

团队

Cal Poly, Team S22-G2, Regan Winter 2020 Cal Poly, Team S22-G2, Regan Winter 2020 的会员

CPSU-REGAN-W20S22G2

5 名成员

创作了12篇指南

0条评论

添加评论

浏览统计数据:

过去 24 小时: 1

过去 7 天: 3

过去 30 天: 11

总计 1,128