简介
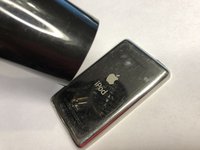
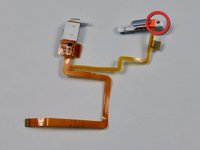
The shiny rear half of your iPod case.
你所需要的
-
-
At an angle, carefully insert a putty knife about 1/8 inch into the seam between the two opening tools.
-
Once the putty knife has cleared the lip of the rear panel, pivot the putty knife so that it is vertical, and carefully (but firmly) wiggle it straight down into the gap between the opening tools.
-
-
-
-
At an angle, carefully insert a putty knife about 1/8 inch into the seam between the two opening tools.
-
Once the putty knife has cleared the lip of the rear panel, angle the putty knife so that it is vertical, and carefully (but firmly) wiggle it straight down into the iPod via the gap between the plastic opening tools.
-
Push with your fingers on the rear panel behind the putty knife to minimize bending. Ever so slightly flex the putty knife to ensure that most of the metal tabs on this side of the iPod are disengaged.
-
-
-
Grasp the front panel assembly with one hand and the rear panel with the other.
-
Gently (GENTLY) disengage the remaining clips on the rear panel by pulling the tops of the front and rear panels away from each other (think of the bottom of the iPod as a hinge), taking great care not to damage the ribbon cables holding the two halves together.
-
-
在这个步骤中使用的工具:Tweezers$3.99
-
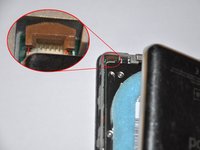
Use angled tweezers or an opening tool to lift the brown lock latch straight up by 1 mm. Make sure you pull from both sides of the latch.
-
Grasp the flex cable with your fingers or tweezers and pull it straight up to disconnect it.
-
-
-
Lift the hard drive up with one hand so you can access the headphone jack ribbon beneath.
-
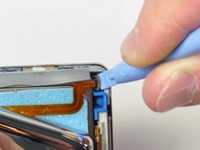
Use a spudger to flip up the plastic tab holding the headphone jack ribbon in place. The tab will rotate up 90 degrees, releasing the ribbon cable.
-
Slide the orange headphone jack ribbon out of its connector.
-
The rear panel is now free from the iPod.
-
-
-
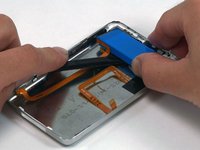
Use one hand to hold the orange ribbon cables in place, and peel up the black tape securing the cables to the rear panel with your other hand.
-
-
-
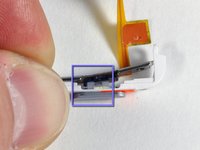
If your replacement part does not include the plastic hold switch, follow the next steps to transfer the plastic hold switch to your new headphone jack.
-
Remove the single Phillips screw nearest to the hold switch.
-
Lift the plastic portion of the Hold switch away from the orange ribbon cable.
-


To reassemble your device, follow these instructions in reverse order.
To reassemble your device, follow these instructions in reverse order.
41等其他人完成本指南。

5条评论
Thanks!
Can I swap rear panel fat to slim? I mean I have 6/7’th gen 120 Gb with slim SSD and what to close it with rear panel from 6’th gen 80 Gb - for 3 mm less width. So question: Is this 80Gb-iPod’s rear panel is compatible to my 120Gb-iPod?
Yes, you can. I upgraded the hard drive with a solid state and needed the extra space.
Just would like to have a confirmation that the rear panels of 5th Gen. (Video) and 6th Gen. (Classic) are identical. Some replacement panels are listed as “fits 5th, 6th & 7th” and some are specific…
What is the plastic for the charging port on the panel called?
I mean the plastic that was left in the panel