跳转到主内容

当前版本的文档还未经巡查,您可以查看最新的已查核版本

你所需要的

  1. , 外壳: 步骤 1 中的图像 1,1
    • 打开iPod之前,请确保保持开关处于锁定位置。 如果您的iPod面向您,解锁滑块应该一直向右。

  2. : 步骤 2 中的图像 1,1
    • 打开iPod可能是一个挑战。在打开iPod之前需要尝试几次,请不要气馁。

    • 使用iPod开口工具打开iPod底部的第一个固定夹。 工具的边缘应该指向金属背壳,以防止刮伤塑料前端。

  3. : 步骤 3 中的图像 1,1
    • 使用此iPod的照片作为参考,以便找到固定夹所在的区域 - 每侧4个,顶部1个,底部2个。 它应该为您节省很多挫折,并帮助避免刮伤塑料盖。

  4. : 步骤 4 中的图像 1,3 : 步骤 4 中的图像 2,3 : 步骤 4 中的图像 3,3
    • iPod的两侧有四个固定夹。 使用iPod开口工具将iPod的塑料前端与iPod背面分开。

    • 将iPod开口工具插入iPod的左侧,使工具的边缘朝向金属背面。

    • 一个小小的拨片可以非常有助于打开iPod。 只需将其插入并在外壳周围滑动开关即可打开卡子以简化流程。

    • 通过摆动iPod开口工具并将其移动到左侧,轻轻地放大现有的缝隙。

    • 继续这样做,直到iPod的整个面板都松动。

    • 然后,您可以在按钮的右侧插入一个iPod开口工具。 插入工具时要非常小心,因为显示屏非常脆弱。

  5. : 步骤 5 中的图像 1,2 : 步骤 5 中的图像 2,2
    • 轻轻地滑动显示器顶部的iPod开启工具,确保它打开固定夹。

    • iPod的另一边现在应该很容易松动。 如果不是这样,请使用iPod右侧的iPod开口工具,方法与iPod左侧步骤相同。

    • 将iPod的正面从背面分开大约一英寸(或几厘米)。

    • iPod的外壳现在是分开的,但还没有完全分开两个半。 两条带状电缆仍将后面板连接到iPod的其余部分。

  6. : 步骤 6 中的图像 1,2 : 步骤 6 中的图像 2,2
    • 使用斜角镊子或iPod开口工具向上滑动棕色连接器闩锁,将橙色电池带电缆固定到位。 确保你从锁的两侧拉。 只需将棕色连接器闩锁抬起约1-2mm即可挑起电缆。 请勿抬起或取下闩锁,否则可能会拉出白色连接器

    • 不要抬起太远,否则可能会将电池连接器从主板中拔出。

    • 确保直接向上滑动棕色连接器。 连接器很脆弱,如果意外地移到侧面,会断开连接。 连接器的底部有挂钩,用于固定电缆。 一旦你折断了其中一只,你将会遇到麻烦,请重新安装电池电缆。 如果断开,将电缆插入插槽,然后将棕色支撑架推到位以防止电缆滑出。

    • 从连接器上拔下电缆。

  7. : 步骤 7 中的图像 1,1
    • 现在你应该还有一根橙色的排线将前壳连接到后面。

    • 此时,您可以卸下并更换蓝色橡胶垫,或者继续将外壳分开。

    • 完成电池更换不需要分开外壳,但这样做更便于更换电池。这确实需要移除额外的线缆,以免在拆卸过程中造成损坏

  8. : 步骤 8 中的图像 1,1
    • 提起硬盘以露出耳机孔的带状连接器(用黄色框表示)。

    • 如果硬盘松动,请务必按照图中所示将其放回槽口。

  9. : 步骤 9 中的图像 1,2 : 步骤 9 中的图像 2,2
    • 使用iPod开口工具,轻轻提起耳机带状电缆连接器的棕色卡扣。 将该卡扣旋转90度,松开排线。

    • 用手指拉出耳机插孔带状电缆。

  10. : 步骤 10 中的图像 1,1
    • iPod的正面和背面现在应该完全分开。

  11. 这个步骤还没有翻译 帮忙翻译一下

    : 步骤 11 中的图像 1,2 : 步骤 11 中的图像 2,2
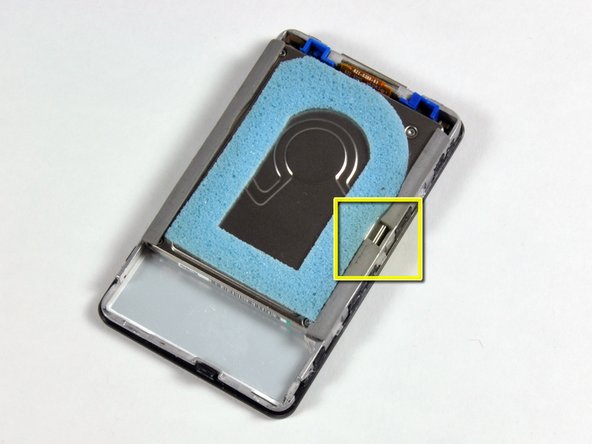
    • Use a small iPod opening tool to release the black hinge holding the hard drive ribbon cable. The tab will rotate up 90 degrees towards the logic board, releasing the ribbon cable.

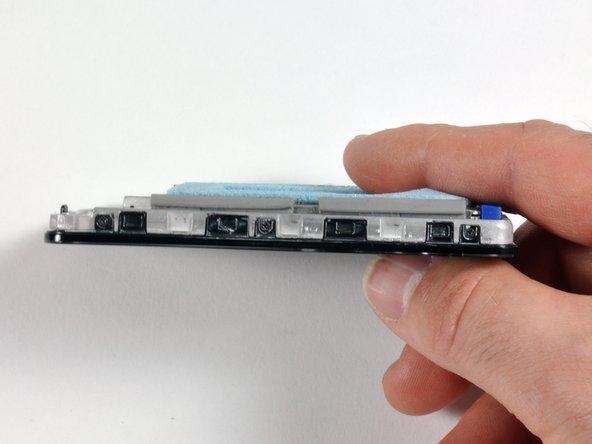
    • Use your forefinger to hold the ribbon cable in place; disconnect the drive from the ribbon cable.

    • Make sure the hard drive rubber side bumpers are attached to the drive being installed. Use the hard drive rubber side bumper installation guide to accomplish this task.

    • If necessary, the blue foam padding on the hard drive might also need to be transferred to the replacement drive.

  12. 这个步骤还没有翻译 帮忙翻译一下

    : 步骤 12 中的图像 1,3 : 步骤 12 中的图像 2,3 : 步骤 12 中的图像 3,3
    • The rubber side bumpers should be installed as pictured:

    • The side of the drive that's being propped by the hard drive holding bracket should have the rubber side bumper that has a sidewall on the corner, as indicated by the red box.

    • There should be a space in between the two smaller rubber side bumpers, as indicated by the yellow box.

    • Both sides of the drive should be seated snugly, as shown in the third picture.

终点

13等其他人完成本指南。

0条评论

添加评论

浏览统计数据:

过去 24 小时: 0

过去 7 天: 8

过去 30 天: 37

总计 23,383