当前版本的文档还未经巡查,您可以查看最新的已查核版本。
你所需要的
-
-
这个步骤还没有翻译 帮忙翻译一下
-
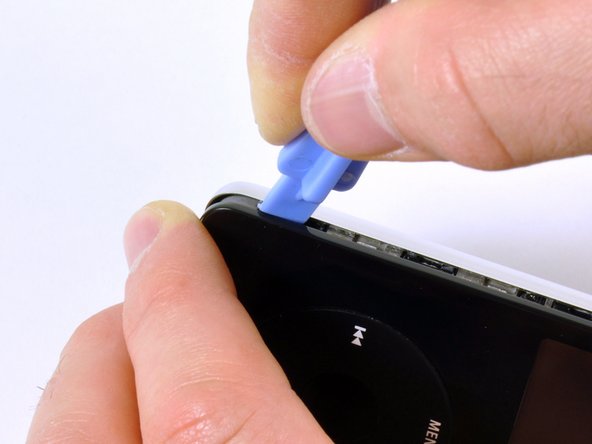
Use a small iPod opening tool to release the black hinge holding the hard drive ribbon cable. The tab will rotate up 90 degrees towards the logic board, releasing the ribbon cable.
-
Use your forefinger to hold the ribbon cable in place; disconnect the drive from the ribbon cable.
-
230等其他人完成本指南。
9条评论
Okay, I apparently did the same thing as Jeff above. When I opened the case, the plastic front came off cleanly, but now I can't figure out how to pry the innards out of the metal casing, which apparently was supposed to just happen by itself, according to the instructions above.
I've tried very gingerly pulling and prying around the edges to see if I can dislodge the metal casing, but no such luck so far. Now what?
Jack Mingo - 回复
Guide was helpfull and well detailed. The screewed on parts from the black cover broke but what the !&&*, it's not like i need them now. I switched the battery without problems, everything from the guide is well detailed.
Buttons wont work now. Re opened it 4 times and buttons still wont work.
Threw this Apple Crap at my wall, now it's all opened up again, permanently!
Guide is perfect tho! Thanks for the help.
I saved myself about $400 (that is on the cheap end of a new iPod 7th gen on Amazon) by buying new hard drive for $25, buying a new battery that came with iPod repair tool for $7.99 (all on Amazon), and used this guide. I had no problems with disassembly and reassembly. This guide is fantastic!
With this guide i managed to save some bacon on my two 5th generation iPods. One black and one white. Just for 25E i managed to find replacement hard disks for them. Now i enjoy the music in both car and living room. Thanks again mate... Cheers from Greece.
I decided to fix my boyfriends ipod video(5th gen 60gb) for his Christmas present. He dropped it a while back and the hard drive went to crap. So I got all my parts and tools today(very quick shipping btw) and decided to go for it. I was a little intimidated at first since I've never done this before but everything was so easy. Had no problem opening or separating the case. Changed the battery while I was in there and that was easy. Got to the hard drive and got it done. Before closing I checked that it was working but it just hung out on the apple screen. Was a little worried that the new hard drive was bad so I disconnected and the reconnected it and it worked perfectly! So proud of myself! All in all, the guide was a huge help, and it only took about 45 minutes to do everything. Easy peasy. Now I know I can change the battery in my ipod with no problem. Thanks!!!
Ravon Byas - 回复


