简介
使用本指南移除和更换 iPhone 8 主板。
注意: 每个 iPhone 的主板和 Touch ID 指纹传感器在出厂时已配对,因此更换主板将禁用 Touch ID 除非你安装了已正确配对的更换 Home 键。
你所需要的
-
-
接下来的三个步骤演示了如何使用反向钳,一个旨在简化打开过程的工具。 如果你不使用 反向钳,请跳过这两个步骤以使用替代方法。
-
将蓝色手柄拉向铰链以解锁反向钳。
-
将手机塞进反向钳的两臂之间。
-
将吸盘放在屏幕上主页按钮的正上方——一个在前面,一个在后面。
-
向下推吸盘以将吸力施加到所需区域。
-
-
-
加热 iOpener并将其穿过反向钳。
-
折叠 iOpener,使其位于 iPhone 的底部边缘。
-
等待一分钟,让粘合剂有机会释放并出现开口间隙。
-
将撬片插入间隙中。
-
跳过接下来的三个步骤。
-
-
-
-
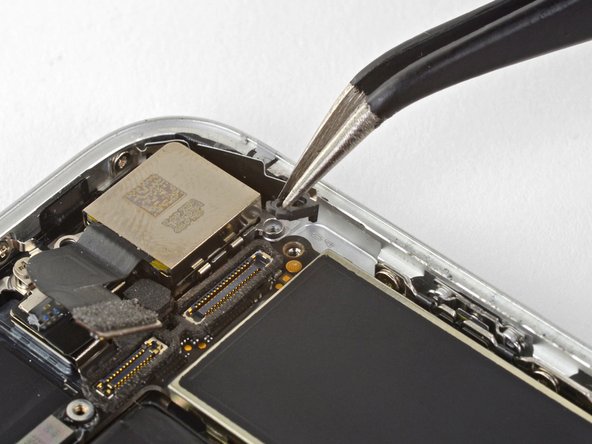
卸下将显示屏电路支架固定在电路板上如下的四个十字螺丝:
-
两个1.3毫米的螺丝
-
两个2.8毫米的螺丝
-
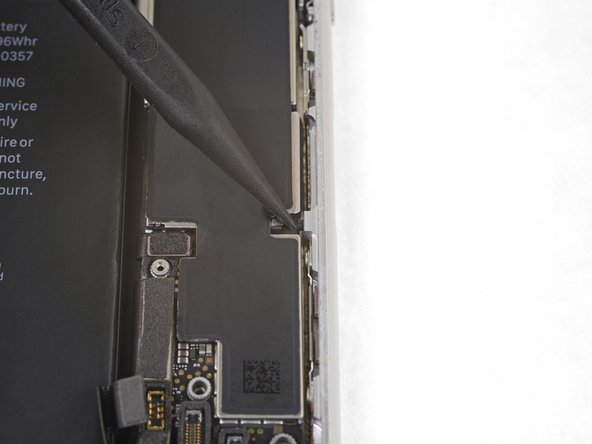
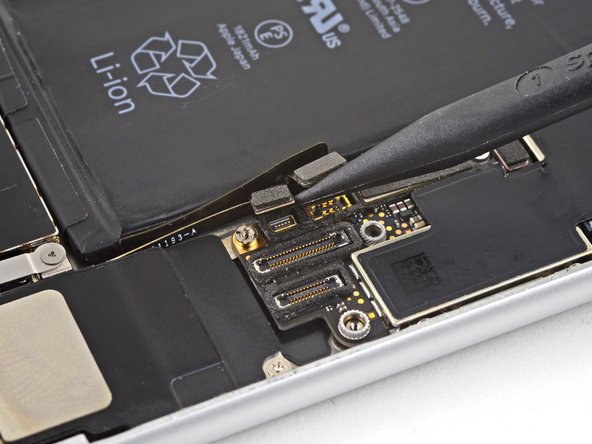
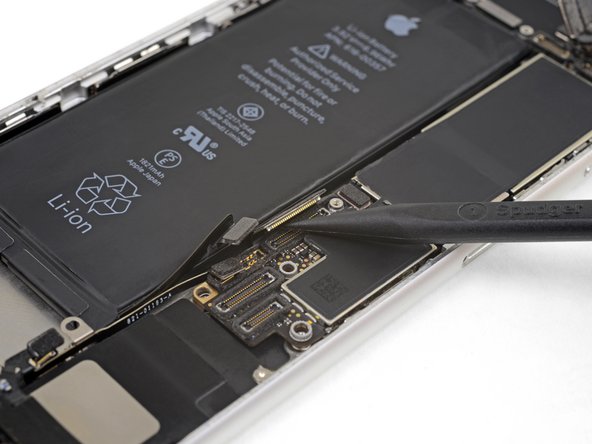
卸下支架。
-


把你的更换零件和原装零件做对比——你可能需要转移一些旧的零件,或者在安装之前把新零件后面的胶带去掉。
请按逆序操作重组你的设备。
把你的电子废料带到 R2 或者 e-Stewards 认证的回收商那里。
维修进展不如意?请查阅我们的问题解答社区 来排除障碍。
把你的更换零件和原装零件做对比——你可能需要转移一些旧的零件,或者在安装之前把新零件后面的胶带去掉。
请按逆序操作重组你的设备。
把你的电子废料带到 R2 或者 e-Stewards 认证的回收商那里。
维修进展不如意?请查阅我们的问题解答社区 来排除障碍。
87等其他人完成本指南。


20条评论
Hello evryone. Do I need a new touch ID that fits the motherboard or can I use my old touch ID?
The motherboards that are for sale, sell with touch ID and without. That`s why I am asking.
Hi Sebastian,
Yes, the Touch ID is paired with the motherboard. In order to keep Touch ID functionality, you have to use the fingerprint sensor that comes with the replacement.
can i use this process two switch a logic board from a working i phone to one that is icloud locked?
That’s why I’m here
Hi Kenneth,
The phone’s “identity” is based off of the logic board, so switching a logic board will remove the iCloud lock—if the replacement logic board is not locked. Note that the Touch ID hardware is paired each logic board.