跳转到主内容

此翻译可能不反映源指南的最新更新。 帮助更新翻译查看源指南

更换iPhone 7 Plus的LCD组件

你所需要的

  1. 更换iPhone 7 Plus的LCD组件, 卸下防水圈: 步骤 1 中的图像 1,3 更换iPhone 7 Plus的LCD组件, 卸下防水圈: 步骤 1 中的图像 2,3 更换iPhone 7 Plus的LCD组件, 卸下防水圈: 步骤 1 中的图像 3,3
    • 从手机底部卸下两颗pentelobe螺丝。

    • 在手机底部左边角插入iSesamo工具并轻轻向上撬起边角。加热一下对卸下LCD组件有帮助。

    • 轻轻地使用iSesamo工具绕设备边缘一周。请小心不要插入过深,那样会造成内部原件的损坏。

  2. 更换iPhone 7 Plus的LCD组件, 开启手机: 步骤 2 中的图像 1,1
    • 小心地向上抬起屏幕并向下松开设备顶部的卡扣,向右翻开组件。

    • 请注意这里有两片保护片务必卸下。靠上的保护片覆盖听筒扬声器柔性电路的弯曲线缆,以及摄像头的柔性电路。靠下的保护片覆盖指纹传感器柔性电路,LCD柔性电路及电池连接器。

  3. 更换iPhone 7 Plus的LCD组件, 卸下柔性电路(FPC)保护片: 步骤 3 中的图像 1,3 更换iPhone 7 Plus的LCD组件, 卸下柔性电路(FPC)保护片: 步骤 3 中的图像 2,3 更换iPhone 7 Plus的LCD组件, 卸下柔性电路(FPC)保护片: 步骤 3 中的图像 3,3
    • 卸下三颗固定上部柔性电路(FPC)保护片的#000 tri-tip螺丝。

    • 卸下四颗固定下部柔性电路(FPC)保护片的#000 tri-tip螺丝。

  4. 更换iPhone 7 Plus的LCD组件, 断开柔性电路的连接: 步骤 4 中的图像 1,3 更换iPhone 7 Plus的LCD组件, 断开柔性电路的连接: 步骤 4 中的图像 2,3 更换iPhone 7 Plus的LCD组件, 断开柔性电路的连接: 步骤 4 中的图像 3,3
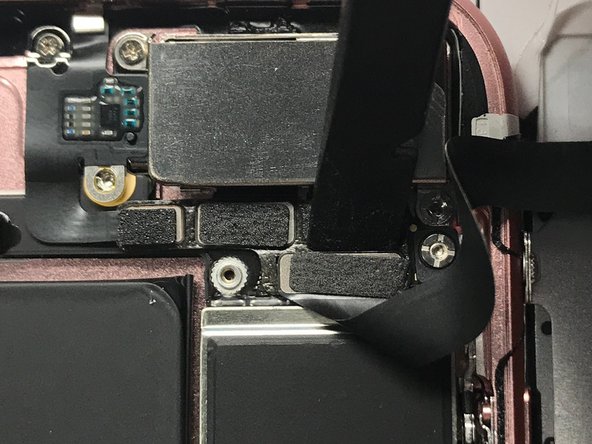
    • 使用尼龙撬棒(Spudger)轻轻地向上撬起位于顶部的听筒扬声器弯曲线缆。

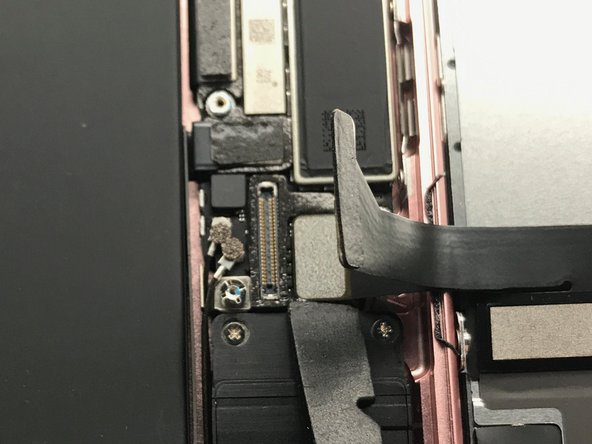
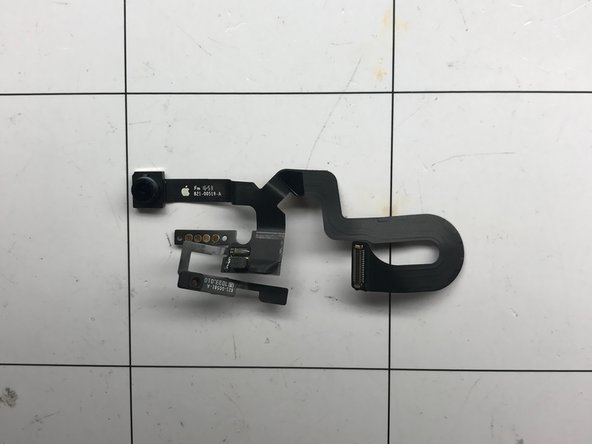
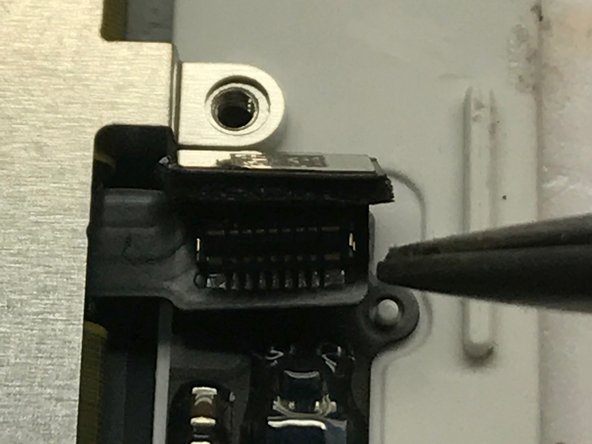
    • 断开手机底部指纹传感器柔性电路及LCD/触摸线缆的连接。

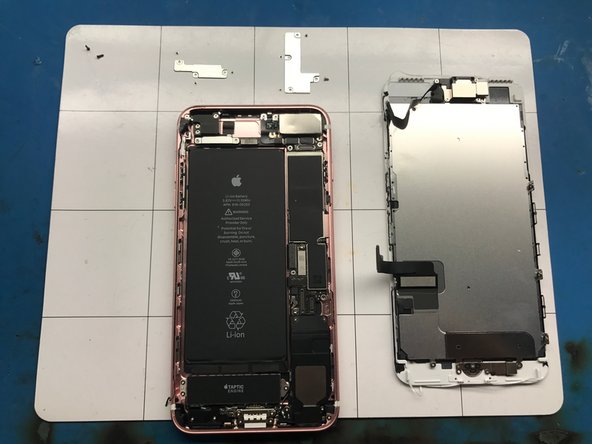
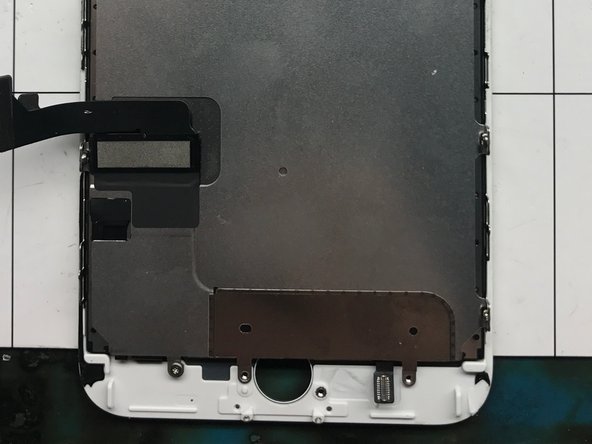
    • 卸下LCD组件外罩并准备卸下LCD组件及小部件。

  5. 更换iPhone 7 Plus的LCD组件, 卸下听筒扬声器固定片: 步骤 5 中的图像 1,3 更换iPhone 7 Plus的LCD组件, 卸下听筒扬声器固定片: 步骤 5 中的图像 2,3 更换iPhone 7 Plus的LCD组件, 卸下听筒扬声器固定片: 步骤 5 中的图像 3,3
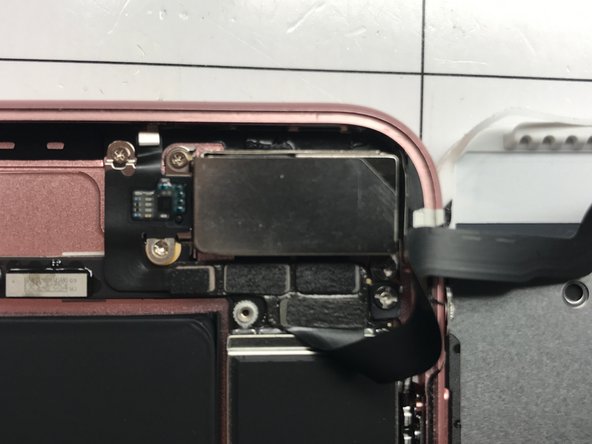
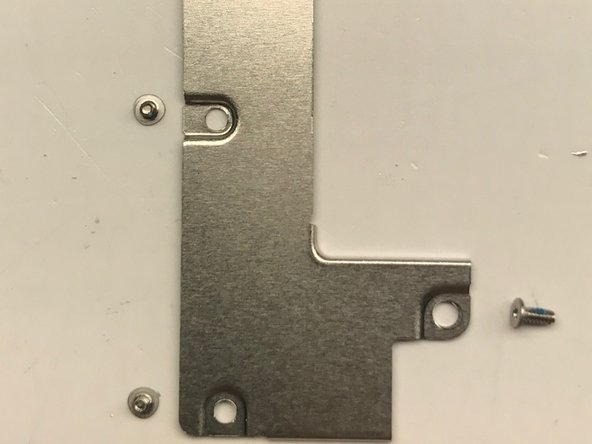
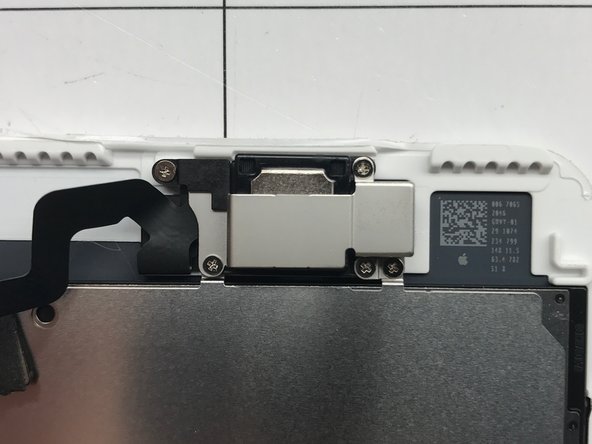
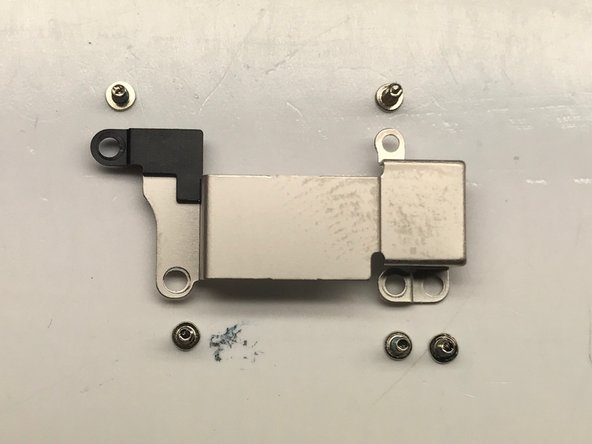
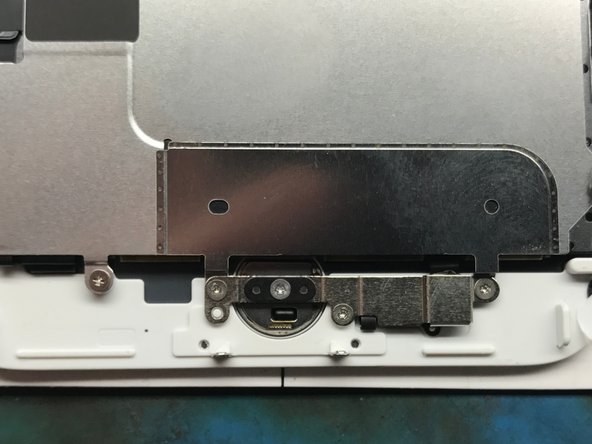
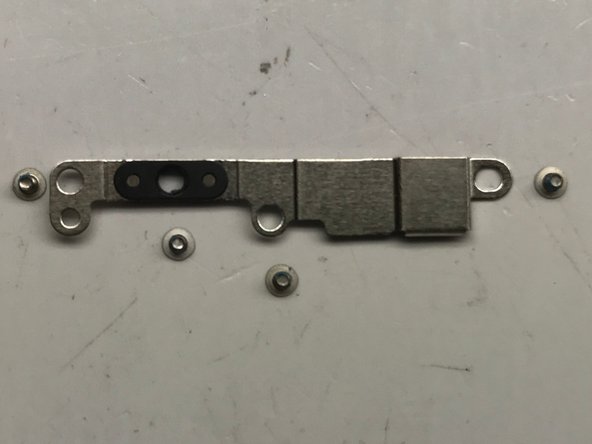
    • 卸下五颗固定听筒扬声器固定片的#000 phillips head螺丝。

    All the screws here are not clarified of their lengths

    Cong Trieu - 回复

  6. 更换iPhone 7 Plus的LCD组件, 卸下听筒扬声器及柔性电路: 步骤 6 中的图像 1,3 更换iPhone 7 Plus的LCD组件, 卸下听筒扬声器及柔性电路: 步骤 6 中的图像 2,3 更换iPhone 7 Plus的LCD组件, 卸下听筒扬声器及柔性电路: 步骤 6 中的图像 3,3
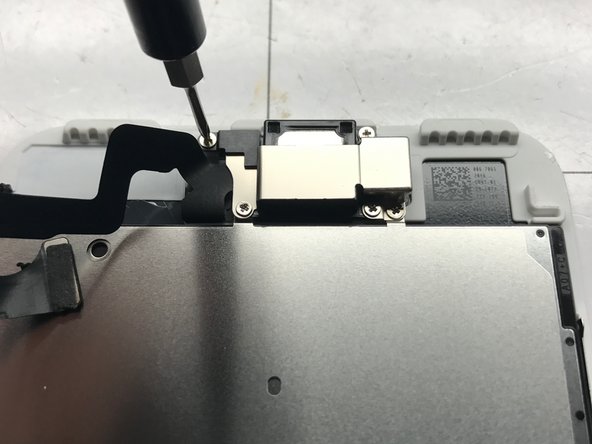
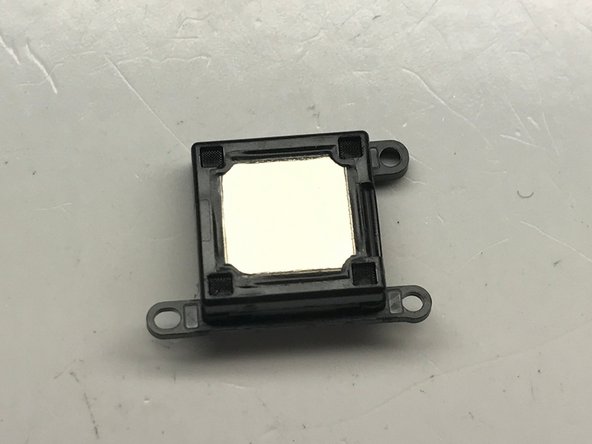
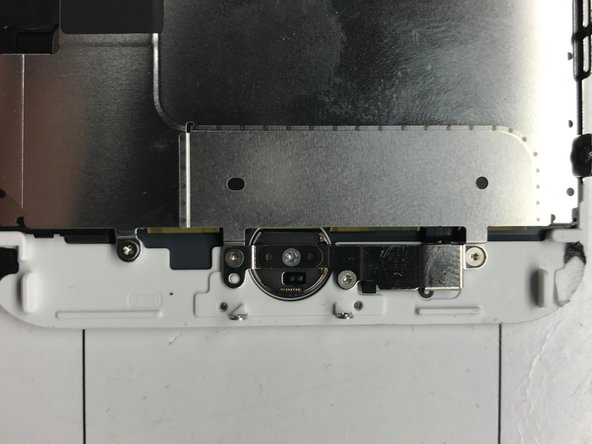
    • 听筒扬声器固定片已经卸下了,现在就可以很容易从设备上卸下听筒扬声器。

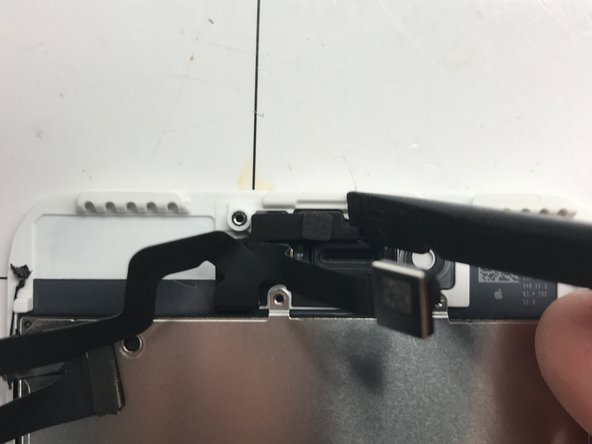
    • 使用尼龙撬棒的平端轻轻地撬起听筒扬声器柔性电路将其从组件上卸下。此部件两侧有粘合胶固定,但是轻轻地用些力就可以撬开。

    It is very easy to damage this flex cable. Do not pry from the connector end of the cable. This is where two flex cables are sandwiched together. It is very easy to separate the two and permanently damage it. Prying the speaker pads up first ensures the flex cables don't separate.

    Jason Bean - 回复

  7. 更换iPhone 7 Plus的LCD组件, 卸下Home键上盖: 步骤 7 中的图像 1,3 更换iPhone 7 Plus的LCD组件, 卸下Home键上盖: 步骤 7 中的图像 2,3 更换iPhone 7 Plus的LCD组件, 卸下Home键上盖: 步骤 7 中的图像 3,3
    • 卸下四颗固定Home键的盖子的#000 tri-tip螺丝。

  8. 更换iPhone 7 Plus的LCD组件, 断开连接并卸下Home键: 步骤 8 中的图像 1,3 更换iPhone 7 Plus的LCD组件, 断开连接并卸下Home键: 步骤 8 中的图像 2,3 更换iPhone 7 Plus的LCD组件, 断开连接并卸下Home键: 步骤 8 中的图像 3,3
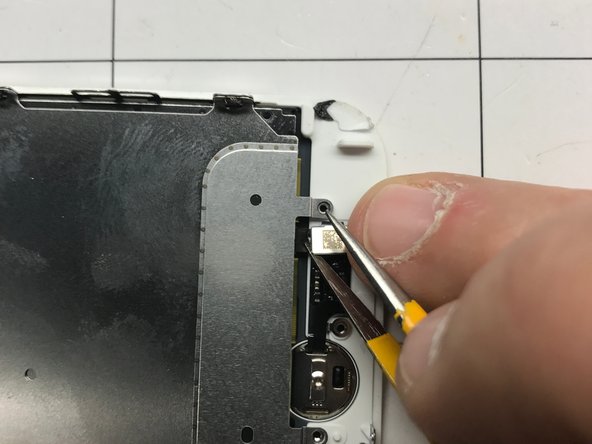
    • 使用needle tip镊子轻轻撬起Home键连接器并将其从Home键弯曲线上分离。

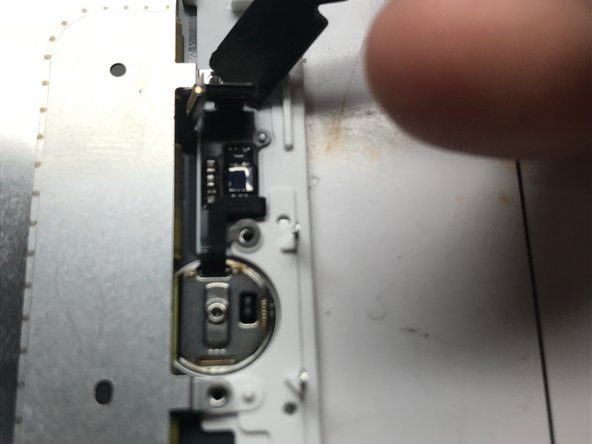
    • 使用撬棒的平端轻轻从框架后侧撬起Home键。

    • Home键需要从LCD组件中间的孔中伸出,并落到你的工作垫上。

    • 如果更换第三方Home键将使其无法使用。如果你的Home键损坏了,则需要前往苹果零售店更换指纹识别器。(Home键损坏的情况可能在更换部件时发生。请务必小心。)

    I found it easier to hold the home button connector with reverse tweezers and then pry with spudger :)

    estebanfallasf - 回复

  9. 更换iPhone 7 Plus的LCD组件, 卸下LCD背板: 步骤 9 中的图像 1,2 更换iPhone 7 Plus的LCD组件, 卸下LCD背板: 步骤 9 中的图像 2,2
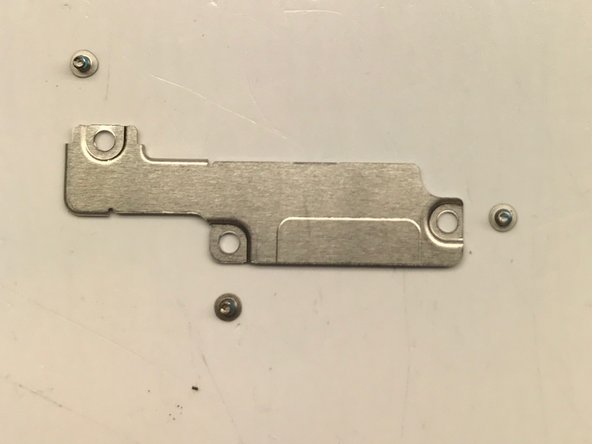
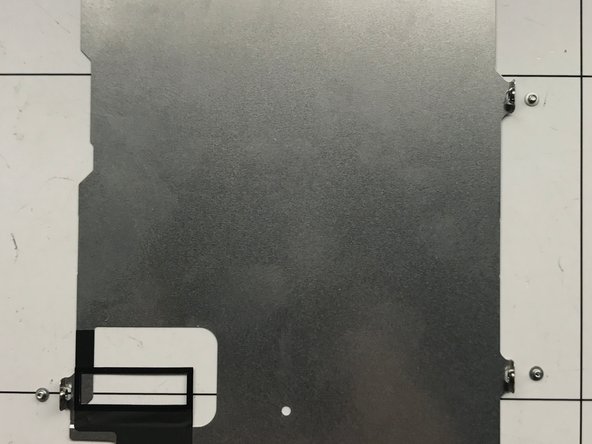
    • 卸下5颗#000 Tri-tip螺丝及1颗#000 Phillips螺丝,它们是固定LCD背板的螺丝。

    • LCD及指纹传感器线缆连通LCD背板。

    Please provide more details for Step 6 (Remove the earpiece speaker and FPC). I accidentally broke the cable while trying to seperate it from the screen. The angle at which you attempt to loosen the adhesive with the splunger makes all the difference. I think going from the bottom up may be the best way, I broke it going in from the left side. Otherwise thanks for your dedication to providing disassembly guides for these complicated electronic devices.

    sblack_nyc - 回复

结论

参考下列步骤的相反顺序以重新组装你的设备。

21等其他人完成本指南。

由衷感谢以下译者:

en zh

95%

Z.Heng正在帮助我们修复这个世界! 您也想加入吗?
开始翻译 ›

团队

Android Alliance Android Alliance 的会员

Community

87 名成员

创作了699篇指南

0条评论

添加评论

浏览统计数据:

过去 24 小时: 3

过去 7 天: 14

过去 30 天: 18

总计 12,544