跳转到主内容

当前版本的文档还未经巡查,您可以查看最新的已查核版本

你所需要的

  1. , 后面板: 步骤 1 中的图像 1,1
    • 开始拆卸前,请将 iPhone 的电池放电到25%以下。充满的锂离子电池在不小心被刺穿的情况下可能会着火和/或爆炸。

    • 拆机前,请先关机。

    • 拆卸掉两颗3.6mm 五角 P2防撬螺丝。

    • 5号螺丝刀只能用一次,不用上太紧,以免滑丝。

  2. : 步骤 2 中的图像 1,2 : 步骤 2 中的图像 2,2
    • 从下往上推开后盖。

    • 大概推出2mm的间隙。

  3. : 步骤 3 中的图像 1,1
    • 向下轻拉后盖,小心不要将塑料卡扣损坏。

    • 取下后盖

  4. , 电池: 步骤 4 中的图像 1,2 , 电池: 步骤 4 中的图像 2,2
    • 卸下电池排线固定架上的螺丝:

    • 1颗1.7mm螺丝

    • 1颗1.5mm螺丝

  5. : 步骤 5 中的图像 1,3 : 步骤 5 中的图像 2,3 : 步骤 5 中的图像 3,3
    • 小心地用塑料棍撬电池排线接头直到松动。

    • 卸下接头。

  6. : 步骤 6 中的图像 1,3 : 步骤 6 中的图像 2,3 : 步骤 6 中的图像 3,3
    • 使用塑料开启工具断开电池连接座。

    • 将工具的尖端放置在扬声器外壳和连接器的金属盖之间,然后先撬起连接座边缘。

    • 电池接头可以垂直从主板上撬下来。不要从侧面用力。

    • 请小心,不要扯掉电池连接座与主板上的焊接点。那儿有4个非常小的焊接点“等待”你犯这个错误!

  7. , 重新安装提示: 步骤 7 中的图像 1,2 , 重新安装提示: 步骤 7 中的图像 2,2
    • 在重新安装过程中,请注意小心地将压力触点放回原位。它应该放在所示的菲利普螺丝柱顶部,金触点应指向电池接口。

    • 务必使用除油剂如 Windex 或异酒精清洁压力触点。手指上的油脂有可能产生无线干扰。

  8. : 步骤 8 中的图像 1,2 : 步骤 8 中的图像 2,2
    • 将塑料开启工具的边缘插入电池与手机中间的缝隙,将电池取出。

    • 沿着电池的右侧边缘使用塑料开口工具,从不同的位置上撬起,将电池完全与后盖的残胶断开分离.

    • 如果粘合剂过于强力,那么可以向电池边缘下滴几滴高浓度(90%以上)的酒精。

    • 等待一分钟左右,让酒精削弱胶粘力。

    • 用塑料开启工具平的一端小心的将电池抬起。

    • 切勿尝试用蛮力将电池撬起!如有必要,可以多滴几滴酒精。绝不要用你的工具使电池变形或将其刺破!

    • 如有酒精残留在手机内,那么请小心将其擦除并在安装新电池之前使其自然风干。

  9. : 步骤 9 中的图像 1,2 : 步骤 9 中的图像 2,2
    • 通过拉着外漏在外头的透明塑料条,将电池从手机取出。

    • 请注意,不要太用力拉扯透明塑料条,因为它很容易一不小心就被扯掉了。

    • 卸下电池。

    • 如果你更换的电池采用塑料套管,请在安装前将其从带状电缆中拉出来并将其取下。

    • 如果你的更换电池配有未加电的电缆,请在将电池安装到手机中之前小心地将电缆折叠成适当的形状。

    • 安装更换电池时,请将电池接口暂时连接到手机以确保正确对齐。将电池胶合到位后,断开电池接口。

    • 在组装好手机之后执行一次重启。这可以很简单地避免诸多可能的问题。

  10. 这个步骤还没有翻译 帮忙翻译一下

    : 步骤 10 中的图像 1,2 : 步骤 10 中的图像 2,2
    • Remove the following screws securing the dock connector cable cover to the logic board:

    • One 1.5 mm Phillips screw

    • One 1.2 mm Phillips screw

    • Remove the metal dock connector cable cover.

  11. 这个步骤还没有翻译 帮忙翻译一下

    : 步骤 11 中的图像 1,1
    • Use the edge of a plastic opening tool to pry the dock cable up from its socket on the logic board.

  12. 这个步骤还没有翻译 帮忙翻译一下

    : 步骤 12 中的图像 1,1
    • Peel the dock connector cable off the adhesive securing it to the logic board and the side of the speaker enclosure.

  13. 这个步骤还没有翻译 帮忙翻译一下

    : 步骤 13 中的图像 1,2 : 步骤 13 中的图像 2,2
    • Use the edge of a plastic opening tool to pry the cellular antenna cable up from its socket on the logic board.

    • De-route the cellular antenna cable out from under the metal fingers attached to the logic board.

  14. 这个步骤还没有翻译 帮忙翻译一下

    : 步骤 14 中的图像 1,1
    • Remove the two 2.4 mm Phillips screws securing the speaker enclosure assembly to the outer case.

  15. 这个步骤还没有翻译 帮忙翻译一下

    : 步骤 15 中的图像 1,1
    • Remove the small black spacer that was under the Phillips screw near the vibrator.

  16. 这个步骤还没有翻译 帮忙翻译一下

    : 步骤 16 中的图像 1,3 : 步骤 16 中的图像 2,3 : 步骤 16 中的图像 3,3
    • Use a plastic opening tool to lift the speaker enclosure assembly out of the case, being sure not to damage the EMI fingers on the attached Wi-Fi antenna.

    • Remove the speaker enclosure assembly.

    • Before reinstalling the speaker enclosure assembly's screws, be sure the Wi-Fi grounding fingers are installed below the lip in the iPhone's metal case as seen in the third picture.

    • Before reassembly, be sure to clean all metal-to-metal contact points between the grounding fingers of the Wi-Fi antenna and the case of the iPhone with a de-greaser such as windex or isopropyl alcohol. The oils on your fingers have the potential to cause wireless interference issues.

  17. , 蜂窝移动网络天线: 步骤 17 中的图像 1,1
    • 拧下将蜂窝移动网路天线固定至扬声器外壳的两颗 1.6 mm 十字螺钉。

  18. : 步骤 18 中的图像 1,3 : 步骤 18 中的图像 2,3 : 步骤 18 中的图像 3,3
    • 从蜂窝天线电缆附近开始,使用塑料开口工具的边缘将天线从扬声器外壳上剥离。

    • 继续将蜂窝天线从扬声器外壳上剥离,小心不要撕裂连接到其边缘的金色支架。

    • 拆下蜂窝天线。

  19. : 步骤 19 中的图像 1,1
    • 安装新的蜂窝式天线时,请确保在粘上天线之前,将金色支架滑到模制在扬声器外壳中的滑槽上。

  20. 这个步骤还没有翻译 帮忙翻译一下

    : 步骤 20 中的图像 1,1
    • Speaker enclosure remains.

终点

185等其他人完成本指南。

8条评论

Your tutorial was very easy to follow and provided the exact direction and instruction for each step... Job well done, thanks for all of your hard work, because of it my install was a success and only took 15 minutes!

dortega4226 - 回复

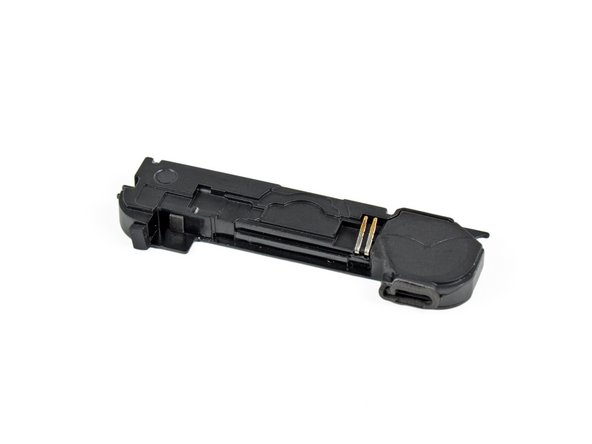
I found antenna is not replaceable.

greatanalyzer - 回复

Went according to directions fairly straightforward. The Philips heads in the ifixit pro kit are definitely substandard quality. Had to use another jewelers screwdriver on these screws. The fins are too wide.

dwatson102 - 回复

Excellent guide I'm now tech wizard but replaced speaker enclosure no problem . Take your time I used a a4 pad and drew circles for each step I was removing screws or brackets so they were all labelled. It's nerve racking at first but follow guide you ll be fine.

Read it twice perform it once!

Be prepared and have all the tools

Enjoy!! I now have sound back thx ifixit!!!

Danny Kay - 回复

It works fine!!! Following the guide with tools, i fix it!!! And it works perfect.

Thanks

giruss São Paulo Brasil

giruss - 回复

添加评论

浏览统计数据:

过去 24 小时: 3

过去 7 天: 18

过去 30 天: 42

总计 135,539