跳转到主内容

当前版本的文档还未经巡查,您可以查看最新的已查核版本

你所需要的

  1. 这个步骤还没有翻译 帮忙翻译一下

    : 步骤 1 中的图像 1,1
    • Before you begin, discharge your iPhone battery below 25%. A charged lithium-ion battery can catch fire and/or explode if accidentally punctured.

    • Power off your iPhone before beginning disassembly.

    • Your phone's rear cover may have two #000 Phillips screws or Apple's 5-Point "Pentalobe" screws. Check which screws you have, and ensure you also have the correct screwdriver in order to remove them.

    • Remove the two 3.6 mm Pentalobe or Phillips #000 screws next to the dock connector.

  2. 这个步骤还没有翻译 帮忙翻译一下

    : 步骤 2 中的图像 1,2 : 步骤 2 中的图像 2,2
    • Push the rear panel toward the top edge of the iPhone.

    • The panel will move about 2 mm.

  3. 这个步骤还没有翻译 帮忙翻译一下

    : 步骤 3 中的图像 1,1
    • Pinch the rear panel with your fingers, and lift it away from the iPhone. Alternatively, use a Small Suction Cup .

    • Be careful not to damage the plastic clips attached to the rear panel.

  4. , 电池: 步骤 4 中的图像 1,1
    • 拧下电池扣屏蔽罩上单个 1.5mm 的菲利普斯十字螺丝,这是用来固定电池接口和主板的。

  5. : 步骤 5 中的图像 1,1
    • 用塑料撬棒将电池排线从主板的电池座上分离出来。

    • 注意小心将排线挑起即可不要撬到主板,如果将电池座撬起,将彻底损坏电池座。

    • 取下天线的金属屏蔽盖。

  6. : 步骤 6 中的图像 1,2 : 步骤 6 中的图像 2,2
    • 用塑料拉手轻轻将电池从机身中拉出。

    • 如果在电池拉出前塑料拉手坏了,沿着塑料拉手方向小心的用手机撬棒在电池背部滑动几下除去胶条。在别的部位可能会造成损坏。

    • 如果你的更换电池采用塑料套管,请在安装前将其从带状电缆中拉出来将其取下。

    • 在扣电池座以前,确保排线接口与电池座位置相符。

    • 在重新安装电池之前,先对金属接口机油进行处理比如清洁剂。手指上的油脂是潜在的危险对于无线链接模块。

    • 进行强制重启在安装完成后,可以有效的避免一些错乱的状况。

  7. 这个步骤还没有翻译 帮忙翻译一下

    : 步骤 7 中的图像 1,2 : 步骤 7 中的图像 2,2
    • Remove the two 1.8 mm Phillips screws securing the dock connector cable cover to the logic board.

    • Remove the metal dock connector cable cover.

  8. 这个步骤还没有翻译 帮忙翻译一下

    : 步骤 8 中的图像 1,1
    • Use the edge of a plastic opening tool to pry the dock cable up from its socket on the logic board.

  9. 这个步骤还没有翻译 帮忙翻译一下

    : 步骤 9 中的图像 1,1
    • Peel the dock connector cable off the adhesive securing it to the logic board and the side of the speaker enclosure.

  10. 这个步骤还没有翻译 帮忙翻译一下

    : 步骤 10 中的图像 1,2 : 步骤 10 中的图像 2,2
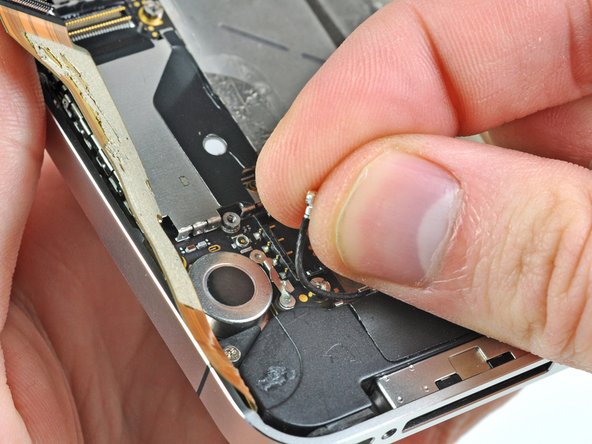
    • Remove the 1.6 mm Phillips screw securing the pressure contact to the logic board near the vibrator.

    • Remove the pressure contact.

    • When reinstalling the pressure contact, be sure to clean it with a degreaser such as windex or isopropyl alcohol. The oils on your fingers have the potential to create wireless interference.

  11. 这个步骤还没有翻译 帮忙翻译一下

    : 步骤 11 中的图像 1,2 : 步骤 11 中的图像 2,2
    • Use the edge of a plastic opening tool to pry the Wi-Fi antenna cable up from its socket on the logic board.

    • De-route the Wi-Fi antenna cable out from under the metal fingers attached to the logic board.

  12. 这个步骤还没有翻译 帮忙翻译一下

    : 步骤 12 中的图像 1,1
    • Remove the two 2.4 mm Phillips screws securing the speaker enclosure assembly to the outer case.

  13. 这个步骤还没有翻译 帮忙翻译一下

    : 步骤 13 中的图像 1,1
    • Remove the small black spacer that was under the Phillips screw near the vibrator.

  14. 这个步骤还没有翻译 帮忙翻译一下

    : 步骤 14 中的图像 1,3 : 步骤 14 中的图像 2,3 : 步骤 14 中的图像 3,3
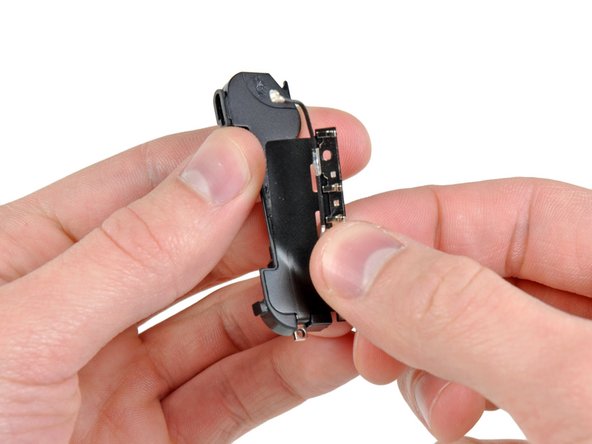
    • Use a plastic opening tool to lift the speaker enclosure assembly out of the case, being sure not to damage the EMI fingers on the attached Wi-Fi antenna.

    • Remove the speaker enclosure assembly.

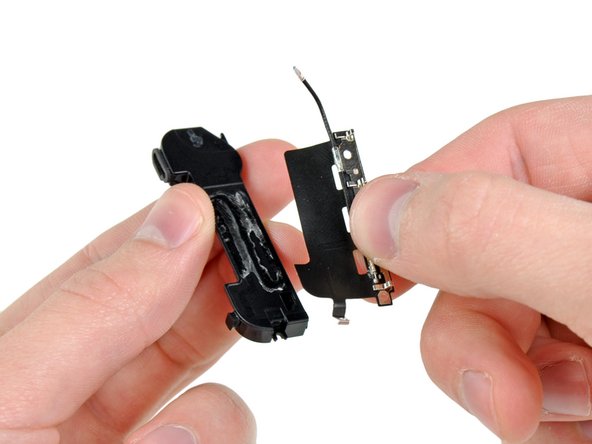
    • Before reinstalling the speaker enclosure assembly's screws, be sure the Wi-Fi grounding fingers are installed below the lip in the iPhone's metal case as seen in the third picture.

    • Before reassembly, be sure to clean all metal-to-metal contact points between the grounding fingers of the Wi-Fi antenna and the case of the iPhone with a de-greaser such as windex or isopropyl alcohol. The oils on your fingers have the potential to cause wireless interference issues.

  15. 这个步骤还没有翻译 帮忙翻译一下

    : 步骤 15 中的图像 1,1
    • Remove the two 1.6 mm Phillips screws securing the cellular antenna to the speaker enclosure.

  16. 这个步骤还没有翻译 帮忙翻译一下

    : 步骤 16 中的图像 1,3 : 步骤 16 中的图像 2,3 : 步骤 16 中的图像 3,3
    • Starting near the cellular antenna cable, use the edge of a plastic opening tool to peel the antenna off the speaker enclosure.

    • Continue peeling the cellular antenna off the speaker enclosure, being careful not to rip the gold bracket attached to one of its edges.

    • Remove the cellular antenna.

  17. 这个步骤还没有翻译 帮忙翻译一下

    : 步骤 17 中的图像 1,1
    • When installing a new cellular antenna, be sure to slide the gold bracket over the ear molded into the speaker enclosure before sticking the antenna down.

  18. 这个步骤还没有翻译 帮忙翻译一下

    : 步骤 18 中的图像 1,1
    • Speaker enclosure remains.

终点

20等其他人完成本指南。

0条评论

添加评论

浏览统计数据:

过去 24 小时: 0

过去 7 天: 3

过去 30 天: 7

总计 12,166