本指南有最近更改,您可查看未经巡查的最新版本。
简介
使用本指南更换iPad液晶显示屏。
你所需要的
-
-
在显示屏组件和后壳之间的顶部插入金属撬棒。
-
抬起撬棒来释放显示屏顶角的卡扣。
-
在顶角处显示屏和后壳之间插入第二根金属撬棒,防止卡扣自动归位。
-
-
-
使用一个撬棒来在iPad的右边沿工作。
-
前面板被顶部底部和左侧的金属卡扣与铝制背板相固定。 右侧为塑料卡扣在身处固定。。
-
一旦卡扣被释放,将前面板的左侧向上提起,然后开始撬动左侧,来释放与后铝制面板之间的卡扣。
Its seems easier to undo the clips on the left and bottom by levering them with an iPad tool and pusing the clips in from the edge with another tool when i can visually see them. One the right side, bottom and most of the left side is done there isnt much need to do the top as it will slide off if moved about a centimeter
-
-
-
在接下来几步中,您将要断开三条将显示屏与逻辑板相连的排线。 线缆是下列几种:
-
数字化线缆
-
光感传感器
-
显示数据线
It would be easier to detach the Display Data Cable at its connector on the far right in the picture, since there doesnt seem to be much play to undo the suggested one.
-
-
-
使用塑料打开工具来翻转挡板来解锁固定在逻辑板插座上的数字化线缆。
-
将数字化线缆直接从插座中拉出
Adding this comment in its proper place:
After flipping up the metal retainer, pull it sideways.
Do not pull it up vertically.
-
-
-
-
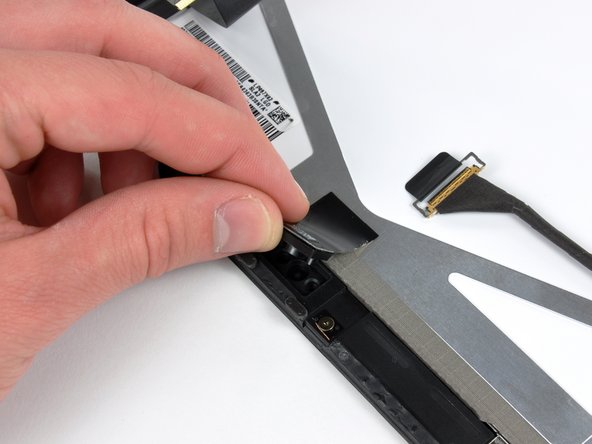
从主板中翻转金属固定器,断开显示数据线缆与主板的连接。
-
从插座中拉出线缆。
IMHO, unhooking data display cable from the other end is preferable to the above location, since the cable itself is sealed or taped onto the assembly.
-
-
-
用塑料撬棒的边缘小心撬起贴在屏幕支架上的光线感应器。
-
当有足够的缝隙时就把光线感应器从液晶显示屏上分离出来。
Step 7 after flipping up the metal retainer, pull it sideways.
Do not pull it up vertically.
I added your comment in the proper place at Step 7
-


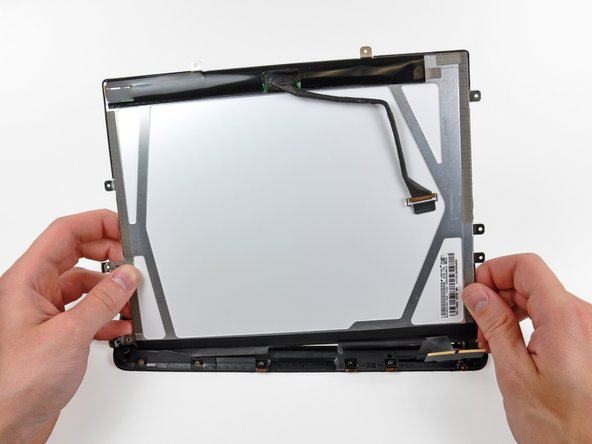


请倒序重组你的设备。
请倒序重组你的设备。
79等其他人完成本指南。

4条评论
So what if ive snapped off one of the retaining flaps? Ive seen in the past when ive snapped them off before i could just plug it in, slap on some kapton tape and it was fine. This time i cant get the bottom of the digitizer to work on new glass. I put on the old glass and the bottom works just fine. the bottom flap is the one that broke, but why would the old glass work just fine, but the new glass does nothing on the bottom half?
Just replaced my lcd using this guide. Not easy, but doable. Took about an hour and a half. broke about half of the clips that hold the assembly in, but moved the remaining ones around so that it is secure. I recommend buying replacement clips if you aren't comfortable with that. Also, this guide says to use a Torx T5 screwdriver. Other sites say T4. It is most definitely T5. I bought the wrong one first and had to get a new one. Home Depot has an 8 in 1 Torx tool for 6 bucks that is great. Thank you iFixit for saving me hundreds that I would have spent on a new iPad!
Don't worry about buying more replacment clips -- if you still have them on the left edge, not having the clips on the top and bottom isn't noticeable.
Styg -
When reassembling at the last step (inserting the screen assembly into the back cover), do NOT simply do the reverse of what you did to take it out. Instead, insert the right edge first (with the plastic tabs). The metal tabs on the left edge (and top and bottom edges if you have any left) are flexible, so it is very easy to snap the left edge of the screen into the back cover AFTER the right edge is in place. If you put the left edge in first, you'll have a much tougher time trying to get the plastic tabs on the right edge into back cover.
1) Are you recommending to cover the display with clear packing tape even if it is intact (not cracked)?
2) If so,will the tape take the display’s oleophobic coating with it when removed?
Mitch Stary - 回复
Hola necesito comprar
Alsone Michel - 回复
Hola, ¿no estoy seguro si te refieres a las gafas de protección o a la pantalla? Te dejo los dos enlaces aquí:
iPad LCD Panel
Safety Glasses
Sandra Hiller -