Throughout the following procedure, you'll be sliding thin plastic cards between the battery and rear case of the iPad to separate the adhesive securing the battery in place. Be careful to keep the cards as flat as possible to avoid bending the battery, which may damage it and cause it to release dangerous chemicals.
Flip the iPad back over and insert a plastic card between the logic board side, speaker end of the battery and the rear case.
If you encounter significant resistance, re-heat the iOpener and repeat the previous step to give the adhesive more time to soften.
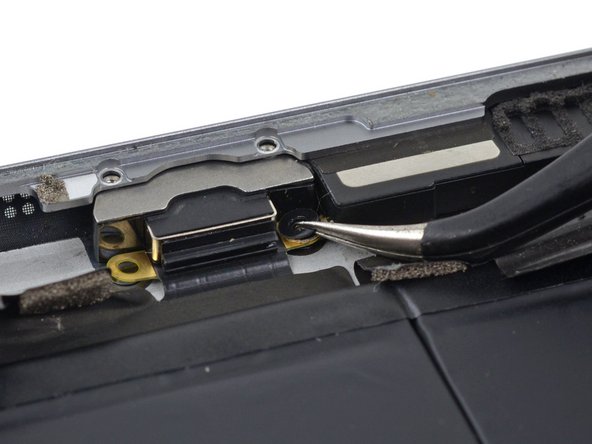
The Lightning connector cable is stuck to the case with some adhesive. To detach the adhesive you will be sliding an opening pick between the cable and the case. Be very careful not to cut the Lightning connector cable itself.
Carefully insert an opening pick under the ribbon cable near the Lighting connector housing.
Slide the opening pick toward the logic board, but stop half an inch from the bend in the cable.
Continuing farther along the ribbon cable risks cutting it.
Reinsert the opening pick under the Lightning connector ribbon cable from the case-side edge.
Slide the pick along the Lightning connector ribbon cable and under the logic board.
Move slowly and carefully. If the opening pick does not slide easily, apply more heat and try again. If you use excessive force, you will likely slip and sever the Lightning connector cable.
This guide is overkill, you really don't need to remove EVERY SINGLE PART From the IPad to replace a logic board. Just unplug everything and you can just unscrew it and replace.
Well, there was a part of the logic board under the battery, so they need to remove that. Sure, they likely could have removed it without taking everything out, but it would probably be a lot harder if things were in the way.