简介
使用本指南打开iPad Mini 2 Wi-Fi版并更换显示屏。
你所需要的
-
-
在锅或平底锅里装满足够的水来完全淹没iOpener。
-
把水加热到沸腾。关火。
-
将iOpener放入热水中2-3分钟。确保iOpener完全浸入水中。
-
用钳子从热水中提取加热的iOpener。
-
用毛巾彻底擦干iOpener。
-
你的iOpener已准备好使用!如果你需要重新加热iOpener,请将水加热到沸点,关火,并将iOpener放入水中2-3分钟。
-
-
-
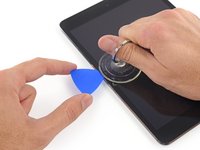
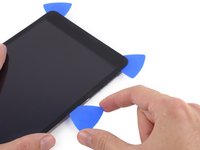
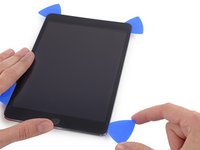
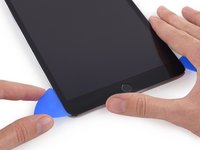
如果你的屏幕已经损坏,那么请效益以防止其进一步损坏或者因触摸而导致身体受伤。
-
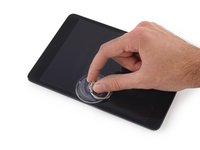
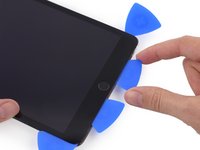
在iPad显示屏上重叠贴上透明胶带直到iPad的整块显示屏都被覆盖。
-
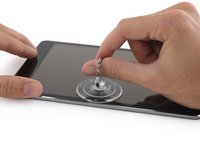
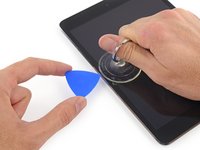
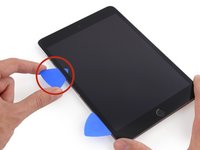
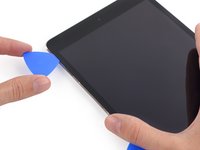
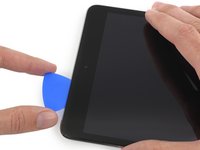
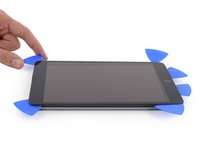
最好尽你的最大努力来完成指南。但是,一旦玻璃已经损坏,它就会随着您的使用而继续损坏,所以你可能需要使用金属撬具来讲玻璃取出。
-
-


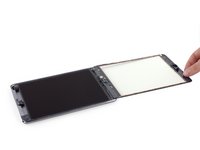


要重新组装您的设备,请按照该指南并按照相反的顺序重新组装。
77等其他人完成本指南。


5指南评论
Would like to know how to remove old adhesive from the front glass and where to put the new adhesive. Is there another guide showing this. Great up to the part it says to follow in reverse.
ifixit puts the reverse the steps up. Not the author
Hello i really need a help, when i was turn it on the ipad mini 2 it was in the apple log and i try to put the display cable bracket and inmediatly turn it off i think was a short cut because y try with another screen and nothing happend thanks
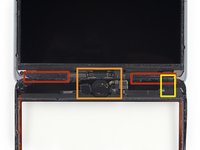
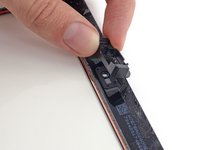
There is no mention of the magnets in the top right and bottom right. Neither in this adhesive guide or in this original repair manual. The iPad I'm fixing is missing the bottom right piece of the screen and the magnet is gone as well...what can I do? How important are they?