If your display glass is cracked, keep further breakage contained and prevent bodily harm during your repair by taping the glass.
Lay overlapping strips of clear packing tape over the iPad's display until the whole face is covered.
This will keep glass shards contained and provide structural integrity when prying and lifting the display.
Do your best to follow the rest of the guide as described. However, once the glass is broken, it will likely continue to crack as you work, and you may need to use a metal prying tool to scoop the glass out.
Wear safety glasses to protect your eyes, and be careful not to damage the LCD screen.
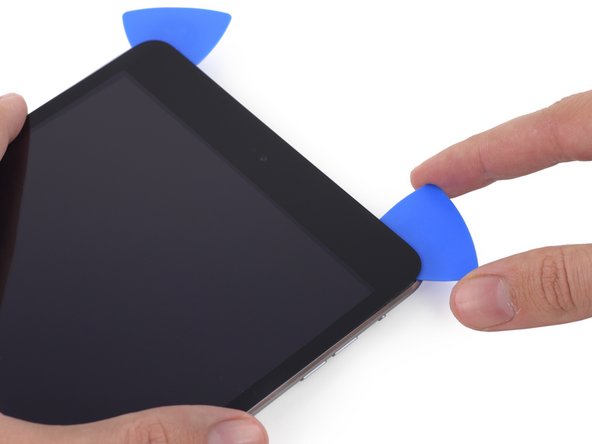
Place a second opening pick alongside the first and slide the pick down along the edge of the iPad, releasing the adhesive as you go.
Throughout the rest of the procedure, if you encounter significant resistance to sliding picks beneath the glass, stop and reheat the section you're working on. Forcing the picks risks cracking the glass.
Take the first pick you inserted and slide it up toward the top corner of the iPad.
If you can see the tip of the opening pick through the front glass, don't panic—just pull the pick out a little bit. Most likely, everything will be fine, but try to avoid this as it may deposit adhesive on the front of the LCD that is difficult to clean off.
Slide the opening pick along the top edge of the iPad, stopping just before you reach the camera.
The third image shows where the front-facing camera and housing are in the iPad.
Avoid sliding the opening pick over the front-facing camera, as you may smear adhesive onto the lens or damage the camera. The following steps will detail how to best avoid disturbing the front-facing camera.
Leave the opening pick in the iPad slightly past the front-facing camera.
Take a second pick and insert it to the left of the camera, where the first pick just was. Slide it back to the corner to completely cut any remaining adhesive.
Leave the second pick in place to prevent the corner adhesive from re-sealing as it cools.
Insert the previous pick deeper into the iPad and slide it away from the camera toward the corner.
Be very careful of the small antenna cable near the upper-right corner. Only slide the pick away from the camera—while sliding it in the opposite direction you may accidentally tear the antenna cable.
Leave the pick from the last step in place to prevent the adhesive from re-sealing.
With a new pick, slice gently over the left-hand antenna, stopping before the home button.
Only slide the pick from the outer edge toward the center of the iPad. Do not move the pick back toward the outer edge, as moving in this direction may damage the antenna.
If you need to slide the pick over the lower section more than once, remove it and re-insert at the outer edge, and slide inwards.
Be very careful with this step. Take your time and ensure the adhesive is hot and soft, and that you've been through all of the adhesive with an opening pick. Don't be afraid to stop and reheat.
At the top of the iPad opposite the home button, you should have a pick lodged into each corner. Twist the picks to lift the glass slightly, separating the last of the adhesive along all four edges.
If you encounter a significant amount of resistance, stop twisting. Leave the picks in place, reheat, and reapply the iOpener to the problem areas, and run a pick through the sticking point one more time.
Once all of the adhesive has been separated, open the front glass like a page in a book and rest it on your workspace.
If you plan to reuse the front panel assembly, you will need to replace the display adhesive. Use our display adhesive application guide to reapply your display adhesive and reseal your device.
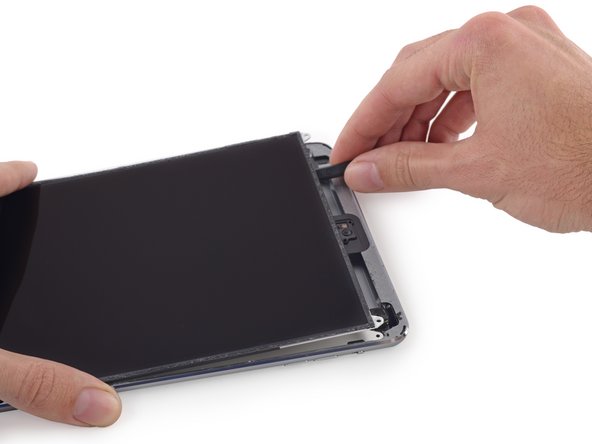
Do not attempt to fully remove the LCD. It is still connected to the iPad by several cables at the home button end. Lift only from the front-facing camera end.
Insert the flat end of a spudger under the LCD between it and the LCD shield plate and lift gently.
Be very careful not to get the spudger under the shield plate. It must be between the LCD and the shield.
Even bending the LCD slightly can permanently damage it, so be extremely careful as you lift.
Do not attempt to fully remove the LCD. It is still connected to the iPad by several cables at the home button end. Lift only from the front-facing camera end.
Flip the iPad LCD like a page in a book, lifting near the camera and turning it over the home button end of the rear case.
Be gentle and keep an eye on the LCD cables as you flip the display over.
Lay the LCD on the front panel glass to allow access to the display cables.
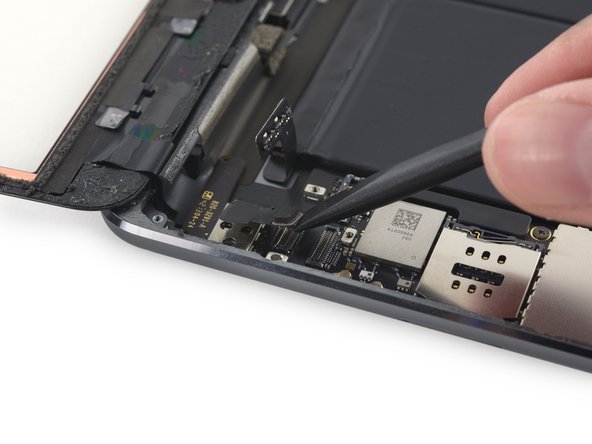
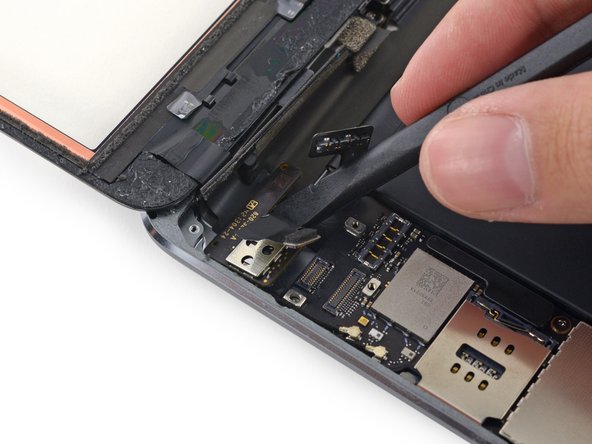
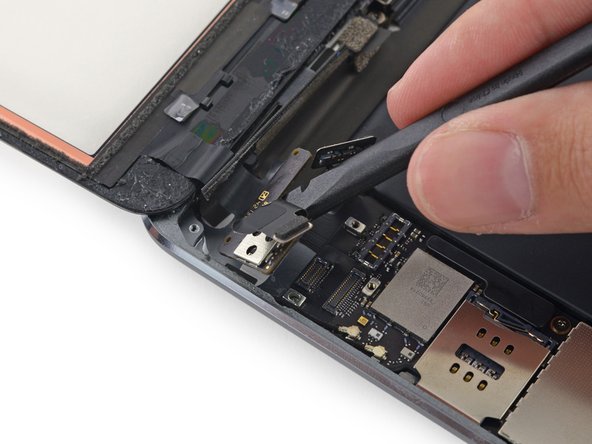
Use the flat tip of a spudger to gently lift the battery connector up off its socket on the logic board.
Be very careful to only pry up on the battery connector and not on the socket itself. If you pry up on the logic board socket, you may break the connector entirely.
when removing the LCD panel be very careful the screw hole tabs break really easy i broke the one next to the cable, but i was able to repair it with epoxy that i had .
Just wanted to say that this guide was great! It took me around three hours since the screen was extremely broken with tiny pieces of glass that had to get removed. Other than that, I had no issues thanks to the help from this guide. Thanks!