跳转到主内容

iON SnapCam 1046 Lite Camera Micro USB Replacement

你所需要的

  1. iON SnapCam 1046 Lite Camera  Micro USB  Replacement, Camera Lens and Cover: 步骤 1 中的图像 1,2 iON SnapCam 1046 Lite Camera  Micro USB  Replacement, Camera Lens and Cover: 步骤 1 中的图像 2,2
    • Remove any external skins placed on the device. To do so, simply lift up and peel to remove.

  2. iON SnapCam 1046 Lite Camera  Micro USB  Replacement: 步骤 2 中的图像 1,1
    • Firmly pull on the back clip in order to remove.

  3. iON SnapCam 1046 Lite Camera  Micro USB  Replacement: 步骤 3 中的图像 1,1
    • Use a Phillips head screwdriver to remove the four 4mm PH00 screws located on the sides of the device. All screws are located under each of the grey covers for the microSD card and the microUSB insert.

  4. iON SnapCam 1046 Lite Camera  Micro USB  Replacement: 步骤 4 中的图像 1,3 iON SnapCam 1046 Lite Camera  Micro USB  Replacement: 步骤 4 中的图像 2,3 iON SnapCam 1046 Lite Camera  Micro USB  Replacement: 步骤 4 中的图像 3,3
    • Grab a metal or plastic opening tool and insert it into the middle slot on the bottom of the camera and lightly pry open.

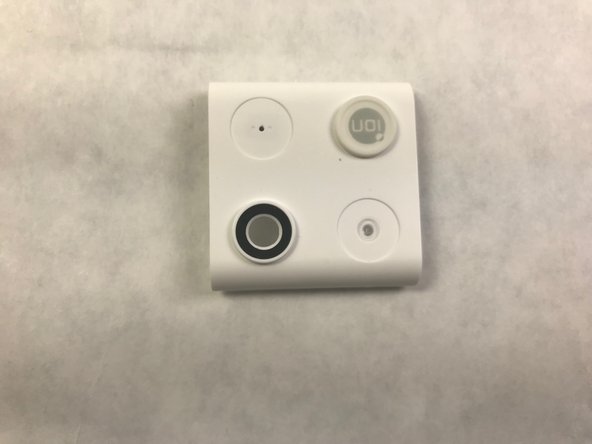
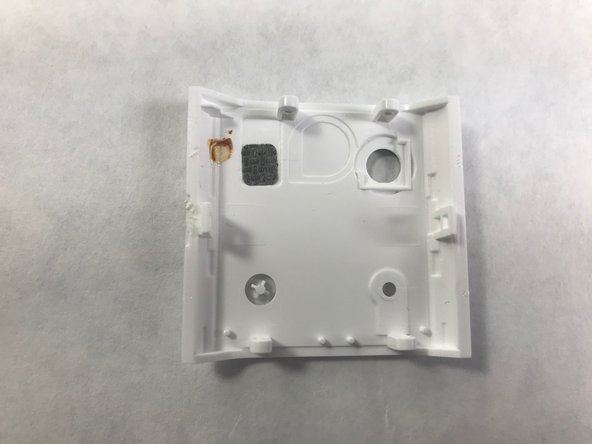
    • Locate the camera lens in the bottom left-hand corner of the picture which can be replaced by replacing the entire cover. The back of the cover is also shown. The camera is now located in the top right-hand corner of the picture.

  5. iON SnapCam 1046 Lite Camera  Micro USB  Replacement, Micro USB: 步骤 5 中的图像 1,1
    • Using the nylon spudger, pop up the edges of the motherboard.

  6. iON SnapCam 1046 Lite Camera  Micro USB  Replacement: 步骤 6 中的图像 1,1
    • With the Micro USB port exposed, part can be replaced with advanced soldering and circuitry.

结论

To reassemble your device, follow these instructions in reverse order.

Baleigh Hance

于11/20/17注册

101 声望

撰写一个指南

团队

IUPUI, Team S22-G4, Bayer Fall 2017 IUPUI, Team S22-G4, Bayer Fall 2017 的会员

IUPUI-BAYER-F17S22G4

5 名成员

创作了4篇指南

0条评论

添加评论

浏览统计数据:

过去 24 小时: 1

过去 7 天: 7

过去 30 天: 12

总计 156