简介
Removing smoke, shadow, dust behing the LCD panel of 20, 21.5, 24 and 27-inch non-unibody aluminium iMac.
你所需要的
-
-
-
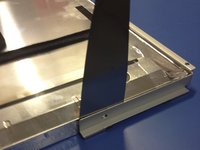
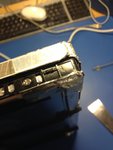
Using the "Putty Knife" make a groove in the shield around the whole frame ;
-
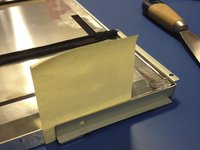
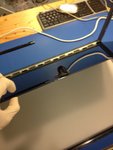
Once done from the bottom center to the edges of the LCD panel unclip the frame (don't touch the top). Clips are located at :
-
Bottom left, center, right ;
-
Left bottom, top ;
-
Right bottom, top ;
-
Lift the frame 90° maximum ;
-
-
-
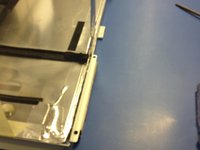
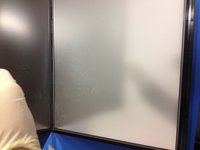
Using gloves and a suction cup gently lift the LCD sheet (no more than 90° failing to do so may bend the LCD and cause image displaying issues);
-
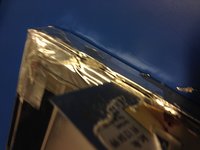
Meticulously clean the inside. Do not use any detergent at most a very lightly humidified microfiber / lint-free cloth ;
-
Do not use an air spray as those might leave marks. Best to get rid of dust is a simple hair dryer going from the top center to the edges ;
-
Reassembly is going back those steps making sure to get rid of your finger-prints ;
-


To reassemble your device, follow these instructions in reverse order.
21等其他人完成本指南。
24指南评论
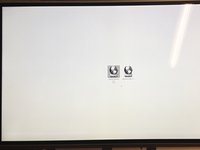
I got the screen cleaned and all was well but when I returned everything back to the iMac the lower part of my screen didn't work...
If the backligt is ok but no image check connections :
— To the logic board ;
— Then underneath the protective cover on the top of step 2 image…
If the backlight is not ok check the connector and the cable at the lower right corner of step 2 image.
Beware that if you have bended the LCD you might have damaged it.
LLange -
It sounds like the LCD got bent then because the connections are fine so I just ordered a new LCD. But the guide was definitely helpful, I got the dust out!
Sorry about this I'm adding a warning on Step 5 to lift gently and no more than 90° hoping this might prevent others to have the same issue.
P.S. the LCD has an electronic board some times people have flickering issues after the display warmed-up. Thus changing that "inner-board" might solve their issue ⇒ after you receive your new LCD, try to sell the old display "inner-board" as well as the connectors…
LLange -